Author: bloomingglenfarm

Cabbage and apples are a classic combination–and it’s no coincidence since they are both staples of the fall and winter diet. This week, the Blooming Glen Farm cabbage of choice is the crinkly-leafed savoy. Savoy cabbage comes from Northern Italy, where it is known as cavolo verza.

The inspiration for this recipe came from one of my favorite food blogs, Nourished Kitchen. I took some liberties, though, replacing onions with leeks and green cabbage with savoy. Because savoy is sweeter and more tender than other cabbages, I eliminated one apple and some cooking time from the original recipe.

Cider-Braised Cabbage and Apples

Cut the roots and most of the greens off 3 leeks, slice lengthwise, and rinse any grit from between the layers. Slice crosswise thinly and fry in a hot skillet with 2 tablespoons of butter. When the leeks begin to brown, add 1 medium apple, cored and thinly sliced. Cook for another 5 minutes until apples start to soften.

Reduce heat to medium. To the skillet, add 1 savoy cabbage, cored and thickly sliced and 1 bay leaf. Stir to bring apples and leeks to the top. As the cabbage begins to wilt down, pour 1-1/2 cups apple cider into the skillet. Simmer for about 15 minutes until apples and cabbage are soft and most of the liquid is evaporated. Sprinkle on 2 tablespoons apple cider vinegar and 1/2 teaspoon sea salt, toss to combine, and remove from heat.

Pair this dish with pork, and you’ve got yourself a time-honored flavor combination that can’t be beat (I chose a juicy bratwurst). If pork isn’t your style, it would also go very nicely with a roast chicken and/or savory white cannellini beans.

Text and photography by Kate Darlington – Blooming Glen Farm second year intern, fresh food enthusiast, and budding food blogger. She also writes for the Digging Deep Campaign as well as for her personal blog, Growing Things.

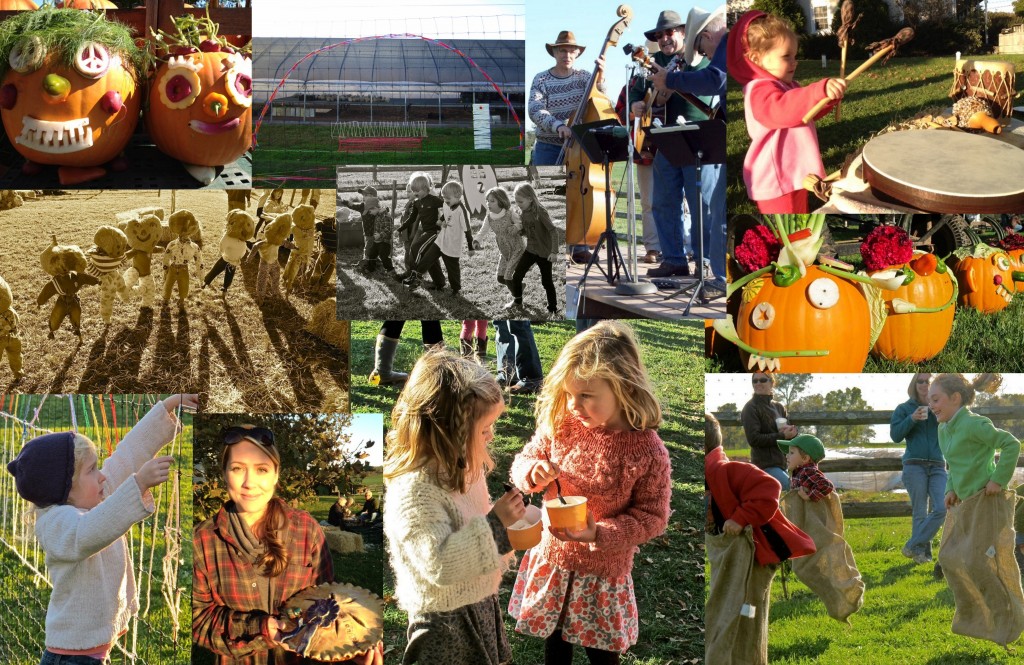
Coming up next week, Saturday Oct. 13th, is Blooming Glen Farm’s annual harvest festival. With fall festivals springing up everywhere you look this time of year, I needed to take a few moments to remind myself why our farm values this season-end celebration.

Harvest festivals and agriculture traditionally go hand in hand. From the ancient Greeks and Romans to modern times, numerous communities and religions honor a tradition of thankfulness at harvest time. The holiday of Jewish religion called Sukkot or “Festival of Ingathering’, is both historical and agricultural. A celebration of family, community and culture, the word “Kwanzaa” comes from the African language Swahili and means “First Fruits of the Harvest.” In Great Britain, until the 20th century, farmers celebrated the end of the harvest with a big meal called the harvest or “mell-supper”, named after the last patch of corn or wheat standing in the fields. Cutting it signified the end of the work of harvest and the beginning of the feast.

Harvest festivals are typically held around the Harvest Moon -the full moon closest to the Autumn Equinox (this year’s harvest moon was Saturday, Sept. 29th, so we’re not too far off). Ancient harvest festivals were celebrated to give thanks for an abundant crop. In our world of seeming overabundance, where our every food whim can be satisfied by a quick stop at the local grocery store, it can be easy to forget to honor this connection between the health of our farms and the health of our families.  

In ancient times, an abundant crop was crucial to sustain the community through the lean winter months. But abundant crop or not, giving thanks was ritualized into the fabric of these ancient communities. Whether it be the labor of the farmers and volunteers, the support of the eaters, or the benevolence of a greater life source (whatever name you may choose to call it)- all these factors and hands contribute to the thriving organism that is a farm. Thanks-giving truly happens best through collaboration and shared experience, taking time out of our busy lives for joyfulness and sharing, with the ultimate result being a healthy, strong, and unified community. And ultimately a community that is thankful for healthy food will always have healthy farms.

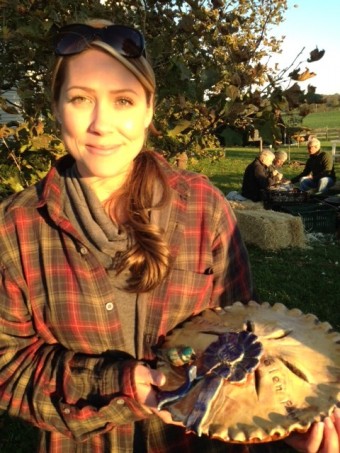
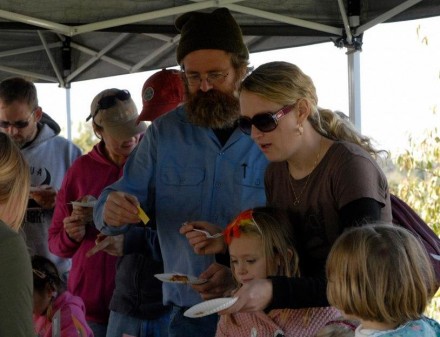
Please consider joining us next Saturday from 2pm until dark for our Harvest Festival and Harvest Supper– bring a potluck dish to share as we all sit down to a meal together made from the fruits of the season. Dance, feast, socialize, drum, craft, collaborate, and reflect on the bounty that the land has given us these past six months. Volunteers are still needed to help make this celebration possible- sign-up sheets can be found at the farm. All are welcome!

Speaking of bountiful harvest, the farm crew is particularly thankful for the broccoli crop this week. It’s the first week of October- the leaves are changing, cooler temperatures at night means sweeter veggies, and kinder weather for crops like broccoli. Broccoli is something we plant every two weeks in the fall. But due to unforeseen elements like weather and insects, there are no guarantees that each sucession will bring a bumper crop. This week’s harvest is the third planting, and by far the most beautiful so far. Less bugs and minimal disease made for large broccoli crowns, and a very enjoyable and speedy harvest, even in the rain on Tuesday.

Photos and text by Tricia Borneman, Blooming Glen farmer and co-owner.

The knobby warty exterior of celeriac, also called celery root, hides a delightful interior. Peel away the rough skin and inside is the smooth ivory flesh, a wonderful aromatic alternative to starchy potatoes. Celeriac is one of those vegetables that can seem intimidating, but after some experimentation it will quickly become a versatile favorite in your kitchen.

Though celeriac will keep for many months in your refrigerator, and up to 6 months in the right root cellar conditions, hopefully you will be inspired to use it sooner. This first idea, because it really is more an idea than a recipe, utilizes celeriac in its raw state. Thanks to nutrition coach Patti Lombardi, who taught a class here at the farm All About Greens, this is quickly on its way to becoming a lunchtime staple in our house!

Spicy Green Wraps

First take one large flour tortilla– I used the biggest ones I could find at Whole Foods- “All Natural Roll-Ups made with whole wheat flour“. Next, decide what you want to use as the “glue”. Patti suggested organic refried pinto beans– spread evenly over the tortilla, and for a little added flavor and spice, a bit of spicy black bean dip (or salsa if you prefer). Hummus would be another idea.

After painting on the “glue”, roughly chop 1/2 a bunch of arugula and pile it down the middle of the tortilla. (You can also experiment with lettuce or kale, always putting the softer greens down first onto the tortilla).

Next comes the crunch- add some finely chopped cabbage. Grate 1/3  of a celeriac, spread on top of the cabbage. Add three grated french breakfast radishes on top of that, and some thinly slivered fennel. I happened to have some ripe avocado, so that went into the mix. Lightly season with sea salt and squeeze a bit of lemon wedge on top.

Then it’s time to wrap it up. Lift the side of the tortilla closest to you (the edge at the bottom of the photo on the top right). Roll away from you into a big tube, using your fingers to press the greens under the wrap and your thumbs to keep the wrap rolling, pressing down tightly as you roll. Don’t worry if you rip it on your first try (I did), but my second one came out perfect. Cut in half (serves 2).

*In the class Patti held here at the farm, her version contained sweet peppers and grated carrot (no radishes), which was a bit sweeter. The great thing about these wraps is you can adjust to your taste, and use whatever happens to be in the share that week. You could also add chicken or turkey if you desire.

Simple Celeriac Saute

A lot of recipes with celeriac have you partnering it with potatoes in a mash, roasting it with other assorted root vegetables, or adding it to a soup. In this simple stove-top dish, celeriac plays the starring role. Lightly seasoned, the flavor of the celeriac shines through, making for a wonderful side dish. I also imagine it would be great on top of lentils.

Using a paring knife carefully off the rough exterior of one celeriac. Cut into 1/2-inch cubes. Over high heat, put a few tablespoons of olive oil in a large saute pan. Add the cubed celeriac, a handful of thyme leaves, and 2 cloves finely chopped garlic. Season with sea salt and fresh ground pepper. Stir to coat and fry for about 5 minutes. Turn down to a simmer and add 3-4 tablespoons water or stock– I used 3 cubes homemade chicken stock I’d frozen in ice cube trays.  Place a lid on top and cook for around 25 minutes, until tender. You can leave in the celeriac in cubes or smash it a little (somewhere in between a cube and a mash). (*Recipe courtesy of JamieOliver.com)

Celeriac Gratin

So far we’ve done celeriac raw and a simple seasoned stove-top celeriac saute. Now let’s do an indulgent comfort dish, sure to please any picky eaters in your family.

Pre-heat your oven to 400 degrees. Butter a 1 1/2 quart gratin dish, or large deep dish pie plate. Scatter 4 thinly sliced shallots over the bottom of the dish. Take two large peeled celeriacs, cut in half, then cut each half into 1/4-inch thick slices, and julienne. Arrange evenly in gratin dish. Sprinkle 2 sprigs thyme leaves over celeriac.

In a small bowl, whisk together 1 cup heavy cream, 1 tablespoon Dijon mustard, dash of nutmeg, and salt and pepper. Pour over celeriac. Sprinkle on top 3/4 cup grated Gruyere cheese and 1/4 cup freshly grated Parmesan cheese. Cover with foil and bake 20 minutes. Remove foil and continue baking until top is brown and bubbly and cream is thickened and reduced, about 20-30 more minutes. Let cool 10 minutes and serve. (*Recipe from MarthaStewart.com)

Photos and text by Tricia Borneman, Blooming Glen farmer and co-owner.

It’s not too late to come to a tasting and cooking demonstration class tonight at the farm- it’s All About Greens, with nutrition counselor Patti Lombardi. Not sure how to store, prep and use the greens (cabbage, kale, beet greens, collards, tatsoi and more) coming from the farm this time of year? Take advantage of this opportunity to learn how to include incredibly healthy and delicious greens in every meal. Cost is $20 and walk-ins are welcome. Class is from 7-8:30 pm in the distribution room at Blooming Glen Farm.

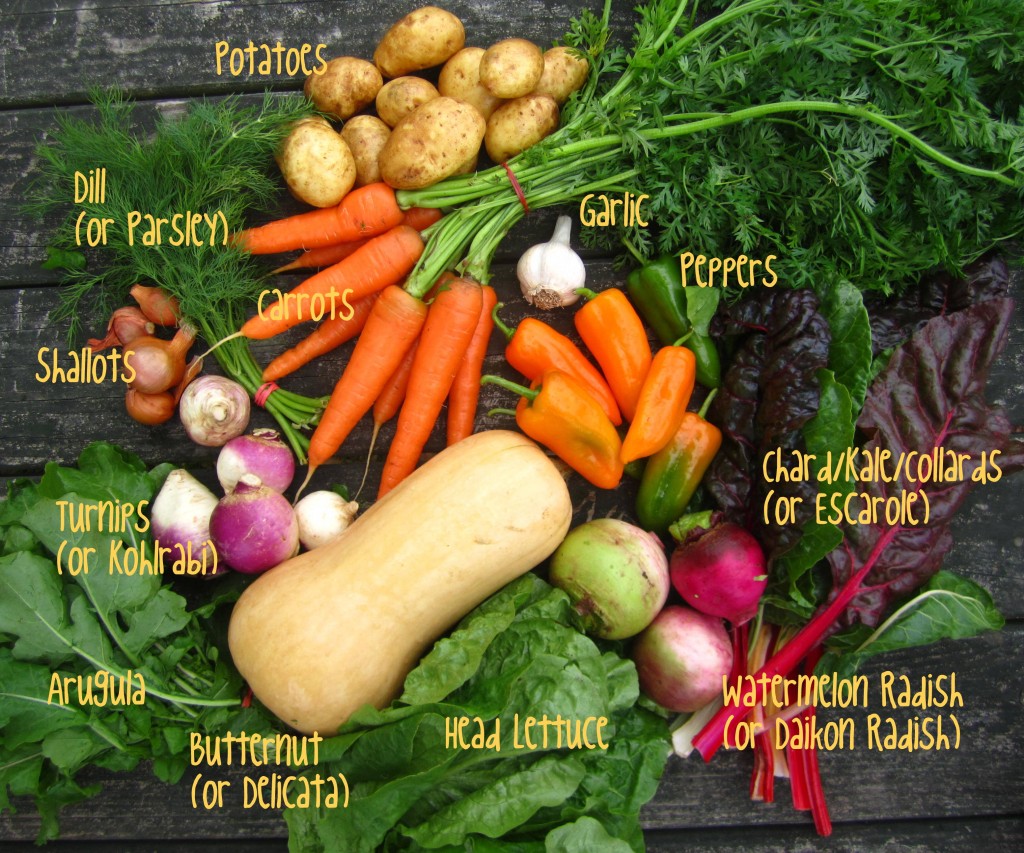
This week’s share has lots of varieties of greens, roots and more. Fall beets are here, the pick-your-own beans are plentiful and spicy arugula is back!

CSA share, week 20, 9/25/12

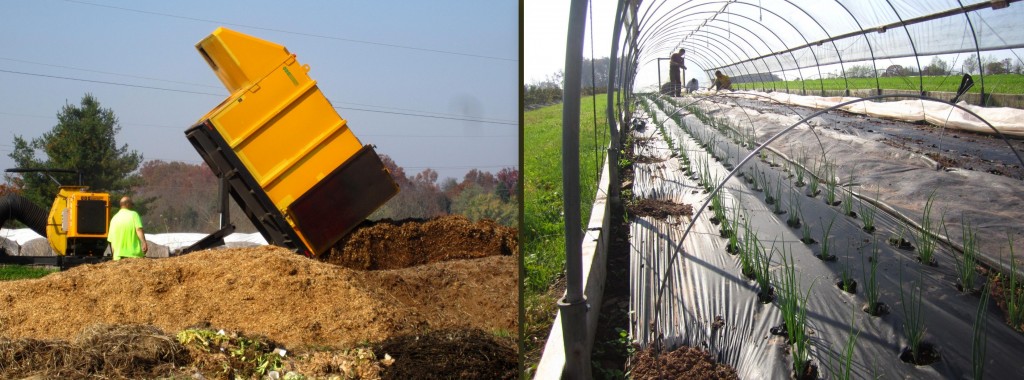
This past week on the farm we began to clean out the greenhouses, removing the summer crops and looking ahead to planting hardy greens for the winter. We will be attending winter farmer’s markets held at both Easton and Wrightstown. We continue to put fields to bed for the winter, sowing assorted mixes of cover crop seeds. Before the next round of rain, our crew cultivated the aisles of our new strawberry field, then mulched them with straw.

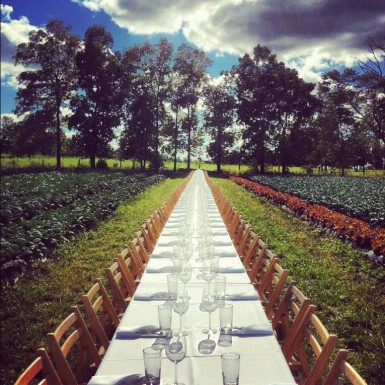
By far, the most exciting part of our week was participating in the Outstanding In the Field dinner on Sunday. Last year you may remember in late summer and fall we were experiencing heavy rains and soggy fields, so the long table ended up in our equipment barn. This year we couldn’t have asked for better weather, or a better setting amidst our vibrant fall crops, under the bright crescent moon. We were honored to be chosen again as a host farm on their 100 farm coast-to-coast tour, and to have the opportunity this year to meet artist and founder, Jim Denevan.

I was struck by the similarity between Jim’s artwork- he makes temporary drawings on sand, earth and ice that are eventually erased by waves and weather- and the “artwork” of the long farm table. In less then 24 hours a beautiful table is set in the field, over 150 guests arrive, and an elaborate dinner is cooked and served. The photo is all that remains the next morning as proof of the experience.

Photo credit: Jim Denevan

As farmers, we too operate in this temporary realm- crops are sown, grown, harvested and consumed over a period of days, weeks, and months, all encompased in one fleeting season. The fields start fallow and end fallow, and in between, there is color and beauty, patterns and life, roots and leaves and fruit, to be captured in photos, but eventually to be returned to the earth. The farm dinner was a celebration of many things- chefs, farmers, visionaries, foodies, and food artisans. To me, it was a reminder of the art that is farming, and of the joy that is found in the creation and the visual display of vegetables in the field and on our collective tables, the sensory and temporary experience of it all, from growing crops to eating dinner. Thank you Outstanding In the Field!

Photos (unless otherwise noted) and text by Tricia Borneman, Blooming Glen farmer and co-owner.

This week marks the official beginning of fall, and both the weather and veggies seem to agree with the calendar. This is a perfect soup for the transitioning season. It is rich and creamy without being too heavy. When roasted, fennel becomes deeply sweet (totally different from the crisp and refreshing taste of raw fennel) and leeks develop a wonderful caramelized flavor. Celeriac lends body and depth to this creamy soup. A touch of tangy blue cheese and crunchy chickpea crackers make it complete.

Roasted Fennel and Leek Soup

Cut off most of the green parts of 2 fennel bulbs and 3 leeks (save a few of the fennel fronds for garnish). Slice the leeks in half long-ways and run the layers under water to remove grit. Chop fennel bulbs and leeks into 1-inch chunks.

Cut away the ugly outside of  1 celeriac and chop into 1/2-inch chunks. Combine with fennel and leeks and toss with a sprinkle of salt and enough olive oil to coat. Spread veggies in a single layer on a cookie sheet and roast in a 400 degree oven for about 30 minutes (stirring once or twice) until they begin to brown and caramelize.

When the veggies are done roasting, combine them with 4 cups of milk, 1 teaspoon salt, 1 teaspoon cracked black pepper, and 1/2 teaspoon dried mustard powder. Heat until milk is hot, but do not boil. When heated through, use an immersion blender or food processor to puree until smooth. Adjust salt and pepper to taste.

Garnish with chickpea crackers (recipe below), crumbled blue cheese, and a sprinkle of chopped fennel frond for an added touch of the gourmet.

Gluten-Free Chickpea Flour Crackers

Combine 1 cup chickpea flour, 2 tablespoons sesame seeds, 1 teaspoon fennel seeds2 teaspoons olive oil, and 1 teaspoon salt in a small bowl. Slowly stir in 1/4 cup water until a thick dough is formed. Roll dough out into a thin layer (1/8 inch or so) on a cutting board and cut into cracker-sized pieces. Line a cookie sheet with parchment paper or a silicone baking mat. Bake for 20 minutes at 400 degrees until golden brown and crisp (I did this at the same time I was roasting the veggies).

This recipe is easily adaptable–replace fennel seeds with chopped herbs, sprinkle with parmesan cheese, etc. Cut into thinner strips for a salad garnish, or into wedges for dipping into hummus or spinach dip.

Text and photography by Kate Darlington – Blooming Glen Farm second year intern, fresh food enthusiast, and budding food blogger. She also writes for the Digging Deep Campaign as well as for her personal blog, Growing Things.

To say that farmers spend a lot of time watching the forecast and checking the radar would be an understatement. Sometimes it can border on obsession. The past few days that obsession paid off. Starting the end of last week and working all day Monday, the mad dash to get empty fields planted into cover crop seeds began. Here’s the sequence of events: mow any crop residue, remove drip tape by hand, wrap up in semi neat bundles to take to the recycler, disc harrow, mix cover crop seed per individual field, spin out onto field, reload, spin some more, cover with disc harrow. Repeat. The let the rains come!

Subsoiling prior to seeding; adding mix of cover crop seed to spin spreader

Working with two tractors in tandem, we were able to get about a third of the farm seeded for the winter. We primarily made up two mixes, depending on the future crop plans for the fields. The first is an overwintering mix of rye, vetch and crimson clover. Its main purpose is long term soil building by the addition of organic matter to the soil and providing nitrogen for any subsequent summer and fall crops. The second mix: tillage radishes, oats and crimson clover, will provide vigorous fall growth, then mostly winter kill, covering the fields to prevent soil erosion but be easily accessible for spring planting.

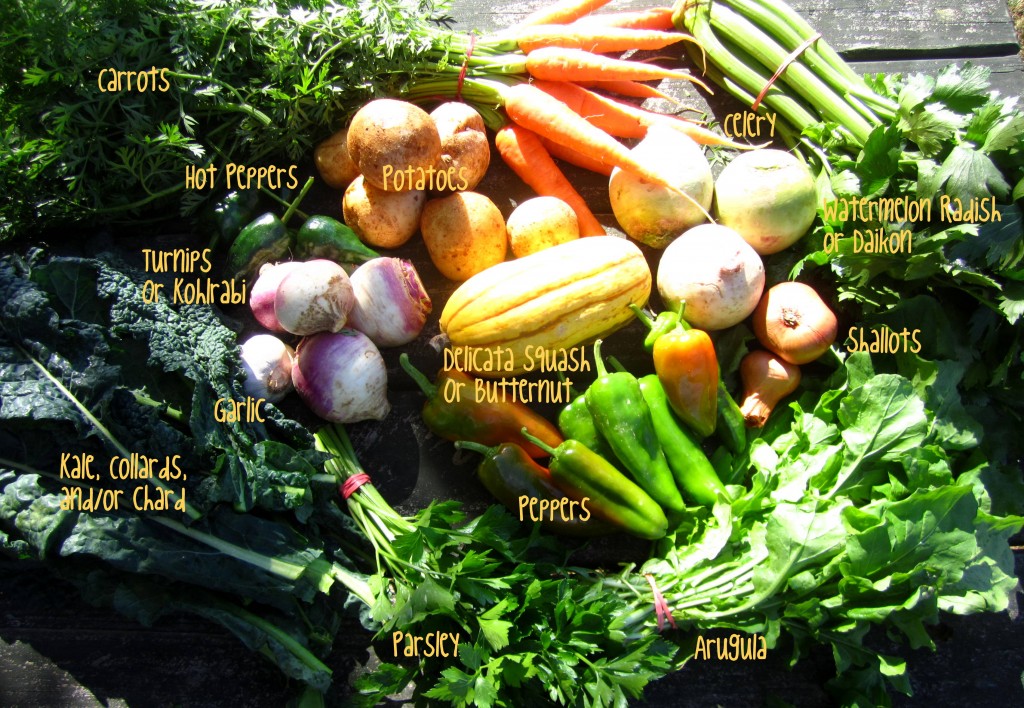
This week’s share sees the first winter squash of the season- delicata (also called sweet potato squash), as well as leeks, radishes and green beans. Delicata squash has a wonderful thin edible skin. I love to slice it into half-inch thick rounds- scooping the seeds out of each, baste with a bit of soy and toasted seasame oil, and bake on a cookie tray until tender and browned, about 20 min at 350 (flip them halfway through). Delicious finger food!

CSA Share, week 19, 9/18/12

Visitors and farm members will be greeted by an incredible new tile mural at the farm, courtesy of local artist Katia McGuirk. Using Michael Alan’s artwork from our brochure and posters as inspiration, Katia translated the design into a mosaic. It is breathtaking! Be sure to join Katia and the rest of the farm community at Fall Fest on October 13th, 2pm until dark! We need volunteers, pie bakers, yarn donations and small children’s clothes donations!

Photos and text by Tricia Borneman, Blooming Glen farmer and co-owner.

I always consider green tomatoes a bonus veggie: An unexpected and tasty gift us CSA members get during the summer-fall transition of share season. For the most part, green tomatoes carry much of the same nutritional value as their red counterparts.  They’re both very good sources of vitamins A, C, and K, manganese, and potassium, and both deliver health-boosting fiber.  Green tomatoes, however, have the added nutritional benefit of being a very good source of the B5 vitamin, pantothenic acid, which is essential in aiding in the metabolizing of carbohydrates, fat, and protein.

Green tomatoes are firmer than their red buddies, so they hold up nice to pickling, cooking, and baking without turning to mush. They have a tart flavor when eaten raw, which some people don’t prefer, but pairing them with a sweeter veggie like red tomatoes, corn, and/or onion, creates a great sweet-and-sour balance.  Green tomatoes bring a brightness to soups, sauces, and salsas, where they also pair well with hot peppers and spices.  Of course, fried green tomatoes is probably the dish we’re most familiar with, but green tomatoes actually do really well baked — either as baked green tomatoes or in savory breads and biscuits.  The recipe below is probably my favorite green tomato recipe; it’s a frittata suitable for a quick breakfast, lunch, or dinner.  Check out the links below for more green tomato nutritional info and links to other yummy recipes!

References and recommended links:

Green Tomato Frittata

Ingredients
1-1/2 green tomatoes, sliced about 1/4″-1/2″ inch thick, lightly sprinkled with salt and pepper
1/2 green tomato, chopped fine (about 1/2 cup)
1 frying pepper, chopped fine (about 1/2 cup)
1 poblano pepper, chopped fine (about 1/2 cup)
1 small onion, chopped fine
1/2 cup cornmeal for dredging
3 garlic cloves, minced
2-3 tablespoons fresh herbs (basil, parsley, chives, and/or thyme are all good here)
10 large eggs
Salt and pepper to taste
Cooking spray

Method
Preheat oven to 400-degrees.

Dredge tomato slices in cornmeal. Coat a large oven-safe skillet (cast iron works great) with cooking spray and fry each tomato slice for 2 minutes. Spray tomato again, and flip, frying again for 2-3 minutes. Set slices aside, and wipe pan clean.  Spray skillet again with cooking spray, add onion, and cook until translucent and soft, about 3 minutes.  Add pinch or two of salt and garlic and mix well. Stir in the chopped tomatoes and peppers, and mix until combined well.  Season to taste with salt and pepper, and cook, stirring often, until all veggies are softened, about 10 minutes. Stir in fresh herbs.

Meanwhile, beat eggs and season with salt and pepper.

Add egg mixture to skillet, turn heat up to medium-high, and lightly combine the ingredients, allowing the egg to distribute evenly throughout the filling, and making sure there is an egg coating on the bottom of the pan.  Place the fried sliced green tomatoes on the top of the frittata. Turn heat down to medium, and cook until edges begin to set, about 3-4 minutes. Place frittata in oven and cook until the center is firmly set, about 12 minutes.

Finish frittata under the broiler until it’s lightly browned, about 3 minutes. Remove from the heat, and allow to cool and set for 10-15 minutes. Loosen the edges with spatula and slice for serving.

Post and photos by Mikaela D. Martin: Blooming Glen CSA member since 2005, board-certified health counselor, and co-founder and -owner of Guidance for Growing, an integrative wellness practice in Souderton. Read more about healthy eating and living on her site, http://guidanceforgrowing.com!

In the height of tomato season we wouldn’t dream of stealing a tomato’s destiny to become juicy ripe and red, but at some point in the fall the harvest of unripe fruit is inevitable, typically because we are facing frost. Our last planting of field tomatoes were all killed by late blight, but the dead plants are still loaded with the green fruit. Tomorrow’s recipe by Mikaela will feature these green tomatoes. I do look forward to the day Tom gives the go ahead for the green tomato harvest because it means it’s time for my mom and I to get together, make a big mess in the kitchen and a big pot of my grandmother’s green tomato relish. It’s a tradition that neither of us would miss, and a winter pantry staple for our family. You can find Nanny’s relish recipe on our website.

CSA share, week 18, 9/11/12

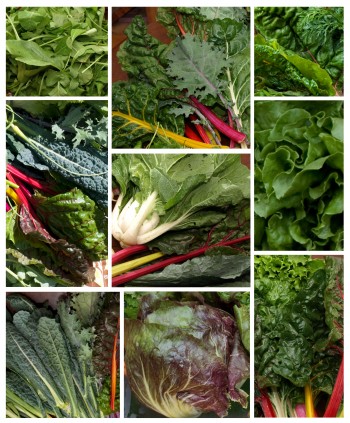
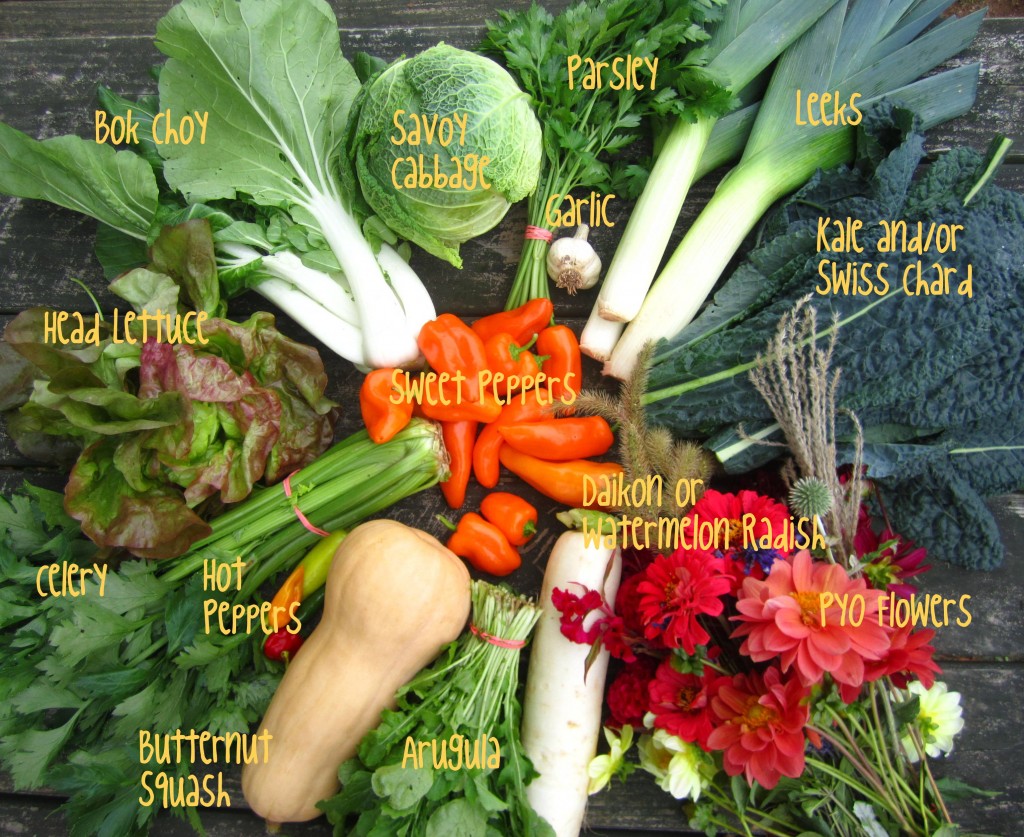
The share is reflecting the changing of the seasons- all the wonderful nourishing fall greens are here- cabbage, escarole, bok choy, kale. (**Feeling overwhelmed by the bounty? Come to nutrition counselor Patti Lombardi’s class on greens here at the farm September 26th.)

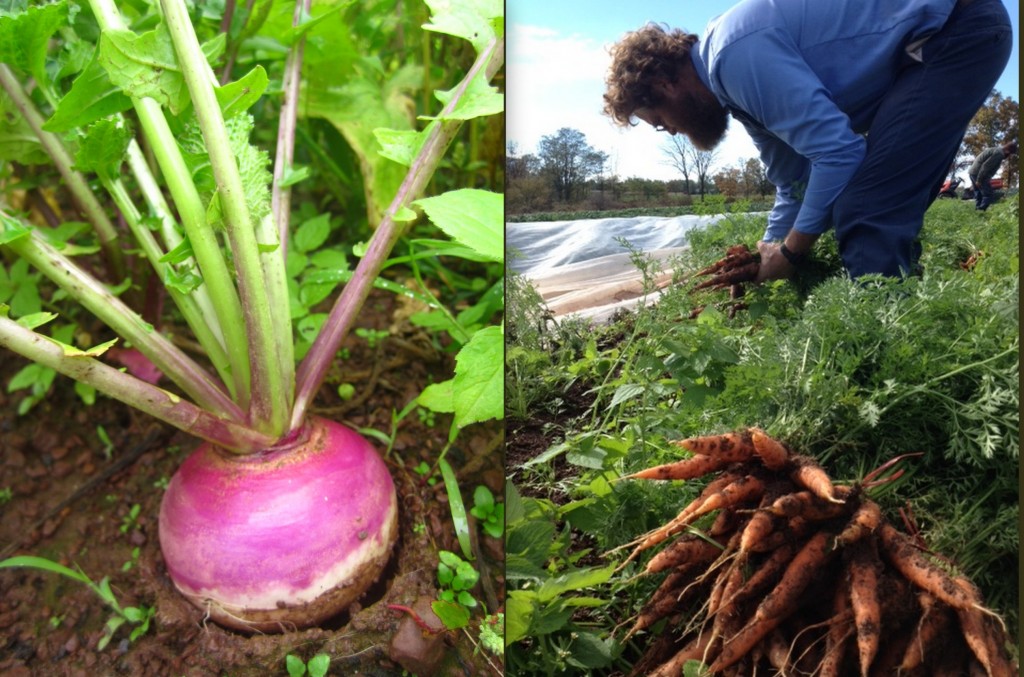
You’ll also notice the addition of celeriac, or celery root, in the share. Before I started farming I had no idea that this vegetable exisited. Now I can’t imagine fall or winter without it. Its bright celery flavor enlivens any soup, it is delectable roasted with other vegetables, or boiled and mashed with potatoes. You’ll find quite a few recipes on our website, as well as plentiful use and storage information in the cookbook “From Asparagus to Zucchini”, for sale at the farm.

It’s September and our crew is working together like an orchestra- everyone knows their roles, and the jobs to be done are familiar. With cooler nights and shorter days come a more relaxed pace, and in general a more pleasant climate to do outdoor work. The leeks have been weeded- they stand tall and stout, and they’ll begin to be harvested next week. We have begun to tackle the big task of digging the remainder of our potatoes (actually the tractor does the digging, and we do the gathering). Next task on the list: getting all our bundled and dried garlic trimmed and processed.

Tom checking the leeks; Natalia harvesting cabbage; next year's strawberries

This week the strawberry plugs, purchased from a farm in New Jersey, went into the ground. Next year’s strawberry crop begins its long nine month journey to harvest. We treat our strawberries as annuals, and plant them new every fall. This helps us to deal with the weed and disease management issues facing organic strawberry growers. Ultimately it is the weather during harvest of these spongy permeable fruits that determines their quality, but we baby the plugs now, carefully planting thousands by hand.

Looking ahead to the fall fest- we are seeking donations of yarn. Artist Katia McGuirk will be leading a community “yarn bomb”, an all-age art installation along the deer fence bordering the fall fest. Please bring your unwanted yarn to the farm to be turned into art. There will be a collection box in the distribution room. Thanks!

Photos and text by Tricia Borneman, Blooming Glen farmer and co-owner.

Wet weather aside, I’m welcoming the cooler temperatures of late because they have allowed me to reacquaint myself with my kitchen. It seems like I’ve taken a hiatus recently from actually cooking. Instead of cooking meals, I’ve been favoring anything fresh I can throw into the same bowl. Now that it’s not 100 degrees in my kitchen, I’m a bit more excited to prepare a real dinner.

And what better way to celebrate my reintroduction to cooking than with juicy pork chops, fragrant herbs, and creamy swiss chard? This meal is easy, quick, and heavenly. It’s got all the advantages of a one-pot meal, but all the elegance of a steak house entree. The perfect end to a day spent working in the rain. (I could barely manage to squeeze in the photo shoot before scarfing it down).

Herbed Pork Chops with Dijon Swiss Chard

Rub both sides of 2 pork chops with salt, pepper, and 2 tablespoons of fresh chopped sage and thyme (both can be found in the Discovery Garden during your CSA pick-up, or at our farmstand at market).

Heat 1 tablespoon butter and 1 tablespoon olive oil in a heavy skillet over medium-high heat. When butter is melted, add pork chops. Sear chops, about 4 minutes per side, until there is a nice crust of fried herbs and meat is just cooked through. Remove from pan and cover with foil to keep warm.

Using the same pan, reduce heat to medium and add  1/2 yellow onion, chopped. Cook until translucent. Add 3/4 pound swiss chard, stems removed and leaves roughly chopped. When chard has partially wilted, stir in 3 tablespoons dijon mustard and 1/4 cup half-and-half or whole milk. Continue cooking the chard until it is fully wilted and the sauce has thickened a bit.

Top a mound of chard with a pork chop and drizzle any remaining sauce from the pan on top. Fluffy homemade biscuits drizzled in local honey make a divine addition to the meal, but it would go equally well with some crusty bread or steamed rice. (Serves 2)

Text and photography by Kate Darlington – Blooming Glen Farm second year intern, fresh food enthusiast, and budding food blogger. She also writes for the Digging Deep Campaign as well as for her personal blog, Growing Things.

Like clockwork Labor Day weekend rolls around and with it hurricane season and intermittent downpours. In anticipation of the heavy rains (and motivated by the memory of last fall when the rains came and never left), we scrambled to move through our “to do” list last week. Our crew put in some late days planting, cultivating and bulk harvesting, all while continuing the “weekly chores” of CSA and market harvests.

CSA share, week 17, 9/4/12

First on the priority list- butternut squash. Always a fun crop to harvest, the farm crew gets to hone its squash tossing skills, filling palette bin after palette bin with this wonderful fall vegetable- a favorite here at Blooming Glen Farm. Soup season, here we come!

The fall roots tucked under row covers continue to grow- red radishes will most likely be harvested next week. This is a wonderful time of year when the overlap of summer and fall crops occur. Yet as many of the summer crops come to an end, we are tilling in fields and getting them ready to be seeded with cover crops- legumes and grasses that will help prevent erosion over the winter and replenish nutrients in the soil.

Radishes under row cover; herbs in the discovery garden

The discovery garden is a wonderful place to spend a few peaceful moments when you come to the farm. You may hear the laughter of children following the hidden tunnels through the teepees and corn plants, catch sight of a hummingbird, or smell the aroma of fresh picked pineapple mint. There are many herbs to discover and choose from like mints, lemon verbena, thyme, sage, garlic and onion chives, marjoram, and edible flowers. Herbalist Susan Hess will be holding a class here at the farm on Wednesday evening at 6pm, Sept. 12th, called “Preserving the Herbal Harvest“. Topics will include: proper harvesting techniques, proper drying and storage methods and basics of making vinegars, syrups, pestos, and more. Click here for more information and to pre-pay and pre-register.

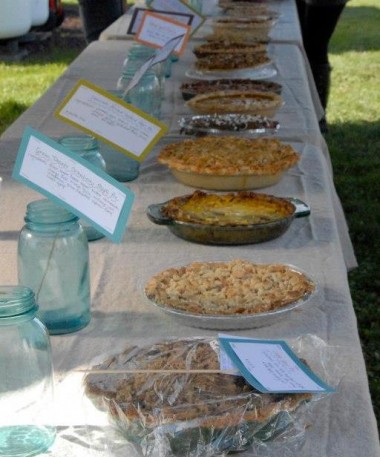
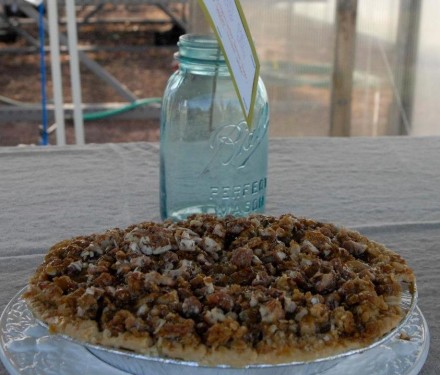
Save the date! Blooming Glen Farm Fall Fest is coming up- Saturday, October 13th, 2pm until dark. The annual pie bake-off, live music and children’s crafts, a drum circle, and potluck dinner at 5pm. Be sure to join us to celebrate the season! Sign up sheets to enter the pie contest as well as to volunteer will be in the distribution room. The talent of our farm community is always welcome- contact us if you have an idea, musical talent, or anything else you’d like to contibute!!

Photos and text by Tricia Borneman, Blooming Glen farmer and co-owner.