celeriac Tag

Quick and easy side dish recipes are great to have on hand.  Ones that incorporate several seasonal ingredients are even better. This recipe features fresh celeriac, a knobby root that has an earthy celery flavor that pairs well with carrots, hakurei turnips and sweet onions in a delicious slaw.

Celeriac Slaw

Ingredients:
1 celeriac
½ bunch of carrots (about 6 oz)
1-2 turnips
1 small sweet onion
1 lime, juiced and zested
3 Tbsp olive oil
2 Tbsp toasted sesame oil
3 Tbsp apple cider vinegar
1 Tbsp honey
¾ tsp sea salt
¼ tsp black pepper
1-2 Tbsp sesame seeds, black or white

  • Prepare the following ingredients.
    • Celeriac- peel and cut into fourths
    • Carrots- scrub and cut off tops
    • Turnips- scrub and cut off tops
    • Sweet onion- peel and cut in half

  • In a medium bowl, shred celeriac, carrots, turnips, and sweet onion.
  • In a small bowl, combine lime juice, lime zest, olive oil, sesame oil, apple cider vinegar, honey, salt, and pepper. Whisk to combine.

  • Add dressing and sesame seeds to the shredded vegetables. Mix well.
  • Chill for at least 15-30 minutes before serving.
  • Enjoy!

Recipe and photos by Stephanie Borzio.  Stephanie is a mom of three active boys and is an autoimmune warrior.  After battling her own health for several years, Stephanie found healing through food and lifestyle changes, including joining Blooming Glen Farm CSA of which she is a long time member.  She is a Board Certified Integrative Nutrition Health Coach who is passionate about sharing healthy living tips and real food recipes.  Instagram and Facebook: Tru You Essentials; Website: www.truyouessentials.com

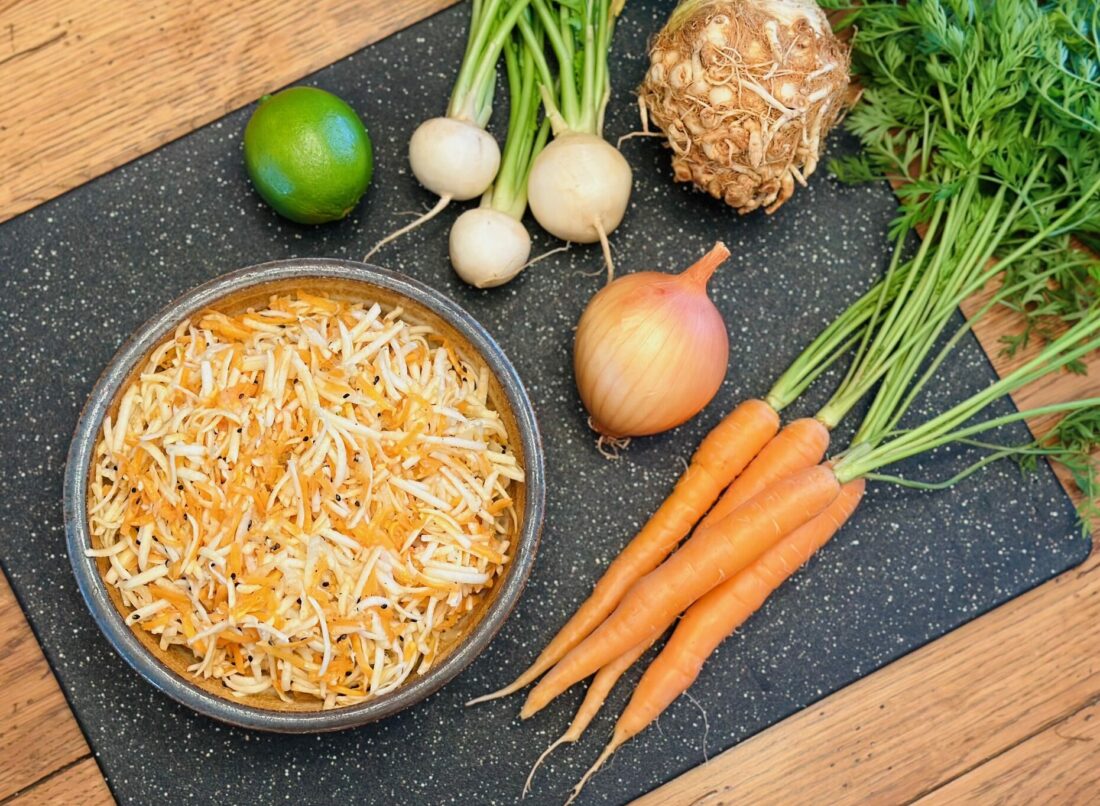
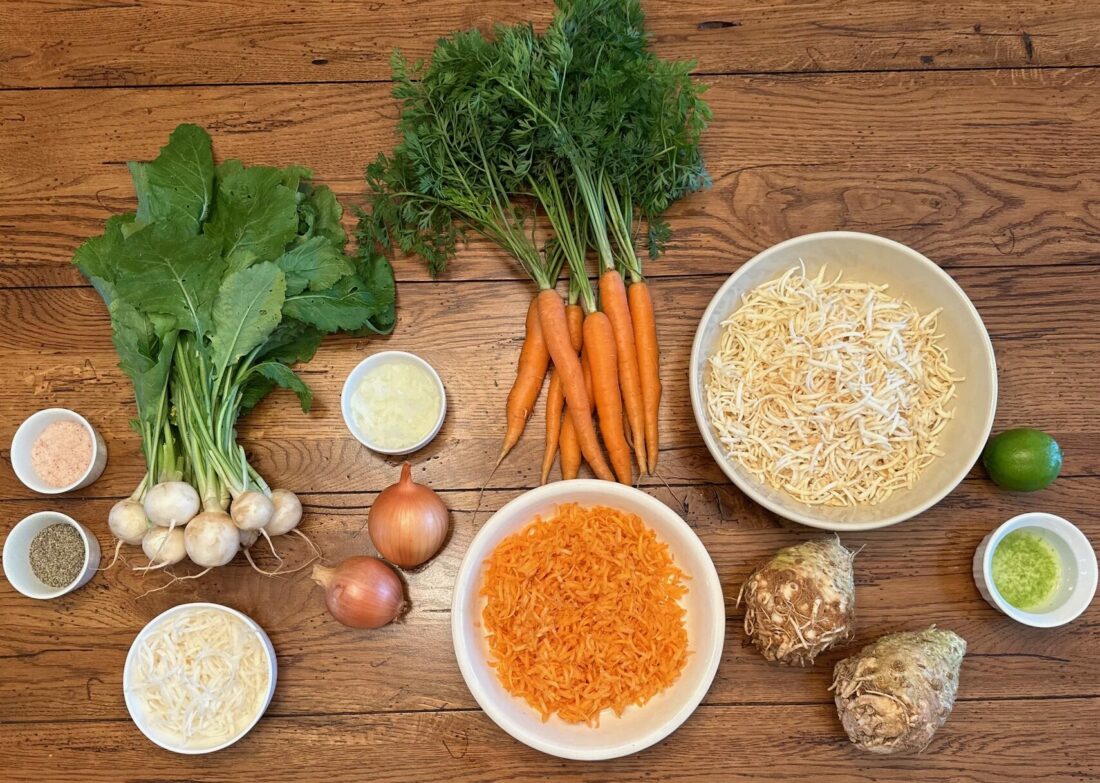
The knobby warty exterior of celeriac, also called celery root, hides a delightful interior. Peel away the rough skin and inside is the smooth ivory flesh, a wonderful aromatic alternative to starchy potatoes. Celeriac is one of those vegetables that can seem intimidating, but after some experimentation it will quickly become a versatile favorite in your kitchen.

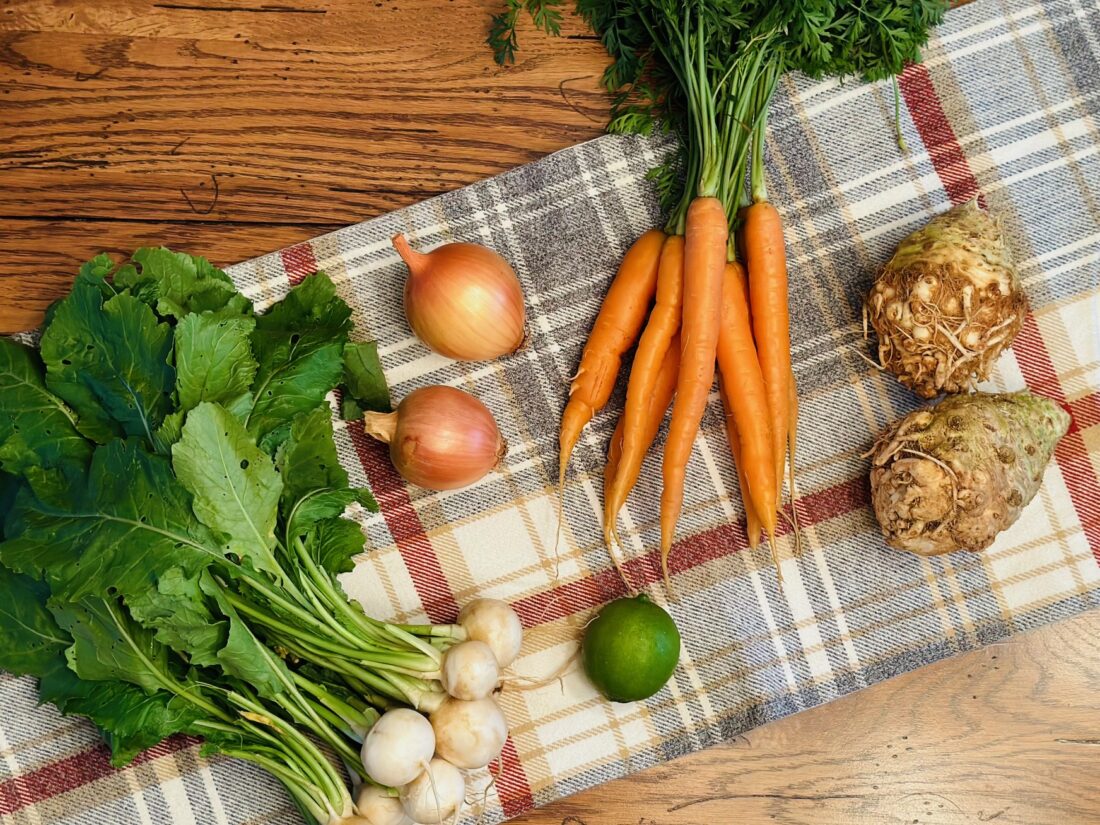
Though celeriac will keep for many months in your refrigerator, and up to 6 months in the right root cellar conditions, hopefully you will be inspired to use it sooner. This first idea, because it really is more an idea than a recipe, utilizes celeriac in its raw state. Thanks to nutrition coach Patti Lombardi, who taught a class here at the farm All About Greens, this is quickly on its way to becoming a lunchtime staple in our house!

Spicy Green Wraps

First take one large flour tortilla– I used the biggest ones I could find at Whole Foods- “All Natural Roll-Ups made with whole wheat flour“. Next, decide what you want to use as the “glue”. Patti suggested organic refried pinto beans– spread evenly over the tortilla, and for a little added flavor and spice, a bit of spicy black bean dip (or salsa if you prefer). Hummus would be another idea.

After painting on the “glue”, roughly chop 1/2 a bunch of arugula and pile it down the middle of the tortilla. (You can also experiment with lettuce or kale, always putting the softer greens down first onto the tortilla).

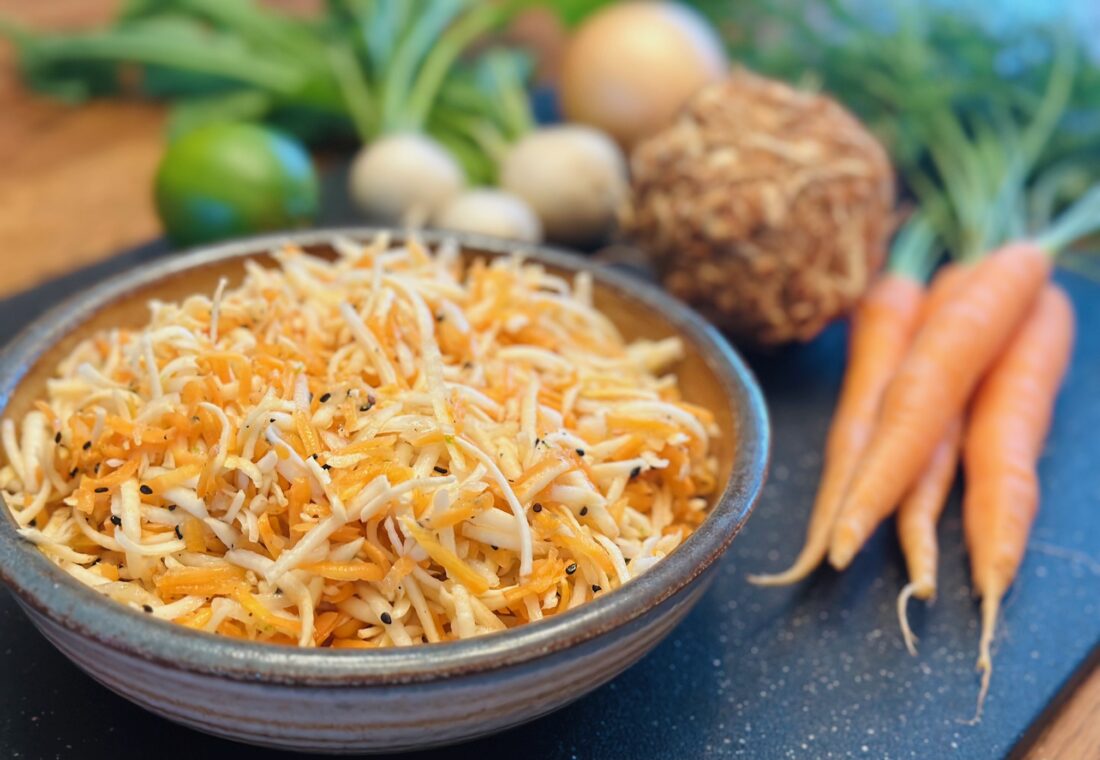
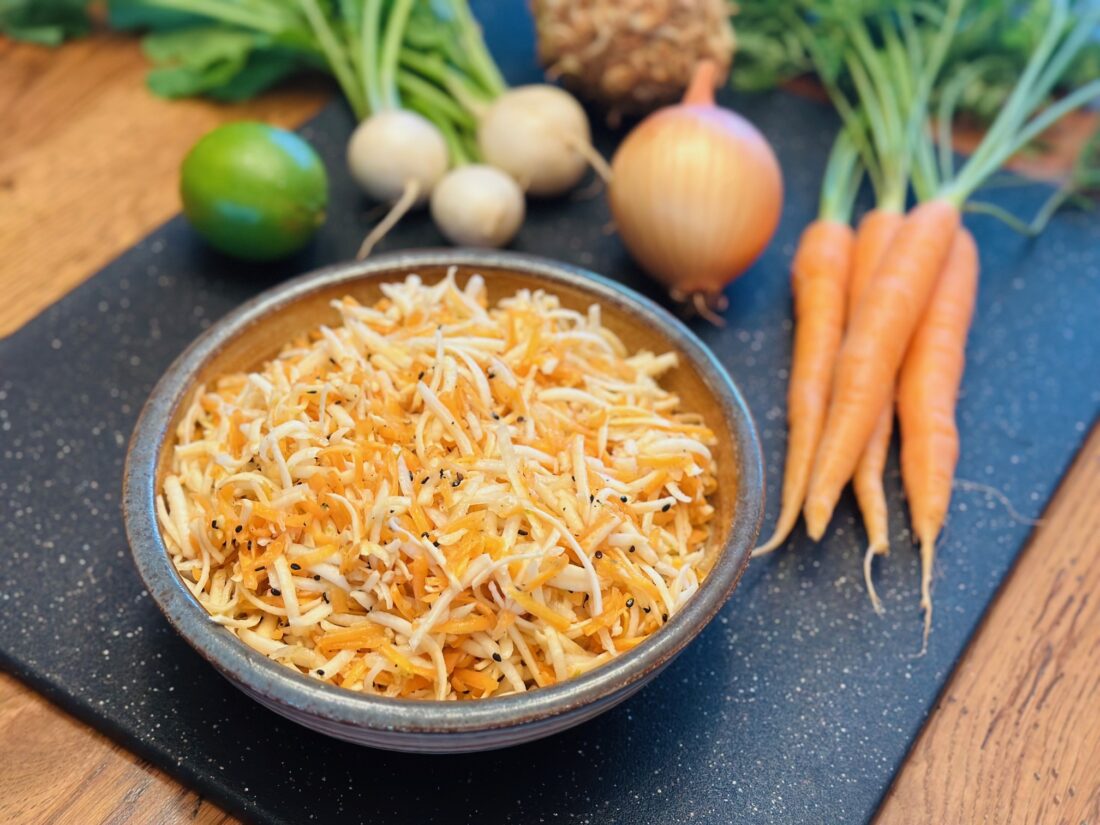
Next comes the crunch- add some finely chopped cabbage. Grate 1/3  of a celeriac, spread on top of the cabbage. Add three grated french breakfast radishes on top of that, and some thinly slivered fennel. I happened to have some ripe avocado, so that went into the mix. Lightly season with sea salt and squeeze a bit of lemon wedge on top.

Then it’s time to wrap it up. Lift the side of the tortilla closest to you (the edge at the bottom of the photo on the top right). Roll away from you into a big tube, using your fingers to press the greens under the wrap and your thumbs to keep the wrap rolling, pressing down tightly as you roll. Don’t worry if you rip it on your first try (I did), but my second one came out perfect. Cut in half (serves 2).

*In the class Patti held here at the farm, her version contained sweet peppers and grated carrot (no radishes), which was a bit sweeter. The great thing about these wraps is you can adjust to your taste, and use whatever happens to be in the share that week. You could also add chicken or turkey if you desire.

Simple Celeriac Saute

A lot of recipes with celeriac have you partnering it with potatoes in a mash, roasting it with other assorted root vegetables, or adding it to a soup. In this simple stove-top dish, celeriac plays the starring role. Lightly seasoned, the flavor of the celeriac shines through, making for a wonderful side dish. I also imagine it would be great on top of lentils.

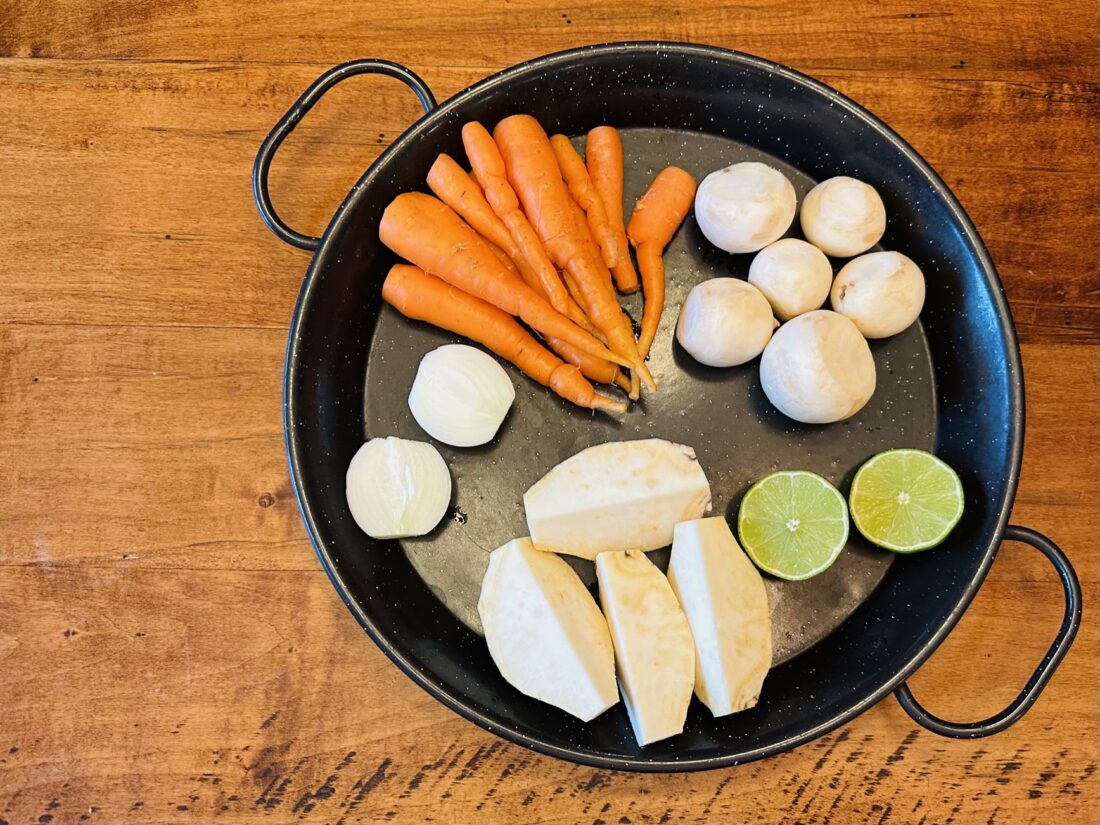
Using a paring knife carefully off the rough exterior of one celeriac. Cut into 1/2-inch cubes. Over high heat, put a few tablespoons of olive oil in a large saute pan. Add the cubed celeriac, a handful of thyme leaves, and 2 cloves finely chopped garlic. Season with sea salt and fresh ground pepper. Stir to coat and fry for about 5 minutes. Turn down to a simmer and add 3-4 tablespoons water or stock– I used 3 cubes homemade chicken stock I’d frozen in ice cube trays.  Place a lid on top and cook for around 25 minutes, until tender. You can leave in the celeriac in cubes or smash it a little (somewhere in between a cube and a mash). (*Recipe courtesy of JamieOliver.com)

Celeriac Gratin

So far we’ve done celeriac raw and a simple seasoned stove-top celeriac saute. Now let’s do an indulgent comfort dish, sure to please any picky eaters in your family.

Pre-heat your oven to 400 degrees. Butter a 1 1/2 quart gratin dish, or large deep dish pie plate. Scatter 4 thinly sliced shallots over the bottom of the dish. Take two large peeled celeriacs, cut in half, then cut each half into 1/4-inch thick slices, and julienne. Arrange evenly in gratin dish. Sprinkle 2 sprigs thyme leaves over celeriac.

In a small bowl, whisk together 1 cup heavy cream, 1 tablespoon Dijon mustard, dash of nutmeg, and salt and pepper. Pour over celeriac. Sprinkle on top 3/4 cup grated Gruyere cheese and 1/4 cup freshly grated Parmesan cheese. Cover with foil and bake 20 minutes. Remove foil and continue baking until top is brown and bubbly and cream is thickened and reduced, about 20-30 more minutes. Let cool 10 minutes and serve. (*Recipe from MarthaStewart.com)

Photos and text by Tricia Borneman, Blooming Glen farmer and co-owner.

This week marks the official beginning of fall, and both the weather and veggies seem to agree with the calendar. This is a perfect soup for the transitioning season. It is rich and creamy without being too heavy. When roasted, fennel becomes deeply sweet (totally different from the crisp and refreshing taste of raw fennel) and leeks develop a wonderful caramelized flavor. Celeriac lends body and depth to this creamy soup. A touch of tangy blue cheese and crunchy chickpea crackers make it complete.

Roasted Fennel and Leek Soup

Cut off most of the green parts of 2 fennel bulbs and 3 leeks (save a few of the fennel fronds for garnish). Slice the leeks in half long-ways and run the layers under water to remove grit. Chop fennel bulbs and leeks into 1-inch chunks.

Cut away the ugly outside of  1 celeriac and chop into 1/2-inch chunks. Combine with fennel and leeks and toss with a sprinkle of salt and enough olive oil to coat. Spread veggies in a single layer on a cookie sheet and roast in a 400 degree oven for about 30 minutes (stirring once or twice) until they begin to brown and caramelize.

When the veggies are done roasting, combine them with 4 cups of milk, 1 teaspoon salt, 1 teaspoon cracked black pepper, and 1/2 teaspoon dried mustard powder. Heat until milk is hot, but do not boil. When heated through, use an immersion blender or food processor to puree until smooth. Adjust salt and pepper to taste.

Garnish with chickpea crackers (recipe below), crumbled blue cheese, and a sprinkle of chopped fennel frond for an added touch of the gourmet.

Gluten-Free Chickpea Flour Crackers

Combine 1 cup chickpea flour, 2 tablespoons sesame seeds, 1 teaspoon fennel seeds2 teaspoons olive oil, and 1 teaspoon salt in a small bowl. Slowly stir in 1/4 cup water until a thick dough is formed. Roll dough out into a thin layer (1/8 inch or so) on a cutting board and cut into cracker-sized pieces. Line a cookie sheet with parchment paper or a silicone baking mat. Bake for 20 minutes at 400 degrees until golden brown and crisp (I did this at the same time I was roasting the veggies).

This recipe is easily adaptable–replace fennel seeds with chopped herbs, sprinkle with parmesan cheese, etc. Cut into thinner strips for a salad garnish, or into wedges for dipping into hummus or spinach dip.

Text and photography by Kate Darlington – Blooming Glen Farm second year intern, fresh food enthusiast, and budding food blogger. She also writes for the Digging Deep Campaign as well as for her personal blog, Growing Things.

I don’t think chicken pot pie needs much of an introduction, but I will say this savory pie is one of my favorite comfort foods….even if it is a bit of a project. (All that gravy and pie crust makes it totally worth it, right?). It is also a great medium to use up things from your fridge. So experiment with variations!

**Warning: This recipe is not for dieters. Though I’m sure you could play with the recipe to omit some butter and the heavy cream.

Chicken Pot Pie

First off, you need to decide how you are going to prepare your chicken. I chose to roast 1 whole chicken and used all the meat (light and dark) from that. An equivalent if you are using chicken breasts would be about 6 breasts. You can prepare these simply by roasting until cooked through. Cut cooked chicken into cubes or shred.

To make crust:

For the pastry, mix 3 cups flour, 1 1/2 teaspoon salt, and 1 teaspoon baking powder in the bowl of a food processor fitted with a metal blade. Add 2 sticks of butter and mix quickly with your fingers until each piece is coated with flour. Pulse 10 times, or until the fat is the size of peas. With the motor running, add between 1/2 and 1 cup of ice water; process only enough to moisten the dough and have it just come together. Dump the dough out onto a floured board and knead quickly into a ball. Wrap the dough in plastic and allow it to rest in the refrigerator for 30 minutes.

To make filling:

-In a medium saucepan, heat 5 cups of chicken stock (I used homemade stock from the bones I used to roast the chicken). Bring to boil and then leave at a low simmer.

-In a large pot, heat a few tablespoons of oil and saute until tender:

1 yellow onion, diced
1 celeriac bulb, peeled and diced into small cubes
2 carrots, diced

-Add in stock with veggies.

-Chop 1 pound of potatoes and about a medium head (2 small) of cauliflower, hard stems removed. Add to pot.

-Bring everything to a boil and then turn the heat down to medium-high heat and cook until the potatoes are tender, about 10 minutes.

-In another small saucepan make a roux by melting 1 stick (8 tablespoons) of butter and adding 3/4 cup of flour. Salt and pepper. Cook on medium heat for just a minute or so. Add roux to pot and stir until the mixture begins to thicken.

-Add 1/2 cup of heavy cream (half-and-half or whole milk will also do), the chicken and a dash of thyme, sage or rosemary.

*The filling should be thick and have a nice gravy. If it seems to thin, just cook on medium heat uncovered for a little longer.

-Pour filling into a large cast iron dish. Roll out your dough to a 1/4 inch thickness and place on top of filling leaving some overhang. Brush dough with an eggwash and sprinkle with fresh cracked pepper and sea salt. Bake at 375 degrees for about 45-50 minutes or until the crust is golden brown. Let cool for at least a half hour so it can set a bit.

**You can also make these into 4 individual pot pies if you have oven safe bowls.

Recipe and photos by Jana Smart- Blooming Glen Farm employee and frequent creator of creative recipes using farm fresh seasonal ingredients. Check out more of her recipes on her food blog http://www.agrarianeats.blogspot.com/

Fall crops are here! Celeriac (celery root) and winter squash are making their first appearance in the share and at the markets this week, so it is the perfect time to brush up on those fall crop recipes or even try out something new.

My go-to preparation for so many fall crops like winter squash, potatoes, or celeriac is to simply toss them in olive oil and roast them. Though it’s delicious and still probably my favorite way to eat them, sometimes a more complex preparation can be a nice change. This recipe is a healthy, vegetarian curry that showcases the sunshine squash’s sweetness and the complex nutty flavor of the celery root. I serve it alongside some rice for a complete and satisfying  meal.

Lentil Curry with Celeriac and Winter Squash

-Half, seed, and peel 1 Kabocha squash–or other winter squash–with a sharp knife (the skin is actually not too hard to peel if your knife is good). Cut squash into 1/4 inch chunks. Similarly, carefully peel and chop 1 celery root into 1/4 chunks. Set aside. 

-Heat a large pot over medium heat with 4 tablespoons of olive or coconut oil (I like coconut for this recipe) and toss squash and celery root in with:

1 large white onion, chopped
3 cloves of garlic, minced
2 medium carrots
2 tablespoons of fresh, grated ginger
1 teaspoon of salt

-Saute veggies for about 15-20 minutes until tender.

-Add 1 tablespoon of curry powder and 1/4 teaspoon (or more) of red chili flakes. Mix well and cook for 2 minutes.

-Add 1 cup of lentils (any type will do), 1 cup of water or chicken stock, and 1 cup of coconut milk. **Coconut milk can be omitted…just add stock or water instead.

-Cover and simmer mixture for 25-40 minutes until lentils are tender. Adding more stock or water if the mixture is getting to thick.

-Let cool slightly and serve with brown or wild rice. Garnish with a fresh herb like chive, cilantro or parsley! ENJOY!

Serves 4 to 5 large portions.

Recipe and photos by Jana Smart- Blooming Glen Farm employee and frequent creator of creative recipes using farm fresh seasonal ingredients. Check out more of her recipes on her food blog http://www.agrarianeats.blogspot.com/

This week’s share sees the first winter squash of the season. Don’t be fooled into thinking it’s an ornamental pumpkin to let rot on your front porch- cook it quick, it won’t store for long. The scarlet kabocha squash, “sunshine”, could hands down be the sweetest and most flavorful it has ever been since we started growing it five years ago. To cook it, I just cut it in quarters, remove the seeds and sit it in a casserole pan cut side up with a little bit of water in the bottom of the pan. Bake at 375 degrees until soft (about 45 minutes) and enjoy! Another vegetable you might not be familiar with is celeriac, or celery root. To enjoy this root vegetable just peel off the roots and rough exterior until it resembles a white turnip. The flavor is just like celery, but a little goes a long way. Use in soups, mashed with potatoes, roasted with other root crops, or grate it raw on a salad.

September 13, 2011

We thank everyone for their support during all this crazy weather. This season by far has been the most challeging for us, from the wet spring to the catastrophic rain and flooding of the last few weeks. We are seeing major crop loss from the over 17 inches of rain we received in under two weeks. We are still assessing the damage (as some crops we thought were okay are succumbing to the moisture and others we just don’t know the extent of the damage- for example our sweet potatoes and potatoes), but it may be that we will have to end the season earlier then anticipated. In the meantime we will do our best to keep the shares as robust as possible, and we give thanks for all the bounty that the farm has already provided. We are scrambling to get our greenhouses cleaned out of their summer crops and prepped in the hopes that we can get something planted in there to make up for all that is rotting or dying in the fields. Our biggest concern now is that our fields dry out enough to get our garlic planted for next year. Keep your fingers crossed, and again we appreciate all the words of encouragement!

Photos and text by Tricia Borneman, Blooming Glen farmer and co-owner.