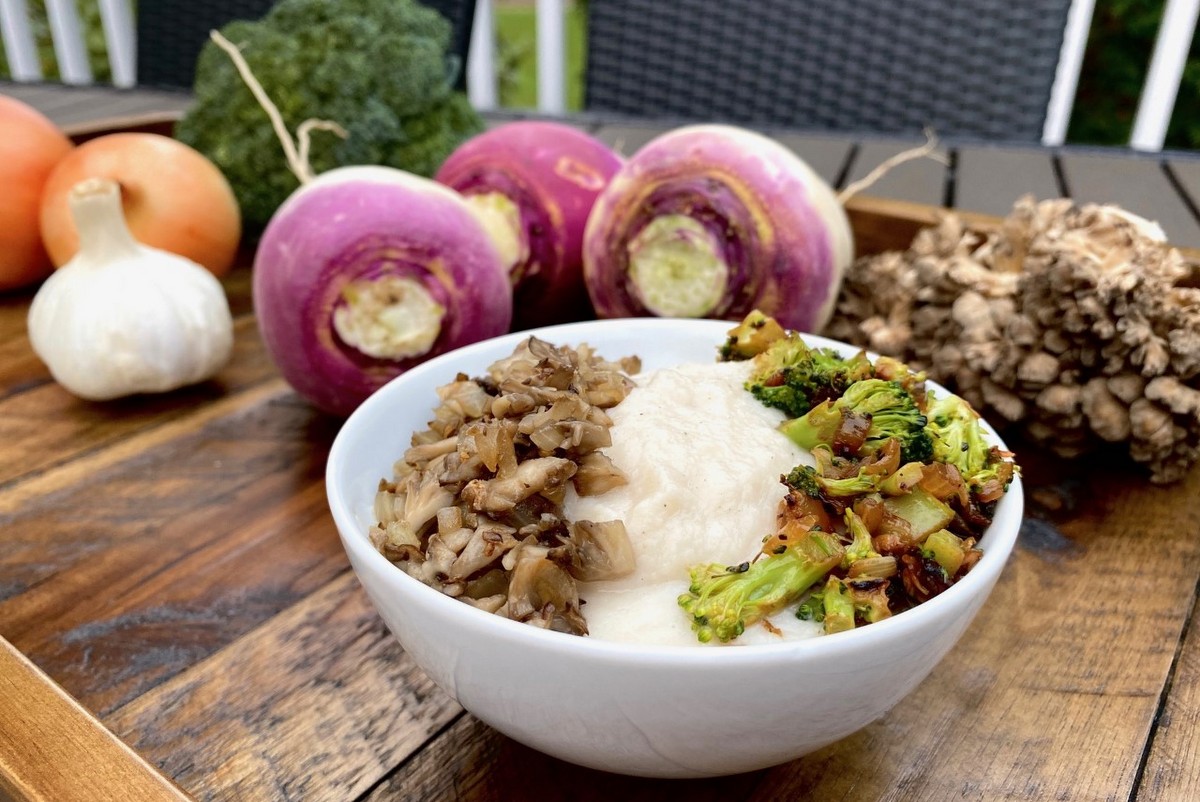
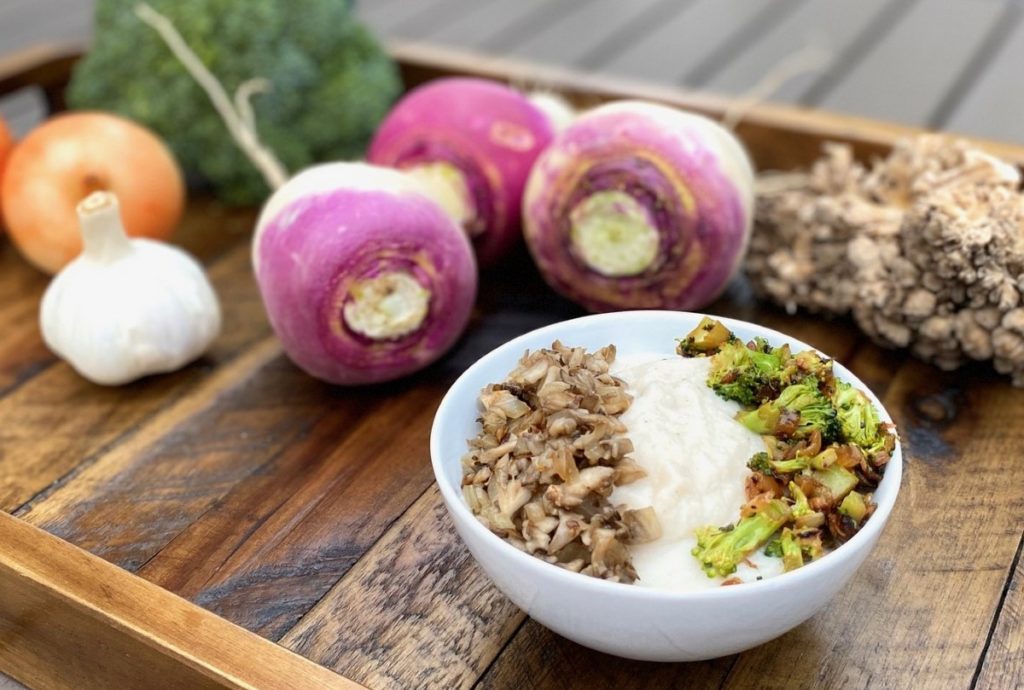
vegan Tag

One of my favorite ways to serve turnips is to roast them, but I wanted to create a recipe that used them in a different way.  This dish features turnips that have been cooked and then pureed.  Top with some mushrooms and broccoli and this dish becomes a delicious blend of flavors and textures.

Pureed Turnips with Riced Broccoli and Sauteed Mushrooms

Ingredients:
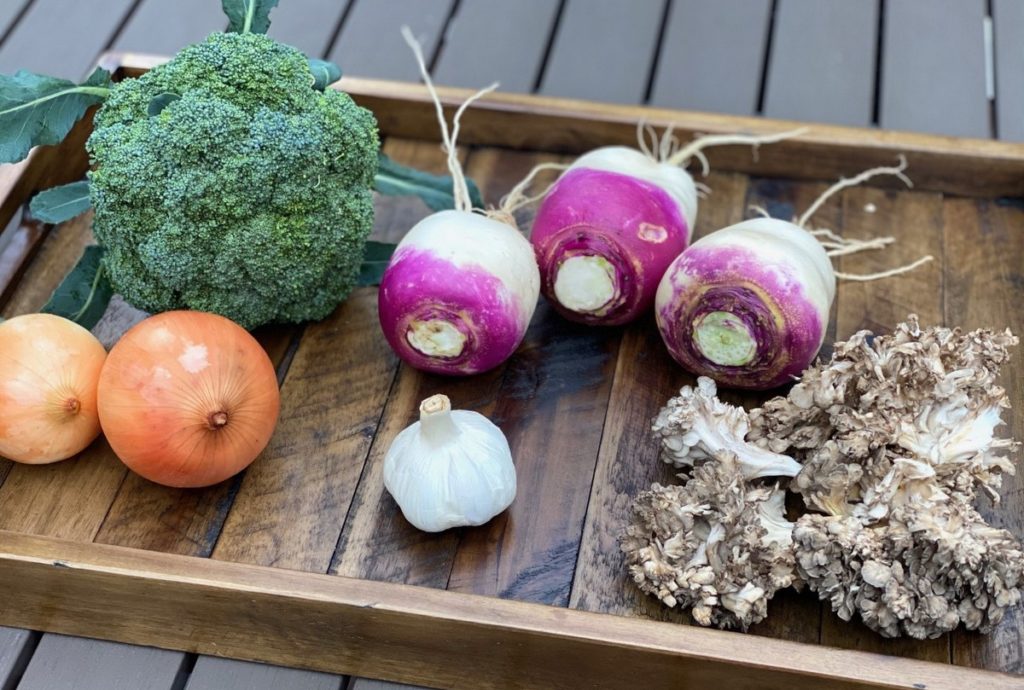
2 lbs purple top turnips
2 Tbsp butter (or non-dairy substitute)
½ tsp garlic powder
1/8 tsp black pepper
¼ tsp sea salt

  • Wash turnips and cut into 1- inch cubes.
  • Fill large pot halfway with water. Bring to a boil.
  • Place cubed turnip pieces in water. Bring to a boil again and then reduce to a simmer.  Cook for 30 minutes or until turnips are fork tender.
  • Drain turnips. Place in blender or food processor with butter and seasonings.  Blend until smooth.
  • Place turnip puree in serving bowl. Top with riced broccoli and sauteed mushrooms or simply serve as a side.
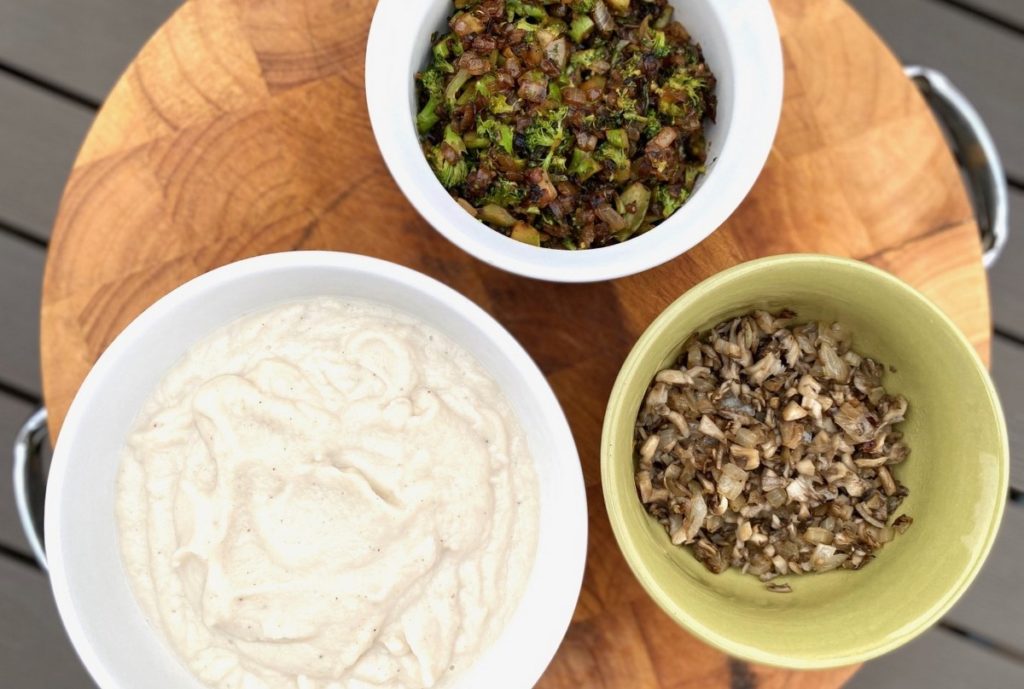
Riced Broccoli

Ingredients:
2 Tbsp olive or avocado oil
½ medium onion, finely chopped*
2 cloves garlic, minced
3 Tbsp water
1 cup broccoli crowns, finely chopped*

Heat oil in pan on stovetop.  Reduce heat to low.  Add onions and garlic.  Cook for 2 minutes.  Add water to deglaze the pan.  Add broccoli and cover.  Cook for 10 minutes.  Remove from heat and set aside.

*You can also put the onion and broccoli in a food processor and finely chop.

Sauteed Mushrooms

Ingredients:
2 Tbsp olive or avocado oil
½ medium onion, finely chopped
1 cup Maitake mushrooms, finely chopped
Pinch sea salt

Heat oil in pan on stovetop.  Reduce heat to low.  Add onions and cook for 2 minutes.  Add mushrooms and salt.  Mix and allow to cook for 5 minutes.  Remove from heat and set aside.

Recipe and photos by Stephanie Borzio.  Stephanie is a mom of three active boys and is an autoimmune warrior.  After battling her own health for several years, Stephanie found healing through food and lifestyle changes, including joining Blooming Glen Farm CSA of which she is a long time member.  She is a Board Certified Integrative Nutrition Health Coach who is passionate about sharing healthy living tips and real food recipes.  Instagram and Facebook: Tru You Essentials; Website: www.truyouessentials.com

Charcuterie Board, Snack Board, Food Board, Grazing Board…. whatever you want to call it! … a board or platter filled with delicious food is great for breakfast, lunch, dinner or even just a snack or appetizer.  It works for a small family, a couple, or even a big party.  Snack boards are adjustable, easy to throw together, and appeal to all ages.  With all of the beautiful food we have available at the CSA this season, I thought it would be fun to dedicate a post to the presentation of these foods in the style of boards or platters.

Creating a board is a very easy way to showcase the fruits and vegetables we receive each week.   Do you get the cheese share?  If so, what a perfect addition that would be.  How about the mushrooms?  Marinate or roast them and add to the platter.  What about the egg share?  Hard boil a few and slice them up to add to a board.

Here are a few ideas of ways to incorporate grazing boards…

  • Create a board for an at home date night. Pair with your favorite cocktail or glass of wine.
  • Make a snack board to serve to your children during virtual schooling.
  • Are you celebrating something special- perhaps a birthday, anniversary, award, or work achievement? Do it with a snack board.
  • Watching a sporting event on television- create a board to graze on while enjoying the game with your family.
  • Are you having a family movie night or game night? Create a board that can be snacked on throughout the evening.
  • Make a food board to celebrate a milestone in your children’s lives and pair with fresh lemonade or sun tea.


Why should you make a snack board or food platter?

  • It’s a way to share, connect, and enjoy spectacular food together.
  • It’s a fun way to liven up our pandemic era eating experience with our family!
  • Boards are fun to create and look at.
  • They can totally be a work of art, a creative way to serve food- providing different colors, textures, shapes, and flavors.
  • Boards provide lots of different choices.
  • Generally they don’t require cooking or very minimal cooking.
  • It’s a different way to serve food. Experiment and see what happens when you display food on a board instead of the usual serving dishes.
  • They can be made in advance so that you can enjoy the snack or meal together.
  • Boards offer lots of variety so that it is appealing to everyone- no matter what their choice of diet is and no matter what their age is.


Steps to creating a great board:

1. SELECT BOARD

Select your board or platter.  Think about how many people you will be serving.  This will help determine the size of your board.   You can use all sorts of materials- wood, marble, slate, stone, etc.  You can use an old cutting board, a large serving dish, or an antique tray.  You don’t need anything special.  Just a flat surface that will hold everything and display it all.

2. GATHER INGREDIENTS

The great thing about this is you can use what you have on hand- in your pantry, refrigerator, or freezer- or you can shop for specific items.

  • Vegetables- fresh vegetables, marinated vegetables, fermented or pickled vegetables, roasted vegetables
  • Fruit- fresh fruit, dried fruits
  • Nuts and Seeds
  • Breads, Crackers, Pretzels, Chips
  • Cheeses- hard cheeses, soft cheeses, cheese spreads, vegan cheeses
  • Spreads, Dips, Jams/Chutneys, Honey, Nut Butters, Mustards
  • Meats- thinly sliced
  • Other options- olives, chocolate

3. ASSEMBLE BOARD

You can keep it simple or get fancy and creative. If you are using any spreads or items that need to go in a bowl, do that first.  Place those on the board and then slowly add other items.  It’s a good idea to start with your largest items first so that you can work through the space you have.  Generally try to keep items on the platter bite size.

4. ADD UTENSILS

If you are keeping cheeses whole, you will want a small knife.  For dips and jams, you will want a small spoon.  Provide a small knife/spreader for spreads.  Make sure you have a utensil for each item that will need it.  You don’t want to put out one spoon and use it for all the spreads and jams.  Provide one knife for each cheese and one spoon for each jam.

5. GARNISH

Add fresh herbs or edible flowers if you want, but this is totally optional.

6. RELAX AND ENJOY

Think of a board as a blank canvas for you to display a snack or even a meal.  Take the beautiful produce we receive from Blooming Glen Farm, the fruit from North Star Orchard, the cheese from Valley Milkhouse or Birchrun Hills Farm, the eggs from Deep Roots Valley Farm, the mushrooms from Primordia Mushroom Farm, the honey from Heirloom Acres Honey and combine it all on a platter that showcases the amazing food we receive each week.  Create a grazing board, take a photo, post, and tag us (@bloomingglenfarm and @truyouessentials).  We cannot wait to see all of the platters you make!

The following past recipe posts would make a great addition to any board:

Tomato Jam- https://www.bloomingglenfarm.com/tomato-jam/

Ground Cherry Jalapeno Jam- https://www.bloomingglenfarm.com/ground-cherries-3-ways-jam-marinade-chocolate-covered/

Fresh Dill Vegetable Dip- https://www.bloomingglenfarm.com/vegetable-crudite-with-fresh-dill-dip/

Roasted Eggplant Dip- https://www.bloomingglenfarm.com/roasted-eggplant-dip/

Refrigerator Pickles- https://www.bloomingglenfarm.com/cucumber-salad-refrigerator-pickles/

Veggie Chips- https://www.bloomingglenfarm.com/veggie-chips/

Roasted Vegetable Chutney- https://www.bloomingglenfarm.com/grilled-tomatillo-salsa-and-roasted-vegetable-chutney/

Lemon Dill Hummus- https://www.bloomingglenfarm.com/fresh-herb-ideas-lemon-dill-hummus-or-basil-salt/

Butternut Squash Hummus- https://www.bloomingglenfarm.com/butternut-squash-hummus/

Fresh Chopped Salsa- https://www.bloomingglenfarm.com/fresh-chopped-salsa/

Recipe and photos by Stephanie Borzio.  Stephanie is a mom of three active boys and is an autoimmune warrior.  After battling her own health for several years, Stephanie found healing through food and lifestyle changes, including joining Blooming Glen Farm CSA of which she is a long time member.  She is a Board Certified Integrative Nutrition Health Coach who is passionate about sharing healthy living tips and real food recipes.  Instagram and Facebook: Tru You Essentials

Varieties of summer squash and zucchini are are abundant during the summer — which is a very good thing! (And to clarify, at the farm we just call it all summer squash, of which this week’s dark gold and green zucchini is included under that heading. I am referring here to the lighter yellow squash as “summer squash”- it is also milder in flavor than the gold and green zucchini varieties that Blooming Glen grows). These light and mild veggies are not only delicious, but also healthy and versatile. Nutritionally speaking, the manganese in squash helps promote strength by building strong bones and connective tissues. As we know, vitamin C supports our immune systems, preventing colds and other infections, but it’s also an antioxidant that can help protect our bodies from the damage caused by pollution. Finally, the fiber in zucchini and summer squash aids digestion and promotes a healthy gut. In order to get all these benefits, it’s important to skip the peeler; like most other vegetables and fruits, a lot of the healthy stuff in zucchini and summer squash lives in or near the skin. Instead of peeling, simply rinse off the veggies under running water to remove any dirt. Here are a few tips for using up your stock of zucchini and summer squash:

  • Dice ’em up: Diced zucchini and summer squash can be added to soups, stir-fries, chilis, crepes and quiches, stews, curries, spaghetti sauce and rice. They can also be enjoyed raw, mixed into pasta salad, grain salads and green salads.
  • Cut into coins: Sliced zucchini and summer squash make a great topping for pizza, taste great layered into lasagna, or used in casseroles.
  • Savory pancakes: Add grated squash and zucchini to whole wheat pancake mix, along with some garlic powder and chopped spring onion. Serve with a dab of sour cream for a savory, summery side dish.
  • On the grill: Slice zucchini and squash lengthwise, into planks and spray lightly with high-heat cooking oil. Place on hot grill or grill pan and sprinkle with salt and pepper. Grill for 5-10 mins., until tender and charred, flipping once.
  • Thicken up soups: Cook and puree squash and zucchini to use as a creamy soup base.
  • Preserving: Shred and freeze zucchini and squash to preserve. Use thawed veggies in breads, muffins, casseroles, fritattas, and quiches.

Post and photos by Mikaela D. Martin: Blooming Glen CSA member since 2005, health counselor, and co-founder of Guidance for Growing, an integrative wellness practice in Souderton. Read more about healthy eating and living on her site, http://guidanceforgrowing.com

P1016499
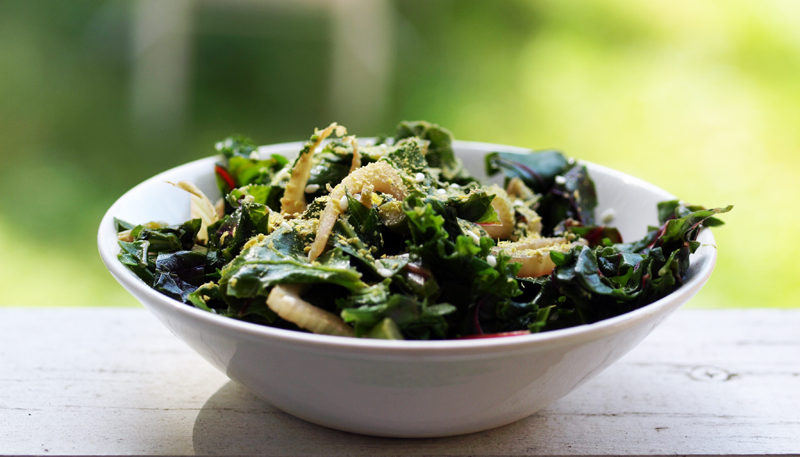
Greens are probably the best food to add to our diets to improve nutrition. They provide cancer-fighting vitamins & minerals, the fiber we need for heart & digestive health, & assistance to our body’s detoxification processes. They’re also really easy to add to our meals; a great way to start is by simply adding a handful of chopped up greens to whatever you’re cooking — sauces, salads, soups, stir-fries, casseroles, just about everything! Another great strategy for getting more greens into our diets is to keep a green side on-hand; make the recipe below to serve with your meals throughout the week!

This recipe also makes use of two super flavorful ingredients that we’ve been finding on our shares lately, garlic scapes & fennel. Scapes have been called a “vegetable, aromatic & even herb all in one,” & I would also put fennel in that unique (& delicious) category.  Both fennel & scapes also give us a nutritional boost with fiber, antioxidants, & phytonutrients.

Add your favorite plant-based protein to make the this dish heartier & more complete — chickpeas, seitan, or quinoa would be tasty.  You can also enjoy this recipe hot or cold.  Eat immediately after preparing as a hot side dish, or let cool & use as an ingredient in a whole grain wrap or mixed into a green salad.

Sautéed Greens with Scapes & Fennel

P1016502

Ingredients
1 tbs cooking oil
5 garlic scapes, sliced
1 fennel bulb & stems, sliced up to fronds
1/2-cup white wine or broth
6-8 cups kale, chard, &/or collards, stripped from stems & chopped
1 tbs red wine or balsamic vinegar
Nutritional yeast or Parmesan cheese, & sesame seeds (optional)

Instructions
Heat oil, scapes, & fennel in skillet until veggies are tender, about 3-5 minutes. Add wine or broth & stir in greens until coated evenly. Allow greens to reduce about 5-7 minutes, stirring often & adding additional wine or broth if needed. Remove pan from heat & toss with vinegar. Serve with optional toppings.

Post & photos by Mikaela D. Martin: Blooming Glen CSA member since 2005, health counselor, & co-founder of Guidance for Growing, an integrative wellness practice in Souderton. Read more about healthy eating & living on her site, http://guidanceforgrowing.com

P1016490 smWell, maybe not 100 ways… but spaghetti squash is so incredibly easy to prepare and so versatile, I bet we could think of 100 ways pretty quickly!  Spaghetti squash can be served as a simple side dish or as a flavorful full meal, and although I won’t list exactly 100 ways to eat it here, the preparation possibilities are truly endless. 

Nutritionally speaking, spaghetti squash is most notable for its high fiber and vitamin C content. The heart- and belly-healthy fiber found in this squash not only promotes cardiovascular health, but also helps maintain blood sugar levels and keeps us feeling full longer. Vitamin C is a powerful antioxidant that plays a role in everything from boosting our immune systems to protecting our skin.

Use the basic roasted squash recipe below as a starting point, then try out the side or main dishes listed, or experiment by using your own favorite flavors.

Spaghetti Squash 100 Ways

P1016492 smBasic roasted spaghetti squash: Preheat over to 400-degrees. Cut squash in half, lengthwise. Scoop out the seeds with a spoon, being careful not to dig into the flesh of the squash. Place squash halves on a baking sheet or in a baking dish, cut side down. Put a little water on the pan, enough to just cover the cut ends of the squash. Bake for 30-45 minutes (smaller squash will cook more quickly), until squash is tender and a fork can easily pierce through the skin/peel and flesh. Remove the squash flesh by scraping a fork lengthwise across the inside of each half. Toss squash with a little oil or butter, salt and pepper.

You can also microwave spaghetti squash: Pierce squash all over with a fork or paring knife. Place in microwave and cook for 10-15 minutes, until squash is tender and a fork can easily pierce through the skin/peel and flesh.

As a simple side, toss above-cooked squash noodles with:

  • Lemon zest and chopped fresh herbs
  • Chopped tomatoes and garlic
  • Tomato sauce and nutritional yeast or Parmesan cheese
  • Capers, lemon, and parsley
  • Butter and scallions

As a main dish:

Taco-style
Grapeseed oil
1/3 cup onions, chopped
2 cloves garlic, minced
2 tablespoons chili powder
1 cup black beans
1 cup tomatoes, chopped
1 cup peppers, chopped
1/2 cup tomatillos, chopped
Toppings: shredded lettuce, sour cream, salsa, crushed tortilla chips, shredded cheddar cheese
Method: Heat a large pot with oil, sauté onion, garlic, chili powder and beans until everything is tender and heated through. Add tomatoes, peppers, and tomatillos and cook ~5-7 minutes minutes, until peppers are just tender. Add squash and combine well. Serve immediately with toppings.

Buffalo and Blue Cheese
Grapeseed oil
1/3 cup green onions, chopped
2 cloves garlic, minced
1 cup chickpeas, or mock chicken, shredded or chopped
1 cup carrots, shredded
1 cup cabbage, shredded
1/2-1 cup wing sauce
Toppings: green onion, chopped celery, blue cheese crumbles
Method: Heat a large pot with oil, sauté onion, garlic, and chicken until everything is tender and heated through. Add carrots and cabbage and cook ~3-4 minutes, until crisp tender. Add squash and combine well. Toss with hot sauce, adjusting amount to desired spiciness. Serve immediately with toppings.

Pad Thai
Grapeseed oil
1/3 cup green onions, chopped
1 cup cubed tofu (baked tofu works great)
1 cup bean sprouts
1 cup carrots, shredded
Whisk together sauce ingredients:
3 tablespoons tamari sauce
3 tablespoons rice vinegar
3 tablespoons orange juice
3 tablespoons lime juice
2 tablespoons light brown sugar
3 clove garlic, minced
1/2 teaspoon red pepper flakes
Toppings: chopped green onions, chopped peanuts, sesame seeds, sriracha sauce
Method: Heat a large pot with oil, sauté onion and tofu cooked/heated through; cooking time depends on whether you’re using raw or baked tofu. Add sprouts, carrots, and half the sauce and cook ~3-4 minutes, until crisp tender. Add squash and remaining sauce and combine well. Cook for a few minutes over low-medium heat, allowing flavors to meld together. Serve immediately with toppings.

gfg_head shot mPost and photos by Mikaela D. Martin: Blooming Glen CSA member since 2005, board-certified health counselor, and co-founder of Guidance for Growing, an integrative wellness practice in Souderton. Read more about healthy eating and living on her site, http://guidanceforgrowing.com!

OLYMPUS DIGITAL CAMERAOne of the most common barriers to health eating that I hear is time. Between family & friends, work & school, hobbies & activities, there just never seems to be enough time, does there?

There are two tricks that I always recommend — and use myself: 1) A little meal planning & food prep each week, and 2) A repertoire of quick, simple, & adaptable recipes.  The Summer Veggie Noodle Bowl here serves double duty, playing a part in both of those tricks!  Prepare a big batch at the beginning of the week & reheat for lunches or dinners throughout the week, & when the seasons (or contents of your pantry) change, simply adapt the ingredients to what’s available.  Bonus: this dish taste great both hot & cold.

Summer Veggie Noodle Bowl

OLYMPUS DIGITAL CAMERA

Sauce
2/3 cup rice vinegar
1/2 cup tamari or liquid aminos
2 TBS sesame oil
3 TBS agave (or other sweetener)
6 gloves garlic, minced
1/2+ tsp crushed red pepper

Noodle bowl
1 package (~10 oz) brown rice vermicelli*
1 tsp sesame oil
1 cup onion, chopped
2 cups zucchini &/or summer squash, shredded or julienned
2 cups carrots, shredded or julienned
kernels from 2 ears of corn
1 head escarole, chopped
1 can (~1-3/4 cups) black soy beans**
Sesame seeds for garnish
* Or 1 package (~9 oz) whole grain soba noodles or 1 package (~8 oz) whole wheat angel hair pasta.  Or, change it to a whole grain bowl & use any whole grain (brown rice, quinoa, bulgur, etc.)
** Or shelled edamame, chickpeas, adzuki, other bean, or any other protein of your choice.

Directions
In a small bowl, whisk together the sauce ingredients until combined & then set aside.

Prepare noodles per package instructions, drain & stir in a small splash of sesame oil to prevent sticking.

Heat oil in a large skillet over medium-high heat. Sauté onions for 3-4 minutes, until translucent. Add zucchini, carrots, corn, escarole, & 1/3* of the sauce & sauté for 5-7 minutes, until heated through. Stir in beans & sauté another 5 minutes, until beans are heated & escarole is cooked down. Stir in noodles & 1/3* of the sauce. Cook for 2-3 minutes, stirring often, until everything is heated through. Garnish with sesame seeds & serve immediately.

* If you’re making a batch that will be reheated, reserve 1/3 of the sauce for reheating.  Otherwise, use 1/2 the sauce while cooking the veggies & 1/2 the sauce when stirring in the noodles.

gfg_head shot mPost and photos by Mikaela D. Martin: Blooming Glen CSA member since 2005, board-certified health counselor, and co-founder of Guidance for Growing, an integrative wellness practice in Souderton. Read more about healthy eating and living on her site, http://guidanceforgrowing.com!

bg_blog lentil potato chard salad 2This versatile summer salad is not only packed with flavor & nutrition, but also uses several recent share ingredients.  We’ve talked about the healthy stuff in potatoes & Swiss chard here before; combining them with lentils, a good source of both plant-based protein & iron, allows this salad to stand in as a hearty side or a main dish.  Roasting the potatoes & chard brings a smokey flavor & unique texture that contrasts perfectly with the raw ingredients. Note: this is a good time to roast some other veggies (beets & kohlrabi, fennel, peppers, eggplant, turnips, etc.) while you have the oven on!

Try serving this salad on top a bed of chopped spring greens, with a side of grilled string beans & your favorite protein, or topped with a fried farm-fresh egg.

Roasted Potato & Chard Salad with Lentils
bg_blog lentil potato chard saladIngredients
1 cup black, green or brown lentils (black pictured)
6 potatoes (~1-1/2 lb), cut into cubes
3+ cups Swiss chard, roughly chopped
Salt & pepper
Grapeseed or other high-heat cooking oil
3 spring onion bulbs (~1/3 cup), finely diced
1 fennel bulb (~1/3 cup), finely diced — or try celery
1-2 clove green (or other) garlic, minced
3 TBS lemon juice
2 TBS Dijon mustard
1 TBS olive oil
1/2 cup fresh herbs, finely chopped (optional)

Method
Preheat oven to 400-degrees.

In a medium pan, bring lentils, water, and ~1/2 teaspoon salt to boil. Simmer the lentils until tender, ~20 minutes. Drain and put aside

Meanwhile, toss potatoes with a little grapeseed oil & a sprinkle of salt & pepper, then place on a single layer on a cookie sheet. Roast until tender & lightly browned, ~20 minutes. Repeat with Swiss chard, roast until wilted & drying, but not crispy, ~10 mins.

In a large bowl, combine the onion, fennel or celery, garlic & lemon juice, then allow to sit for a few minutes. Whisk in mustard & olive oil. Season to taste with salt & pepper.

Add lentils, potatoes & herbs to the bowl & toss to combine. Serve warm or chill until ready to serve.

gfg_head shot mPost and photos by Mikaela D. Martin: Blooming Glen CSA member since 2005, board-certified health counselor, and co-founder of Guidance for Growing, an integrative wellness practice in Souderton. Read more about healthy eating and living on her site, http://guidanceforgrowing.com!

BeetsBeets are a staple veggie at the farm, making an appearance both at the beginning & end of the season each year. Like many root vegetables, beets have lots of vitamins & minerals, including those that help grow red blood cells (folate) & those that that help build sturdy & strong bones (manganese). Also like many root vegetables, much of the nutrition in beets lives in or near the skin, so skip the peeler & simply scrub them clean before eating.

Enjoy beets raw & cooked: Use slices of raw beets in a veggie dip or hummus, or dice them up small & add them to a green, grain or pasta salad. Use a grater to shred raw beets for slaws or to use in breads, muffins & even cookies! Of course, the sweetest way to eat beets is by roasting them. The simple recipe below combines beets with another CSA staple, kohlrabi. You can serve this dish as is, or use it as a base for a more hearty meal:

  • Serve chilled & topped with cooked quinoa & plain yogurt (pictured below)
  • Mix in chickpeas or black soy beans
  • Use as a pita filling with hummus
  • Top with plain yogurt or sour cream & minced chives
  • Serve on top of a chopped green salad
  • Combine with a cooked whole grain (brown rice, bulgur, farro, etc.)
  • Top with sunflower or sesame seeds

Roasted Beets & Kohlrabi with Fennel
BeetsIngredients
8 beets
8 kohlrabi
3 fennel
1-1/2 tablespoons grapeseed or other high-heat cooking oil
salt & pepper

Method

Preheat oven to 400-degrees. Trim tops off beets, scrub clean & dice. Trim, peel & dice kohlrabi. Slice fennel bulbs & stems, up to fronds. Toss beets, kohlrabi & fennel with a bit of grapeseed oil, salt & pepper.

Place vegetables in a baking dish, cover & bake for 25 minutes. Sprinkle with a little more salt & pepper, stir, recover & return to the oven. Bake until just tender, about 20 more minutes.

gfg_head shot mPost and photos by Mikaela D. Martin: Blooming Glen CSA member since 2005, board-certified health counselor, and co-founder of Guidance for Growing, an integrative wellness practice in Souderton. Read more about healthy eating and living on her site, http://guidanceforgrowing.com!

Rice & Beans PeppersFrom Cuban black beans with yellow rice to Indian ramjah (kidney beans) with basmati rice, rice and beans is a classic, versatile dish that’s found throughout most cultures around the globe. Rice and beans are hearty, inexpensive, and super adaptable, making them a worthwhile addition to anyone’s kitchen repertoire. The key to making this not only a belly-filling meal, but also a nourishing and nutritious one is using whole grains and loading up on veggies. The recipe below uses heart-healthy brown rice, and loads of Blooming Glen Farm-fresh veggies that are packed with vitamins and minerals. The black beans bring plant-based protein, making this a nice rounded and complete meal.

As with many recipes on this blog, the one below is very much open for alterations, depending on your particular tastes, what you have available in your pantry, and what veggies you may need to use up from your share.  I’ve added lots of peppers to this version, since they’re abundant right now. The poblano peppers add a tiny bit of heat, while the frying peppers bring in some sweetness.  Greens are always a good thing to add to your meals; using them here brings in a satisfying chewiness, perfectly complimented by the soft peppers and beans.  Corn would be a nice addition and so would zucchini — feel free to use up whatever vegetables you have on hand!  You can substitute pinto or other beans in place of the black beans. You can even skip the rice and serve the beans over baked or smashed potatoes (leave skins on) or another whole grain. Experiment and have fun 🙂

Recipe note: I make rice and beans by first getting the rice going in a rice cooker, then moving on to the prep and cooking of the beans.  In most cases, by the time the beans are done, so is the rice.

Rice & Beans

Rice & Beans

Ingredients
2 teaspoons grapeseed oil
1 medium onion, peeled and chopped (~1 cup)
3 garlic cloves, minced
1 tablespoon ground cumin
1 teaspoon oregano
1 teaspoon smoked paprika
4 poblano peppers, seeded and chopped (~1 cup)
4 sweet peppers, seeded and chopped (~1 cup)
1+ jalapeño pepper, seeded and chopped (optional)
1+ cup kale, chopped fine
2 large tomatoes, seeded and chopped (~2 cups)
2 15-oz cans black beans, rinsed and drained
1+ cup broth (No-Chicken Broth is good here)
2 teaspoons maple syrup
3 cups hot cooked brown rice*
Fresh cilantro (optional)
* I prepare rice for this recipe with broth, rather than water.

Method
Heat oil in a large skillet. Add onion and cook for a minute or two, until they begin to soften. Add garlic and spices, cook for one minute more. Add peppers. greens, and tomatoes, stir well, and cook until veggies are tender, about 8-10 minutes.

Meanwhile, mash 1/2-cup of the beans.

Add mashed beans, whole beans, broth, and maple syrup to the skillet. Turn up heat and bring to boil, stirring frequently. Reduce heat, cover and simmer 15 minutes, stirring occasionally. Uncover and simmer until reduced to desired thick consistency, about 5-10 minutes. Salt and pepper to taste. Serve over rice, topped with cilantro.

Post and photos by Mikaela D. Martin: Blooming Glen CSA member since 2005, board-certified health counselor, and co-founder of Guidance for Growing, an integrative wellness practice in Souderton. Read more about healthy eating and living on her site, http://guidanceforgrowing.com!

Tabbouleh Salad ingredientsTabbouleh (also tabouli) is a classic Middle Eastern salad made from whole grains and highlighted by the fresh herbs, cucumbers, and tomatoes that are in season right now. The whole grains in tabbouleh come from bulgur, which is made from whole hard wheat (wheat berries) that’s been parboiled, dried, and then cracked.

This whole wheat is very different than the wheat-based products we often buy at the grocery store:  When wheat is refined and processed — primarily into wheat flour — nearly all of its nutritional value is stripped away.  In fact, “more than half of wheat’s B vitamins, 90 percent of the vitamin E, and virtually all of the fiber” are lost.  When wheat is refined, its nutritious bran and germ are removed and we’re left only with a starch that’s digested as a simple sugar, causing our blood sugar levels to spike as if we’d eaten candy!

Healthy whole wheat like bulgur, on the other hand, is a complex carbohydrate that offers a unique combination of minerals, antioxidants, and fiber, all of which work in concert together to protect our cardiovascular health, prevent Type 2 Diabetes, promote digestive health, and help fight off cancer.  Once cooked, bulgur has a mild, nutty flavor that adds a fantastic chewy, meaty texture to foods. Mix it into a salad, stirfry, chili, spaghetti sauce, taco filling, or use it as a base for a grain salad (such as this Asian Bulgur and Edamame Salad), stuffed peppers, breakfast porridge, or savory side dish.

In addition to whole wheat, tabbouleh takes advantage of the cucumber bounty we’ve been enjoying with our share.  Cucumbers aren’t commonly thought of for their nutrition, but they actually are a good source of vitamin A, magnesium, phosphorus, and manganese, and a very good source of potassium and vitamins C and K.  Thanks to the phytonutrients in cucumbers, they also bring our bodies anti-inflammatory, antioxident, and anti-cancer benefits, too.

The important key to accessing all this great stuff, however, is consuming the skin. (Some might remember that this is true for many of the vegetables we eat — we’ve talked about potatoes, sweet potatoes, squash, and eggplant here before 🙂 )  If you’re just getting used to eating the skin on cucumbers, try peeling only half of the skin off at first, then move up to keeping it all intact.

Tabbouleh a naturally versatile and adaptable dish, so feel free to play around with the grain-herb-veggie ratio.  You might prefer an herb-based salad, or you might choose to go heavy on the cucumbers, since they’re so abundant right now (as I did in the salad pictured). You could even make this recipe gluten-free by substituting bulgur for another healthy whole grain, such as quinoa. Tabbouleh pairs great with hummus, baba ganoush, and pita.

Tabbouleh

Tabbouleh

Ingredients
2 cups boiling water
1-1/4 cup bulgur wheat (use quinoa for a gluten-free version)
1 cup parsley, chopped
1/2 cup mint, chopped
1/4 cup minced onion
1+ cup cherry tomatoes, quartered or chopped
1+ cup cucumbers, diced

Dressing
1/4 cup olive oil
juice from 1/2 lemon, more to taste
1 tsp salt, more to taste
pinch of pepper
pinch allspice

Method
Place bulgur in a bowl and pour boiling water over top. Let stand for 20-30 minutes, until softened, but still chewy.  Drain off any excess liquid, and fluff. If using quinoa, prepare per package instructions. Add herbs and veggies to bulgur and gently stir. Combine dressing ingredients in a small bowl and mix well. Add dressing to bulgur, gently stirring until dressing coats salad well. Adjust seasonings to taste.  Serve chilled.

Post Sources
Harvard School of Public Health
Nutrition Data (Bulgur)
Nutrition Data (Cucumber)
WH Foods (Cucumber)

Post and photos by Mikaela D. Martin: Blooming Glen CSA member since 2005, board-certified health counselor, and co-founder of Guidance for Growing, an integrative wellness practice in Souderton. Read more about healthy eating and living on her site, http://guidanceforgrowing.com!