Author: bloomingglenfarm

Radicchio,  baby “arrowhead” cabbage, green beans, cucumbers and fresh garlic all make their debut in the share this week. Tuesday was the longest day of the year and the official first day of summer. Here at the farm, the solstice marks somewhat of a turning point in our season. We shift from planting, to tending and harvesting the crops. All of our major plantings are in, a goal we look to achieve before the solstice, for every day from here out will be a delightful dance towards winter, as the days gradually, almost imperceptibly, get shorter.

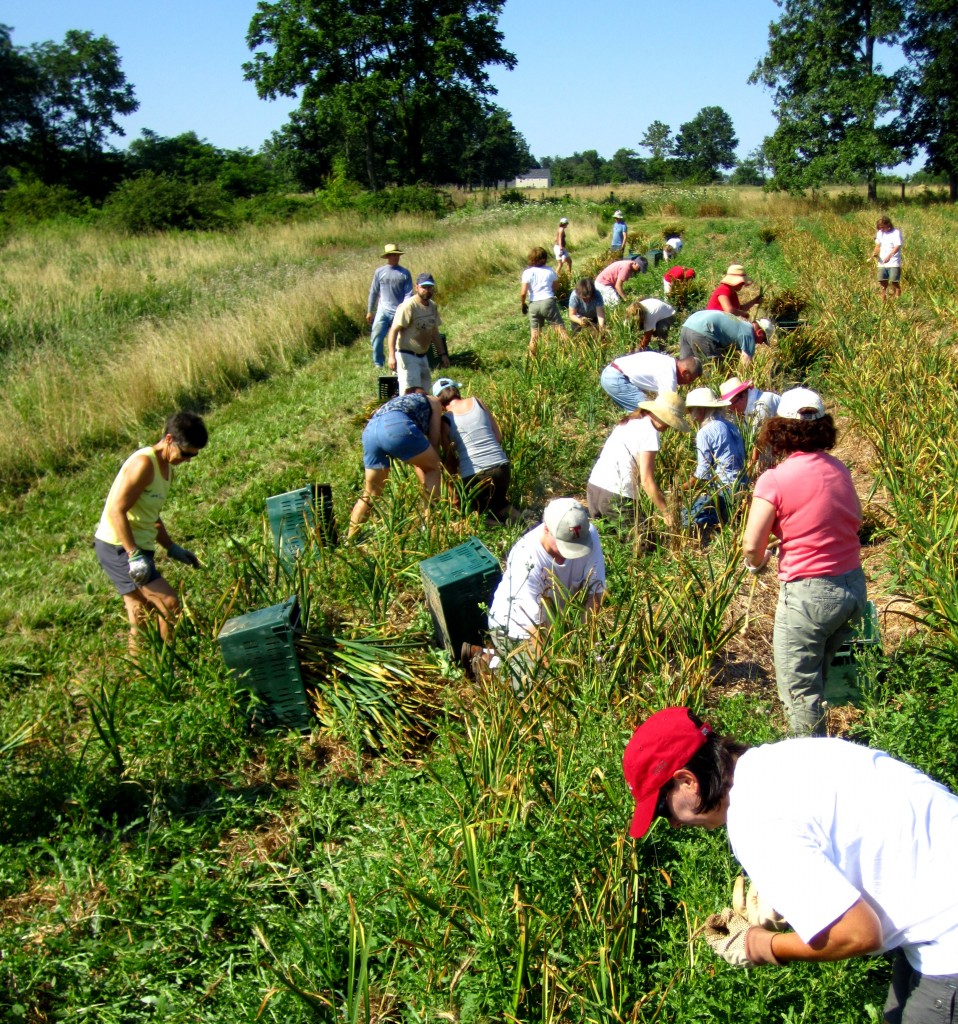
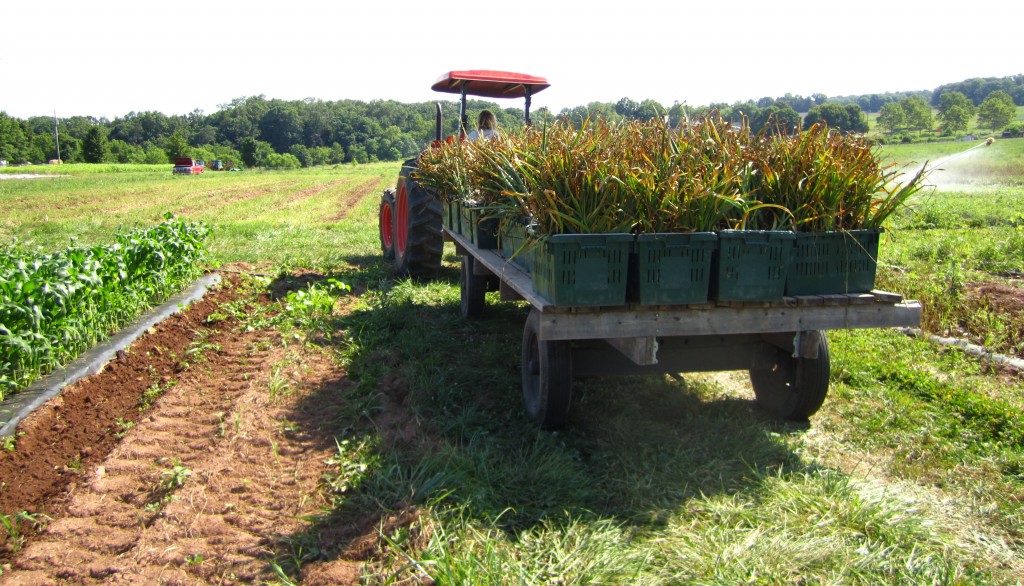
A little about fresh garlic: garlic is planted in the Fall, and the first harvest is when we snap the scapes to promote bulb growth.  Scapes, which you are familiar with by now, are the delicious, curly flower stalks on hardneck varieties. The next harvest, and main event, is of the bulb itself. Our entire garlic crop, about a half an acre, will be harvested the beginning of July and hung to dry and cure. Right now, we are harvesting some of the garlic as green garlic, which simply means it has not yet been cured. Uncured garlic doesn’t store as well, but how long are you really gonna let a single bulb of garlic hang around?! It is wonderfully aromatic, and a rare early summer treat. Use it just as you would regular garlic, but first you must remove several layers of moist skin to get to the cloves. With that bunch of basil, why not make some pesto?! Enjoy!

CSA share week 4

Photos and text by Tricia Borneman, Blooming Glen farmer and co-owner.

Radicchio is another one of those veggies most people avoid because they either 1) don’t know what the heck it is  2) don’t know how to prepare it even if they muster the courage to pick it up from the farmers’ market 3) are plagued by some bitter and unpleasant memories of the time a few leaves made their way into a salad mix. Well I’m here to tell you that you can overcome your fears…you CAN love radicchio! All it takes is a preparation that balances the pleasant bitterness of the leaves with a sweet and nutty topping.

Radicchio

Radicchio is a member of the chicory family (along with endive and frisee) and is a widely grown crop in Italy where it was first cultivated and popularized. In addition to making a delightful salad, this veggie is sturdy enough to braise and grill–a popular option for those who might not be crazy about it raw. For this recipe I chose to grill the radicchio in halves on a gas grill, but you can also use a cast iron pan or roast it in the oven.

Grilled Radicchio Salad with Pear and Pecorino

-Wash and dry:
1 head of radicchio from your share

-Cut into half and coat with olive oil
-On a medium/low heat, grill radicchio halves on each side for 4 minutes until wilty and tender. If the outer leaves get a little crispy, that’s okay! (It is more delicious that way)
-Set aside to cool slightly and in the meantime whisk together:

2 tablespoons balsamic vinegar
1 teaspoon Dijon mustard
3 cloves of green garlic (from your share!)
4 tablespoon Extra Virgin Olive Oil
Salt and pepper to taste

-Cut up the radicchio halves into chunks and toss them with the vinaigrette. Thinly slice 1 half of a Bosc pear (or an apple) to toss in. Top with some grated Pecorino or Parmigiano-Reggiano. Serve warm or at room temperature. ENJOY!

Recipe contributed by Jana Smart- Blooming Glen Farm employee and frequent creator of creative recipes uses fresh seasonal ingredients. Check out more of her recipes on her food blog http://www.agrarianeats.blogspot.com/


As spring moves into summer, the season of barbecues, picnics and parties is upon us. And so is the season of summer squash! If you’ve ever planted them in your garden, you know what a bumper crop squash can be once they get going — here at the farm, it’s no exception. Try this fresh recipe to help you use your share of the bountiful harvest and entertain in style. Fresh spring rolls will always wow a crowd, but they are actually pretty easy to make. Keep this recipe on hand throughout the summer and swap in different veggies as your CSA share changes.

Summer Squash Spring Rolls

Start by preparing the filling ingredients:

2 medium summer squash, grated
2 spring onions, cut into long thin strips
6 swiss chard leaves, de-stemmed and cut in half
1 bunch cilantro, de-stemmed
1 bunch basil and/or mint (optional), de-stemmed

Place these in piles on a cutting board or plate. Now, prepare an assembly station: Fill a baking pan with a bit of hot water. Next to the water, you’ll need two clean plates — one to work on and one to put the finished product on. Now you’re ready to roll!

Begin with a package of Spring Roll Wrappers (also known as rice paper wrappers, found in the Asian section of most grocery and health food stores). Soak one rice paper wrapper in the water for about 15 seconds, until it is soft and pliable. Lay the wrapper flat on the plate and fold in the right and left sides. Stack the filling, starting with swiss chard, on top of the wrapper — kind of like you would do a burrito.

Wrap the bottom edge over the veggies, rolling it up as tight as you can. The wrapper will stick to itself as it dries. Repeat with the rest of the wrappers. Cut each roll in half. Serve with Peanut Dipping Sauce. Makes 24 rolls

Peanut Dipping Sauce

Whisk together:

1/2 cup peanut butter
2 teaspoons sesame oil
2 tablespoons soy sauce
3 tablespoons vegetable broth or coconut milk
1 tablespoon rice wine vinegar (substitute white wine vinegar if needed)
1 tablespoon sweet chile sauce, or 1 teaspoon tabasco
Juice of 1 lime
1-inch piece of fresh ginger, grated or finely minced

Serve with spring rolls. Use any leftovers as a dip for other fresh veggies like kohlrabi and turnips.

Recipe contributed by Kate Darlington – Blooming Glen Farm intern, Colorado native, and food lover.

If you have a back stock of turnips in your fridge, or have yet to experience their wonderful flavor, I was reminded today by a CSA member of a wonderful turnip soup recipe archived on our website. So after Farmer Tom came in soaking wet from the rainstorm I promptly made the quick and easy recipe. https://www.bloomingglenfarm.com/sm_db_item.php?id=52&featuretype=recipe 

Our dinner was turnip soup- which uses both the roots and turnip greens and a bit of Swiss chard, with cornbread on the side (made from cornmeal grown and milled in Bucks County- more on that later), kale chips hot from the oven and garlic scapes tossed in oil and salt and sauteed over high heat until carmelized. Fast, and delicious!

CSA share- week 3

Photos and text by Tricia Borneman, Blooming Glen farmer and co-owner.

Last week was a first here at Blooming Glen Farm. The soaring heat plummeted, the sky darkened and 3/4 inch hail fell on our fields. After racing around closing greenhouses to protect them from the wind, we ran for cover, amazed as the grass became covered in the white marbles. After our intitial shock wore off, we anxiously assesed the damage. The swiss chard looks a bit holier then usual, as does some of the head lettuce, but for the most part everything looks like it will recover, or outgrow the damage.

The spring crops have had a tough go at it. First they had to endure a long cold wet spring, many of them going into unfavorable conditions and muddy ground. Then as soon as the rain stopped, the temperature soared into the upper 90’s and those greens that so love the cool weather either sagged from the soggy conditions, like the arugula and radishes, or quickly bolted, sending up flower tops. Rows of bok choy, tatsoi, and chinese cabbage have yellow flowers sprouting from their centers, rendering them bitter and unpickable. 

After a wonderful flush of sweet deliciousness, the strawberries have gone as quickly as they came, but that seems to be the norm for the fragile fruit. Now we enjoy another week of the candy sweet sugar snap peas, and look forward to tasty string beans.

Baby green beans

The summer crops have enjoyed the burst of heat, and summer squash makes its first appearance in the harvest this week.

Now the focus on the farm switches to crop maintenance jobs like weeding. Our crew of 10 moves around the farm tackling hot spots and clearing crops of weeds with just our hands as tools. CSA volunteers have helped us get a jump on things as well.  Thank you! Every bit helps!

After a spring crop is harvested and the field is empty, ideally it is planted into a cover crop. One example is buckwheat, a short season annual that’s useful for weed suppression. It is also a scavenger of phosphorus and calcium and mineralizes rock phosphate, making these nutrients available for later crops. Residue from the succulent buckwheat plants decomposes quickly. Parasitic wasps, ladybugs, and hoverflies are beneficial insects that are attracted to buckwheat.

Close-up of a buckwheat flower and field in bloom

Photos and text by Tricia Borneman, Blooming Glen farmer and co-owner.

If you are anything like me, standing over a hot stove in 90-plus degree heat is not something that gets you going at the end of a long day. However, we are lucky to have a medley of veggies on the farm that actually require zero cooking to be appreciated in all their glory. In fact, consuming vegetable in their raw state is probably one of the best things you can do for your body. Beets, kohlrabi, turnips, and fennel (all in the share this week!) are wonderfully tasty and nutritious when lightly prepared. No cooking required!

This is one recipe with many variations–since not everyone may like fennel or raw beets. But I highly suggest giving them both a try in this fresh and savory/sweet slaw. You might just be surprised!

Two Slaw Variations, One with beets and the other with grated apples

Kohlrabi and Turnip Slaw (with variations)

*This recipe makes enough for two “lunch salads”, but could feed four if served as a side dish. The recipe is also easily doubled.

With a mandolin or your kitchen knife, chop into “matchsticks” (a grater works fine, too):

3 kohlrabi bulbs, peeled
2 turnips
2 fennel bulbs
1 beet

*If you don’t like fennel, try putting some celery seed, parsley, or extra dill to kick up the flavor. For those of you who might not like raw beets, try grating half of an apple in instead!

Mix together:

2 tablespoons white or red wine vinegar
2 teaspoons stone ground or Dijon mustard

Whisking with a fork, slowly add:

4 tablespoons of olive oil
1 teaspoon of honey
salt and pepper to taste

Pour dressing (to taste) over veggies and toss lightly. Add a fresh herb, like dill, in for a fresh finish.  

Garlic Scapes

Now we have got to talk about these garlic scapes. What the heck are they and what do you do with them?! We knew you would ask.

Garlic scapes are the flowering shoots of the garlic that, if not removed, will bring the growth of the garlic bulb to a bit of a halt. So in order for our garlic heads to get nice and fat, we pluck off these curly cues and put them right into your CSA basket. Did I mention that they are delicious?!

Though they can be grilled or thrown in a food processor to make a pesto, my new favorite way to prepare them is just a quick saute that gives them strikingly similar flavor to garlicky green beans.

Scapes with Lemon and Almonds

I simply heat up a cast iron pan to medium high heat, throw in a little coconut or olive oil, and saute the scapes for a few minutes until they are tender and slightly caramelized.  Near the end I toss in some chopped almonds to toast, add some lemon juice, salt and pepper…..and wha-la! They are a perfect side dish to any meal and are a seriously good/seriously addicting snack.

Recipes contributed by Jana Smart- Blooming Glen Farm employee and frequent creator of creative recipes uses fresh seasonal ingredients. Check out more of her recipes on her food blog http://www.agrarianeats.blogspot.com/

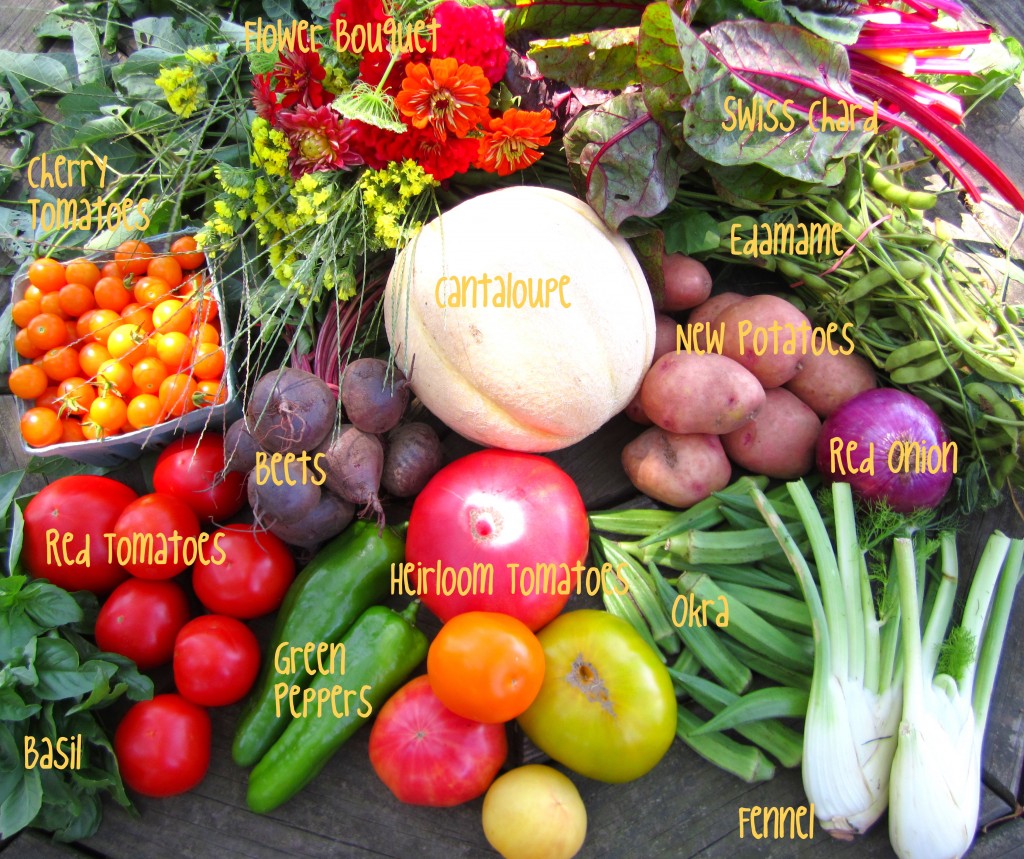
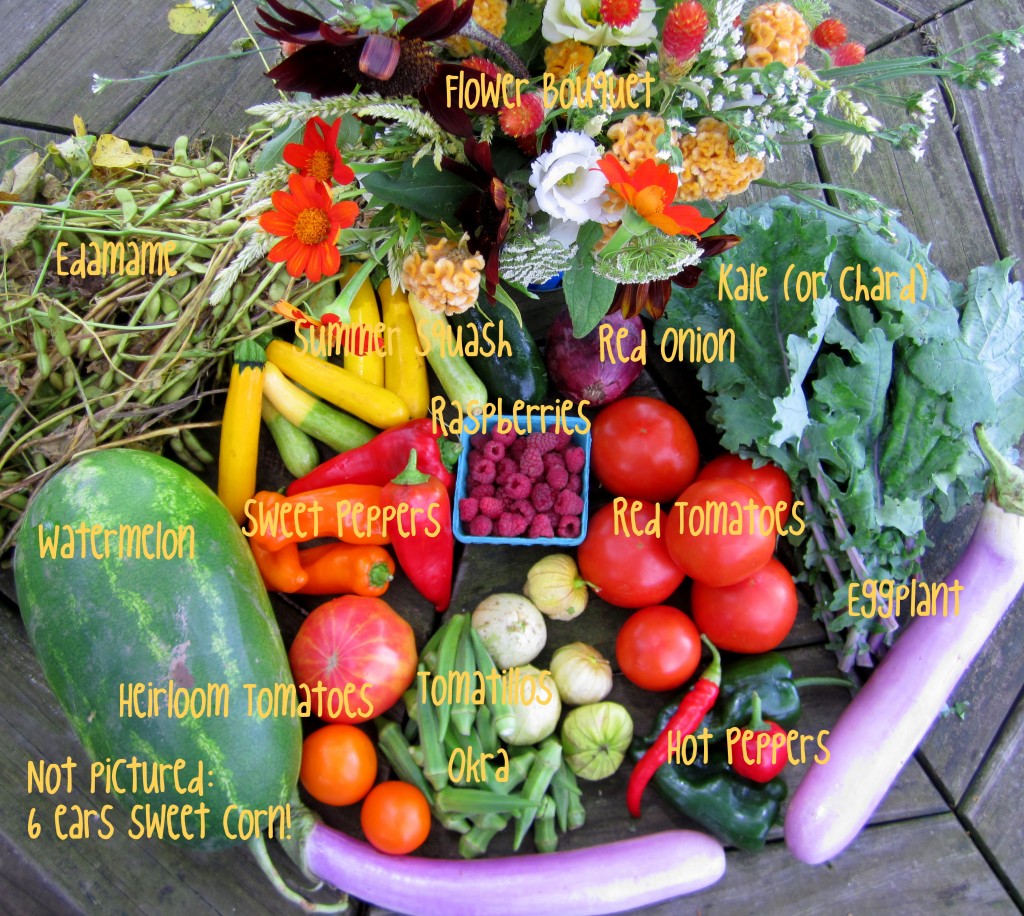
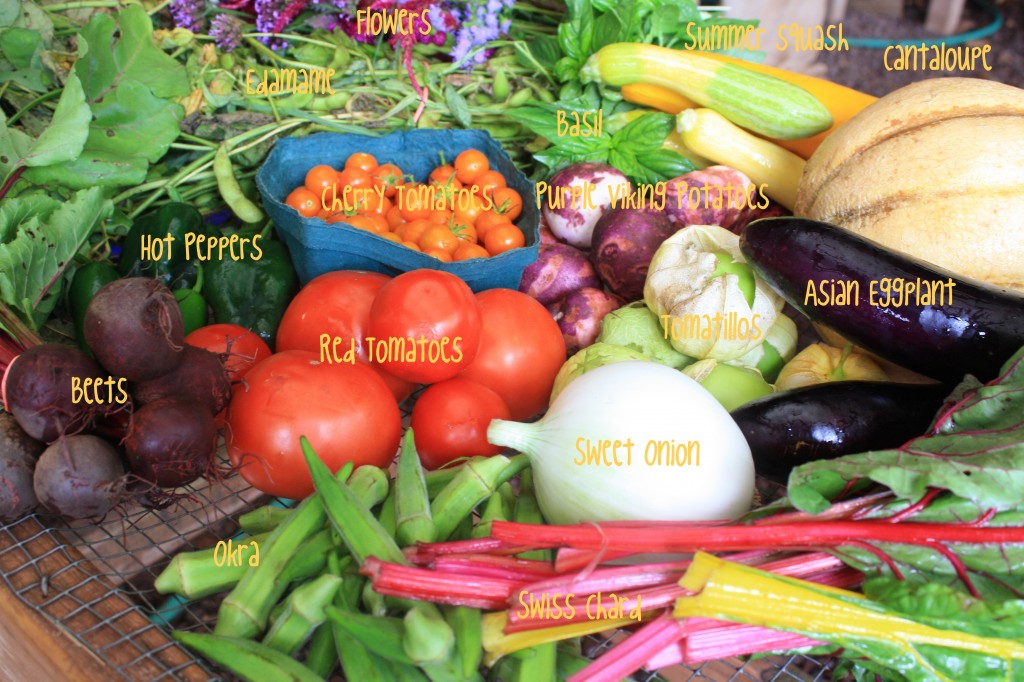
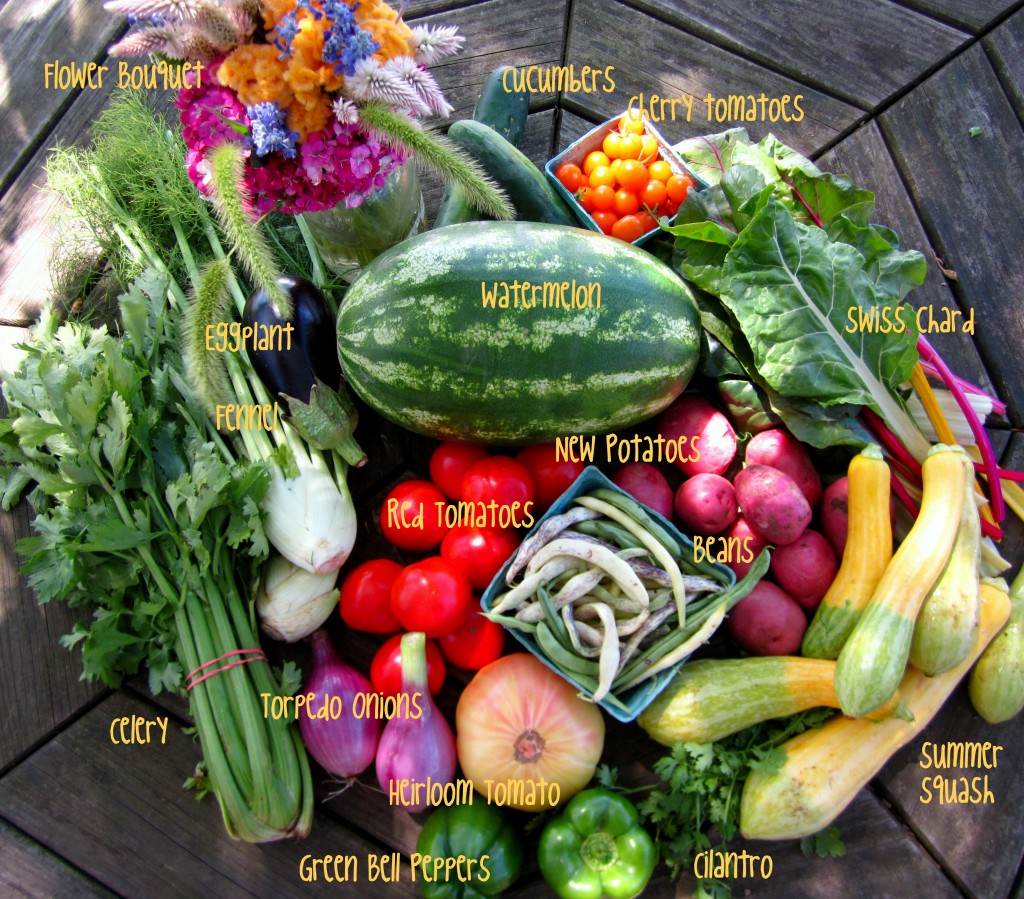
In case you get home and you’re not too sure what you left the farm with, here is a handy photo we plan to post weekly to help you out. Also keep an eye out for our weekly recipe from Jana. Enjoy!

CSA share June 7th (week 2).

And I couldn’t resist including this picture~ these strawberry pickers are travelling in style! Seriously- how genius! I can only imagine how much more farm work I might have gotten done if I’d had one of those when mine was just a wee one!

The mobile picking unit!

Photos and text by Tricia Borneman, Blooming Glen farmer and co-owner.

Harvest has begun! The first CSA pick-up was last week and we are in full swing at the farmers’ markets. The strawberries are super sweet and the sugar snap peas are fattening up and ready for picking.

The first bounty of the season!

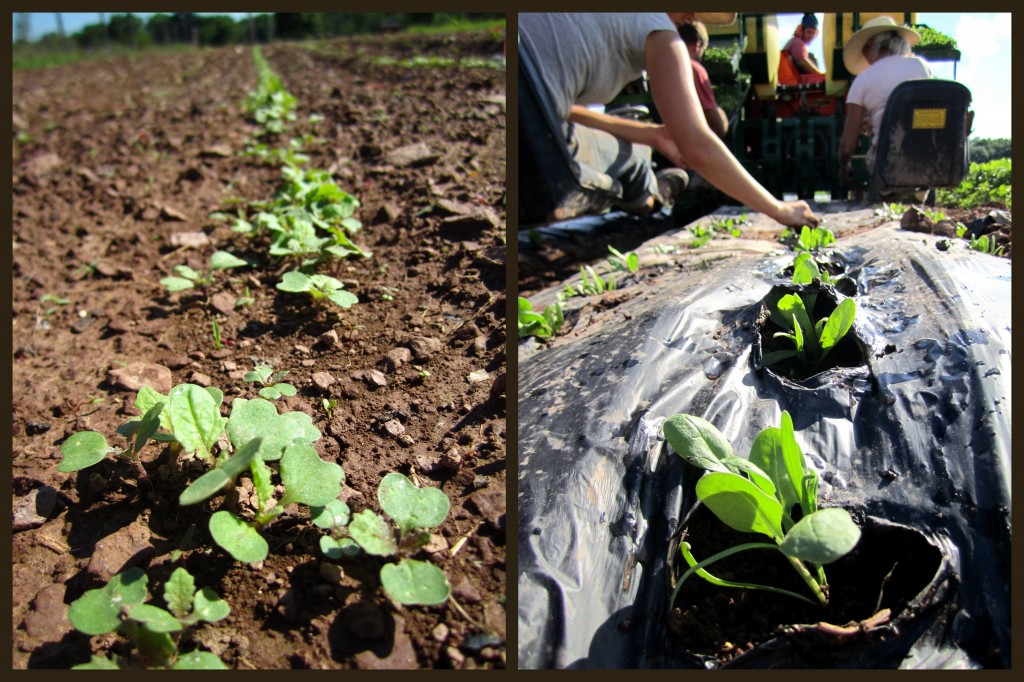
The wet spring has quickly turned into extreme heat and dry weather, despite the official start of summer still a few weeks away.  We are finishing up gettting the last of our big plantings into the ground. The potatoes, both regular and sweet, are in, and the two big fields of tomatoes were finally planted, all by hand, since the plants were so large.

Farmer Tom surveys the tomato field.

More beans get transplanted- both green beans and edamame.

Farmer Cindy drives Jill and Kate on the transplanter.

Tomorrow we transplant the winter squash and more melons, and then we can focus on weeding (…and harvesting, and trellising, oh, and definitely some more planting!).

Coming up this week at the markets and in the CSA share is fennel. The bulb is a wonderful addition to lots of dinner dishes, but don’t forget to use those stalks too. After a long day in the sun, we like to cool off with a refreshing iced beverage, and what fun to use a fennel stalk as a straw, for just a hint of licorice flavor! Stay cool!!

Whether it's a minty mojito, or an ice water, enjoy it with a fennel straw!

Photos and text by Tricia Borneman, Blooming Glen farmer and co-owner.

Some of you might remember the survey we sent out a few months ago that had a variety of questions surrounding a big idea we had for a BGF cookbook. Although we are not quite ready to make it happen this year, we still gleaned a lot of important information for this blog and the weekly recipes we put on it. One of the most helpful survey questions we asked was, “what veggie would you like more recipes for?”.  An overwhelming number of you said that Swiss chard was among the top of your list. Since Swiss chard is not going to be a stranger to anyone’s CSA pickup basket, we would like to help you out by throwing you a few of our favorite chard recipes every now and then to keep your kitchen churning out delicious variations on this Blooming Glen favorite.

Swiss chard

One problem people always run into when they first cook chard is the difference in cooking times for the leaves and stems. These recipes allow you to make two dishes from one bunch of Swiss chard–one with the tender leaves and the other with the crunchier stems.

This is also a great way to use these beauties from this week’s share….

Spring Onions

Recipe for the leaves:

Creamed Chard and Spring Onions


With 1 bunch Swiss chard from your share:

-Remove leaves from chard and set stems aside.

-Chop and wash (no need to dry) chard leaves and place it in a large pot over high heat. Cook, covered, with just the water clinging to leaves, stirring occasionally, until wilted, about 6 minutes.

-Press or squeeze out the excess liquid any number of ways, either by wringing it out in cheesecloth or paper towel or putting it in a mesh strainer and pressing the moisture out with a spatula. Wipe out the large pot so you can use it again.

-Heat: 1 1/4 cups milk or cream in a small saucepan over moderate heat, stirring, until warm. Keep warm.

-Back in the large pot, saute: 3 tablespoons of butter, 3 spring onions, ends trimmed, white and some green parts sliced into thin coins, and 2 cloves of garlic (optional).

-Whisk in 3 tablespoons all-purpose flour and cook roux, whisking, about three minutes.

-Add warm milk or cream in a slow stream, whisking constantly to prevent lumps, and simmer, whisking, until thickened, three to four minutes.

-Stir in chard, 1/4 cup finely grated parmesan (keep extra on hand for serving). Then salt and pepper to taste and cook, stirring, until heated through.

TIP: This is delicious tossed with pasta. Just use 1 3/4 cups of milk instead of 1 1/4 cups. This should be enough to toss with about half a pound of pasta (more or less depending on how saucy you like yours).

With the stems:

Swiss Chard Stalk “Hummus” (taken from the NY Times Recipes for Health)

If you usually toss the stems in favor of the more tender leaves, consider saving them for this luscious and ingenious Middle Eastern appetizer.

-Chop 1 pound Swiss chard stalks (about 4 cups)

-Steam the chard stalks about 15 minutes or until tender when pierced with a fork. Drain well, and allow to cool. Place in a food processor fitted with the steel blade. Puree, stopping the machine from time to time to scrape down the sides.

-In a mortar, mash 2-4 cloves of garlic with 1/2 teaspoon salt until you have a smooth paste. Add to the chard stalks. Process until smooth.

-Add 1/2 cup tahini, and again process until smooth. With the machine running, add 1/4 cup lemon juice and salt to taste. Stop the machine, taste and adjust seasonings.

-Transfer the dip to a wide bowl. It will be a little runny (unless the tahini you used was thick) but will stiffen up. Drizzle on the olive oil and serve.

Yield: About two cups.

Recipes contributed by Jana Smart- Blooming Glen Farm employee and frequent creator of creative recipes uses fresh seasonal ingredients. Check out more of her recipes on her food blog http://www.agrarianeats.blogspot.com/

The first CSA Pick-up is set for Tuesday May 31st and Friday June 3rd. In the meantime, while we wait for the produce to start rolling in, here’s a simple recipe for a household staple: Yogurt! It is a great source of protein and calcium, and the live probiotics found in yogurt help our bodies maintain healthy digestive systems. Homemade yogurt is one of my favorite things to make. It is simple and inexpensive — and with all the benefits of the probiotics and none of the additives found in many store-bought brands, who wouldn’t want to try?

No fancy gadgets or expensive ingredients required. Here’s what you’ll need:

  • 1 Quart Organic Milk (I recommend raw milk from Hendrick’s)
  • 4 heaping Tablespoons plain yogurt (most store-bought yogurt will do, as long as it has live active cultures and no sweeteners)
  • Thermometer (helpful, but not absolutely necessary)
  • Glass or ceramic container with lid (a 1-quart mason jar works great)
  • 2-3 Kitchen Towels to insulate your container of choice

Start by heating the milk in a saucepan. If you are using a thermometer, heat to 180 degrees. If you don’t have a thermometer, no worries, heat the milk until it gets nice and foamy but not all the way boiling. This step essentially pasteurizes the milk, killing off any potentially nasty bacteria.

After the milk reaches 180 degrees, remove from heat and let cool until it is between 95-110 degrees, or about 20 minutes (this will feel slightly warm, but not hot). Whisk in the yogurt. The first time you will have to use a store-bought yogurt or purchase a yogurt culture from a dairy supplier. After you have made yogurt once, you can use a few dollops from your previous batch as a starter for the next one.

Use a clean container with an air-tight lid.

Pour the milk/yogurt combo into the container, seal it up, and wrap it in the kitchen towels. The towels insulate the container, maintaining a warm environment for the live cultures to multiply.  A thermos or crock-pot can also be used to achieve the same results.

A mason jar swaddled in towels provides the perfect climate for live yogurt cultures to do their work.

Leave the yogurt-to-be incubating for several hours. The longer it sits, the more thick and tangy it will become. I usually heat the milk while I’m in the kitchen cooking dinner, then leave it to rest overnight. By morning, I have fresh yogurt for my smoothie.

After the yogurt sets up, refrigerate and enjoy! Don’t forget to save a few spoonfuls as a starter for your next batch. Add honey, stevia, maple syrup, or raw cane sugar for a sweeter yogurt. Or mix in your jam of choice for a boost of color and flavor.

This week, I mixed in a bit of the Johnny Jump Up Jam for a stunning and sweet treat

Yogurt is pretty forgiving, so feel free to experiment with milk type, incubation time, and flavorings until you find your perfect variation.

Recipe contributed by Kate Darlington – Blooming Glen Farm intern, Colorado native, and food lover.