Author: bloomingglenfarm

Mondays our core crew of eight have the day off, and our part time workers come in to help Tom or I with the harvesting that needs to be done. Cucumbers and squash, and soon tomatoes, need to be picked every other day. So a big thanks to Aaron and Paul for coming in on a hot humid holiday to harvest almost 500 cucumbers and over 300 pounds of summer squash. That’s a lot of bending over to pick- up, down, up, down- quite an ab workout!

Aaron and Paul loading the squash harvest.

Things at the farm have been on the drier side lately. We did get a whopper of a storm on Sunday evening- a quick downpour brought an inch of rain in less then 20 minutes. Unfortunately, the wind also blew like crazy, coming from mutiple directions, and racing through our sweet corn planting. It looks like a small twister went through the field, leaving the corn plants blown horizontal, many snapped in half. We’ll just have to cross our fingers that most will still bear ears.

You can rest assured that when it doesn’t rain (and even when it does), our irrigation manager Brian Smyth is on the job. Brian works with Tom on a daily basis to keep all the crops watered and spends a lot of time fertilizing through our drip irrigation system with organically approved amendments like fish, sea minerals and seaweed. Brian can often be seen heading out into the fields with his bucket of tools- setting up drip tape, fixing leaks, moving irrigation pipes, and monitoring what needs to be turned off, and what goes on next. It’s no small job! The green house tomatoes in particular never get rained on unless we irrigate them, which protects them from disease and other problems that can occur with irregular watering, like blossom end rot.

Brian fertigating the greenhouse tomatoes.

Speaking of tomatoes, we are so close! The cool nights that are so wonderful for sleeping have delayed the ripening of the tomatoes a bit, at least as compared to last year. But it won’t be long! And those heirlooms we talked so much about? Well, the fruit set is looking amazing! I see a BLT in my future!

Sweet red tomatoes on the left, and heirloom tomatoes on the right.

Photos and text by Tricia Borneman, Blooming Glen farmer and co-owner. (Photos of tomatoes by Jana Smart)

I’m sure you are as excited as we are to have the first batch of this season’s potatoes make its way into your CSA share. Fresh out of the dirt, these pink little nuggets have a flavorful, earthy goodness that is hard to beat. One important thing to note about this week’s variety–Dark Red Norland–is that they are a “new” potato and have not been cured, so the skin is really delicate. This is great because you don’t have to peel them, but it also means they will look a little tattered from tumbling in our root washer.

I still think they are mighty pretty : )

Dark Red Norland

The first thing I usually want to do when potatoes come into season (besides mashing them with a pound of butter) is make a simple cold potato salad. Since I’m looking for a new way to incorporate more fresh herbs into my dishes, I concocted this “fancy” version of potato salad with four kinds of herbs and those delicious yellow wax beans you have the choice of picking this week. I encourage you to eat this one warm or at room temperature. The flavors seem to develop much better. ENJOY!

Herb Potato Salad with Yellow Wax Beans
*This recipe actually uses 7 items from this weeks share!

-Cut 2 pounds of new potatoes into bit size cubes and bring them to a boil in a large pot of salted water. Boil for 10 minutes or until “fork tender”.

-In the meantime, chop:

1 sweet onion
1 bunch of celery (about 5 stalks)
a handful each of chives, parsley, dill, and french tarragon

-Cut the stems off of a half-quart (or 1/2 pound) of  fresh yellow wax beans (green beans can also be used). Blanch them in boiling water for 2-3 minutes and then transfer immediately into a bowl of ice water. Chop into bit-size bits. [***I actually just threw them in with the potatoes that were already boiling on the stove and it turned out just great!]

-Drain the cooked potatoes and toss in the beans, veggies and herbs.

-Pour in a simple vinaigrette made with 3 tablespoons of red or white wine vinegar, 6 tablespoons of olive oil, 2 teaspoons of dijon mustard, and salt to taste.

Recipe and photos by Jana Smart- Blooming Glen Farm employee and frequent creator of creative recipes using farm fresh seasonal ingredients. Check out more of her recipes on her food blog http://www.agrarianeats.blogspot.com/

The combination of scents mingling in the walk-in-cooler after harvest on Tuesday smelled like a wonderful earthy soup. Actually, combined with a chicken from Ledamete Grass Farm, the soup pot is where the celery and sweet onions, fresh garlic and parsley ended up in our kitchen. Speaking of great local offerings coming right to our doorstep, be sure to check out Otolith’s website to get in on the next community supported seafood share- early summer wild caught salmon! Otolith is a true family business. Owner and founder Amanda Bossard was here delivering the halibut share, and telling me how her youngest, at age 9, is spending the summer in Alaska fishing with Dad (Amanda’s husband, Murat), and loving every minute of it!

CSA Share week 5

In addition to the tasty produce, this week’s share saw a rainbow of bouquets, and big smiles, coming from the pick-your-own flower field.

Choosing the perfect flower, but really, how can you go wrong?!

The farm is blooming!

Sunflowers...golden, orange, and chocolate colored.

Photos and text by Tricia Borneman, Blooming Glen farmer and co-owner.

Don’t get me wrong, home-canning is probably one of the best ways to preserve excess fruits and veggies (not to mention rather necessary when you are trying to keep something in your cupboard through winter). However when it comes to pickles, it seems I always gobble them up within about a week of making them–rendering all that tedious canning effort a bit of a waste. I was simply amazed to discover a few years ago that you could make pickles in just a few hours with minimal effort and be eating them the next day. I actually prefer fermenting my pickles without vinegar…but sometimes your pickle craving just can’t wait! I wrestled up some recipes from Sherri Brooks Vinton’s book Put ’em Up! for two types of fridge pickles: bread-and-butter and classic dill.  They are prepared the same way except for the spices used at the end. The end product is very crunchy and both are just perfect for burgers or to eat right out of the jar!

Just start with some salt, 3 cucumbers, and a bunch of sweet onions from your share.

-Cut your cucumbers into 1/4 inch slices and your onions into rings. Place in large bowl.

-Prepare brine by dissolving 1 1/2 teaspoons of kosher salt into two cups of water.

-Pour brine over cucumbers and onions. Add a few cups of ice cubes and more water to cover the veggies. Let the bowl sit in your fridge for 2 hours to get crunchy and absorb some of the brine.

-Drain veggies in colander and rinse.

For Bread-and-Butter Pickles, combine in a non-reactive saucepan:

2 cups distilled white vinegar
1 cup water
1/2 cup sugar
1 tablespoon mustard seed
1 1/2 teaspoon black peppercorn
1 1/2 teaspoon celery seed
1 1/2 teaspoon turmeric
1 1/2 teaspoon kosher salt

For Classic Dill Pickles, combine in a non-reactive saucepan:

2 cups distilled white vinegar
1 cup water
1 tablespoon sugar
4 green garlic cloves, minced
1 teaspoon black peppercorn
1/2 teaspoon celery seed
1 tablespoon dill seed
1 1/2 teaspoon kosher salt
1 teaspoon red pepper flakes (optional)

-Bring to a boil. Add the drained vegetables and return to a boil, stirring to ensure that all of the veggies are heated through. Remove from heat. Ladle into bowls or jars (this recipe makes a quart and a pints worth). Cool, cover and refrigerate for up to three weeks.

Recipe and photos by Jana Smart- Blooming Glen Farm employee and frequent creator of creative recipes using farm fresh seasonal ingredients. Check out more of her recipes on her food blog http://www.agrarianeats.blogspot.com/

Last week on the farm the focus was tackling six 200 foot long beds of carrots that were engulfed in weeds (each bed contains three lines, which adds up to 3600 feet of carrots, but who’s counting?!). In farmer speak, we call it “thinning”, making space for the carrots to grow to full size by pulling out any growing tightly together. We thin them to about 2-3 inches apart, and since we got to the job a little later then we would have liked, we all enjoyed some tasty micro-carrots as a result of our labor. The process requires a lot of time on your hands and knees, time to listen to your I-Pod, get introspective with your fellow farmers, or wonder how those giant farms in California manage hundreds of acres of carrots (lots of equipment!). Carrots are probably one of the most labor intensive crops on the farm, and the main reason we don’t grow that many of them, despite how deliciously sweet and earthy they taste.

Carrot Thinning

When we weren’t thinning carrots, we were harvesting cucumbers. This spring and early summer, we have seen a lot of bug pressure, especially from the Colorado potato beetle. But this season, thanks to our consistent use of those large white floating row covers, we have been lucky when it comes to the striped cucumber beetle, our arch nemesis. We plant numerous rotations of all our cucurbits (squash, melons, cucumbers), and use lots of row covers, hoping to keep those pesky bugs at bay. They can pretty quickly decimate the plants, but with the combined efforts of our crew wrestling with those row covers, and keeping the plants covered until flowering, we are seeing great results. We even decided to wash all those cucumbers in our barrel washer, as doing a thousand by hand seemed too daunting of a task!

Jess washing cucumbers in the barrel washer.

This week’s recipe from Jana will feature some fresh ideas for cucumbers. I had always heard about people putting cucumbers in their water for a refreshing summer beverage, but had never tried it myself. Then on one of those hot days last week, I came across a delicious and simple recipe for “Cucumber Limeade” in the Fresh Times, the weekly newsletter of the Food Trust’s Farmers Markets. Lindsay Lidge, wife of the Philly baseball player Brad Lidge, and a regular at our stand at the Headhouse Farmers Market, does a wonderful seasonal recipe each week. You can check out the Cucumber Limeade recipe here: http://www.thefoodtrust.org/php/TeamUp/go/?p=391

Photos and text by Tricia Borneman, Blooming Glen farmer and co-owner. (Carrot photos by Jana Smart)

Each year here at Blooming Glen Farm we welcome from 3 to 4 new interns into our farm community. They come from different backgrounds and locales, but they all share a curiosity for learning sustainable agriculture. Tom and I started our journey in farming 11 years ago as interns, and we strongly believe the best way to learn farming is by doing. We have had over 30 different folks pass through the farm over the years, all bringing their unique perspectives and individual energy to what is very much a team effort in accomplishing all that we do here in a single season, and year six at Blooming Glen Farm is no different. Over the next few weeks via the blog I will introduce you to a few of the faces you’ll see around the farm, whose hearts and hands are intrinsically woven into the physically demanding, very often challenging, but wonderfully and entirely rewarding, process of putting food on all our tables.

Kate Darlington, 24, grew up in a small Colorado mountain town called Steamboat Springs. She studied International Political Economy at University of Puget Sound in Tacoma, WA, focusing on global poverty and development.

“I never had a great sense of what I wanted to do when I ‘grew up,’ so when I graduated, I didn’t really know which direction to head. I thought I would try my hand at addressing some of the big problems I studied in college — like poverty in Africa — so I moved to Kenya to work with a non-profit organization. It was a great experience, but it was also overwhelming and frustrating. After doing something so foreign and broad in scale, I realized I needed to do something more local and tangible when I came back to the U.S — to literally get my hands dirty.

I have always been interested in food from a culinary point of view — taking joy in cooking from an early age. In the past several years, though, I have come to see how food is about more than just eating and cooking. Understanding how important our food systems are for our physical health, environmental health, and societal health was what directed me to a job in sustainable agriculture. Eventually, I hope to bridge my interest in organic farming and social justice. I’m passionate about the use of organic agriculture as a social justice and community development tool — both in the US and the rest of the world.

Working on the farm is proving itself to be both rewarding and challenging. It has definitely given me a greater appreciation for all the hard work that goes into producing the food we eat. Being here during this unusually wet spring has also been a good reminder of how intimately our sustenance is connected to nature.”

Kate Darlington

Photos and text by Tricia Borneman, Blooming Glen farmer and co-owner.

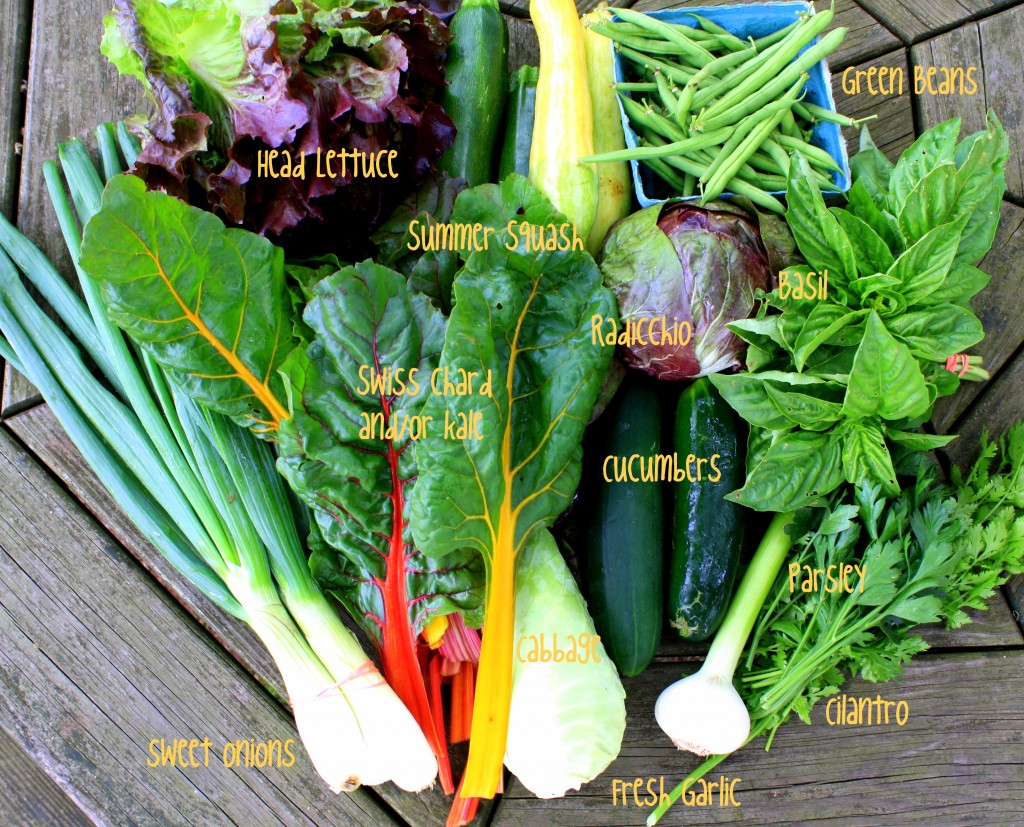
Radicchio,  baby “arrowhead” cabbage, green beans, cucumbers and fresh garlic all make their debut in the share this week. Tuesday was the longest day of the year and the official first day of summer. Here at the farm, the solstice marks somewhat of a turning point in our season. We shift from planting, to tending and harvesting the crops. All of our major plantings are in, a goal we look to achieve before the solstice, for every day from here out will be a delightful dance towards winter, as the days gradually, almost imperceptibly, get shorter.

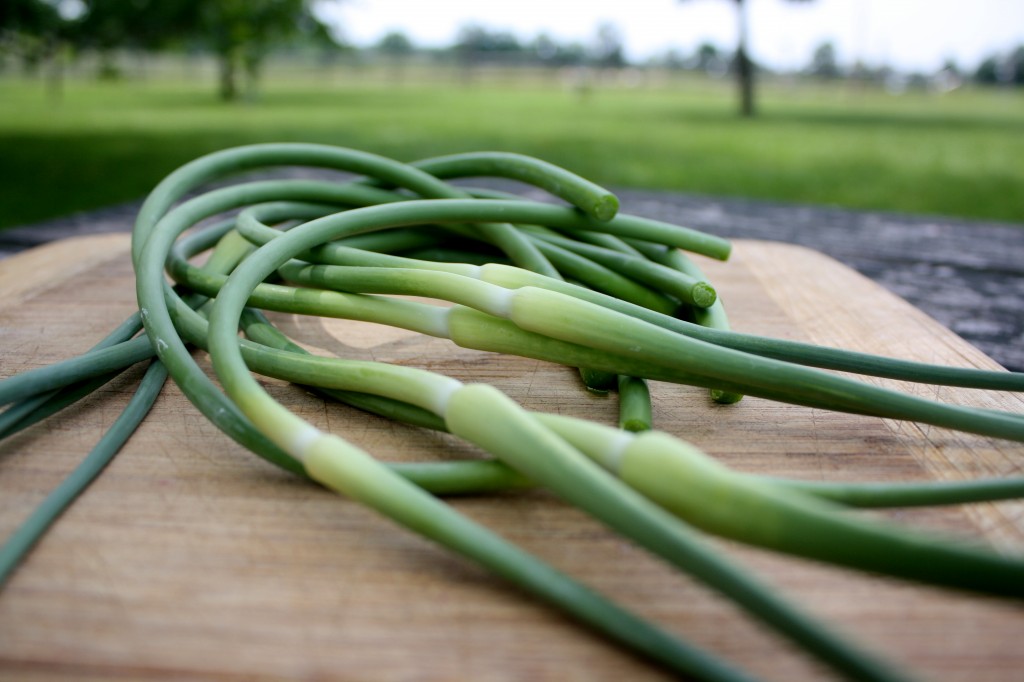
A little about fresh garlic: garlic is planted in the Fall, and the first harvest is when we snap the scapes to promote bulb growth.  Scapes, which you are familiar with by now, are the delicious, curly flower stalks on hardneck varieties. The next harvest, and main event, is of the bulb itself. Our entire garlic crop, about a half an acre, will be harvested the beginning of July and hung to dry and cure. Right now, we are harvesting some of the garlic as green garlic, which simply means it has not yet been cured. Uncured garlic doesn’t store as well, but how long are you really gonna let a single bulb of garlic hang around?! It is wonderfully aromatic, and a rare early summer treat. Use it just as you would regular garlic, but first you must remove several layers of moist skin to get to the cloves. With that bunch of basil, why not make some pesto?! Enjoy!

CSA share week 4

Photos and text by Tricia Borneman, Blooming Glen farmer and co-owner.

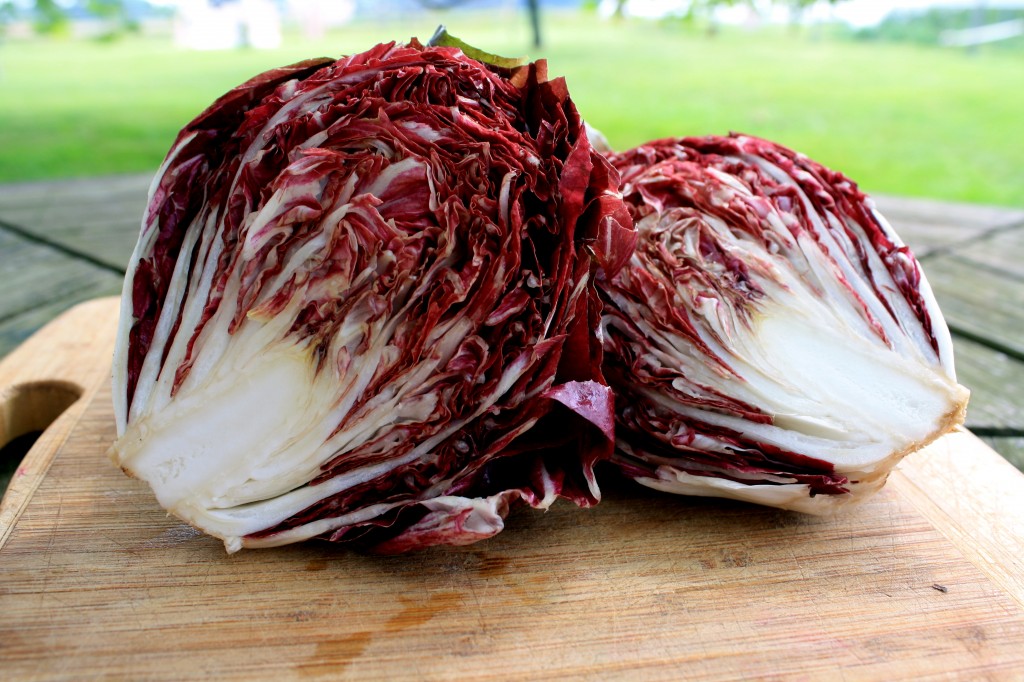
Radicchio is another one of those veggies most people avoid because they either 1) don’t know what the heck it is  2) don’t know how to prepare it even if they muster the courage to pick it up from the farmers’ market 3) are plagued by some bitter and unpleasant memories of the time a few leaves made their way into a salad mix. Well I’m here to tell you that you can overcome your fears…you CAN love radicchio! All it takes is a preparation that balances the pleasant bitterness of the leaves with a sweet and nutty topping.

Radicchio

Radicchio is a member of the chicory family (along with endive and frisee) and is a widely grown crop in Italy where it was first cultivated and popularized. In addition to making a delightful salad, this veggie is sturdy enough to braise and grill–a popular option for those who might not be crazy about it raw. For this recipe I chose to grill the radicchio in halves on a gas grill, but you can also use a cast iron pan or roast it in the oven.

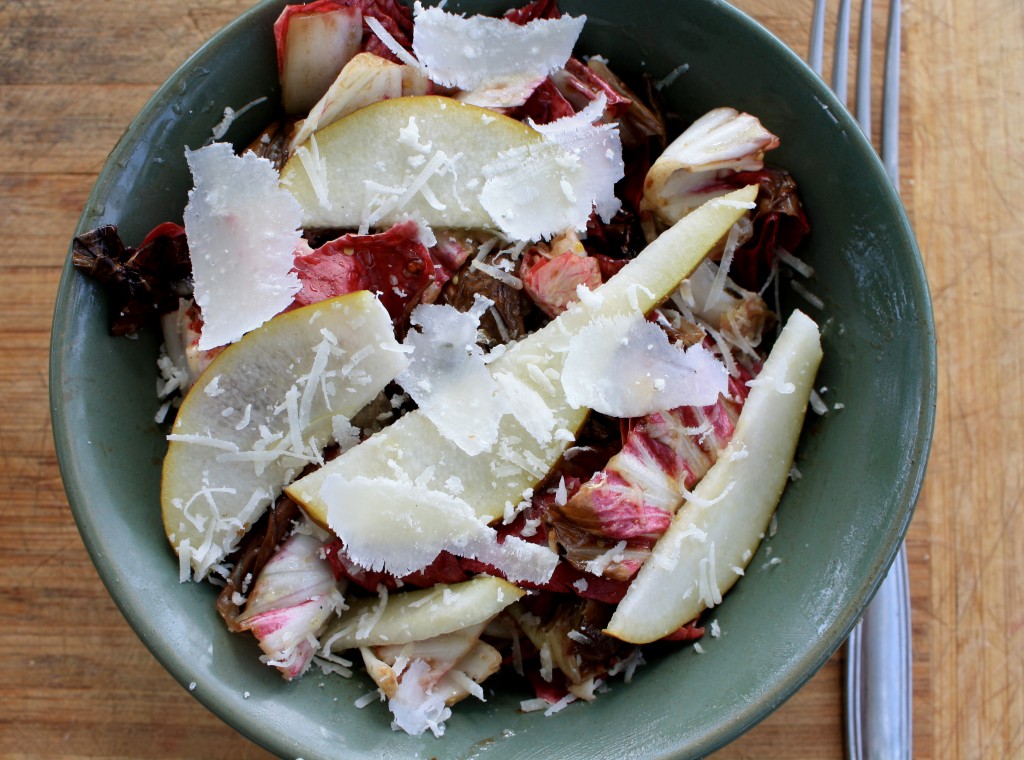
Grilled Radicchio Salad with Pear and Pecorino

-Wash and dry:
1 head of radicchio from your share

-Cut into half and coat with olive oil
-On a medium/low heat, grill radicchio halves on each side for 4 minutes until wilty and tender. If the outer leaves get a little crispy, that’s okay! (It is more delicious that way)
-Set aside to cool slightly and in the meantime whisk together:

2 tablespoons balsamic vinegar
1 teaspoon Dijon mustard
3 cloves of green garlic (from your share!)
4 tablespoon Extra Virgin Olive Oil
Salt and pepper to taste

-Cut up the radicchio halves into chunks and toss them with the vinaigrette. Thinly slice 1 half of a Bosc pear (or an apple) to toss in. Top with some grated Pecorino or Parmigiano-Reggiano. Serve warm or at room temperature. ENJOY!

Recipe contributed by Jana Smart- Blooming Glen Farm employee and frequent creator of creative recipes uses fresh seasonal ingredients. Check out more of her recipes on her food blog http://www.agrarianeats.blogspot.com/


As spring moves into summer, the season of barbecues, picnics and parties is upon us. And so is the season of summer squash! If you’ve ever planted them in your garden, you know what a bumper crop squash can be once they get going — here at the farm, it’s no exception. Try this fresh recipe to help you use your share of the bountiful harvest and entertain in style. Fresh spring rolls will always wow a crowd, but they are actually pretty easy to make. Keep this recipe on hand throughout the summer and swap in different veggies as your CSA share changes.

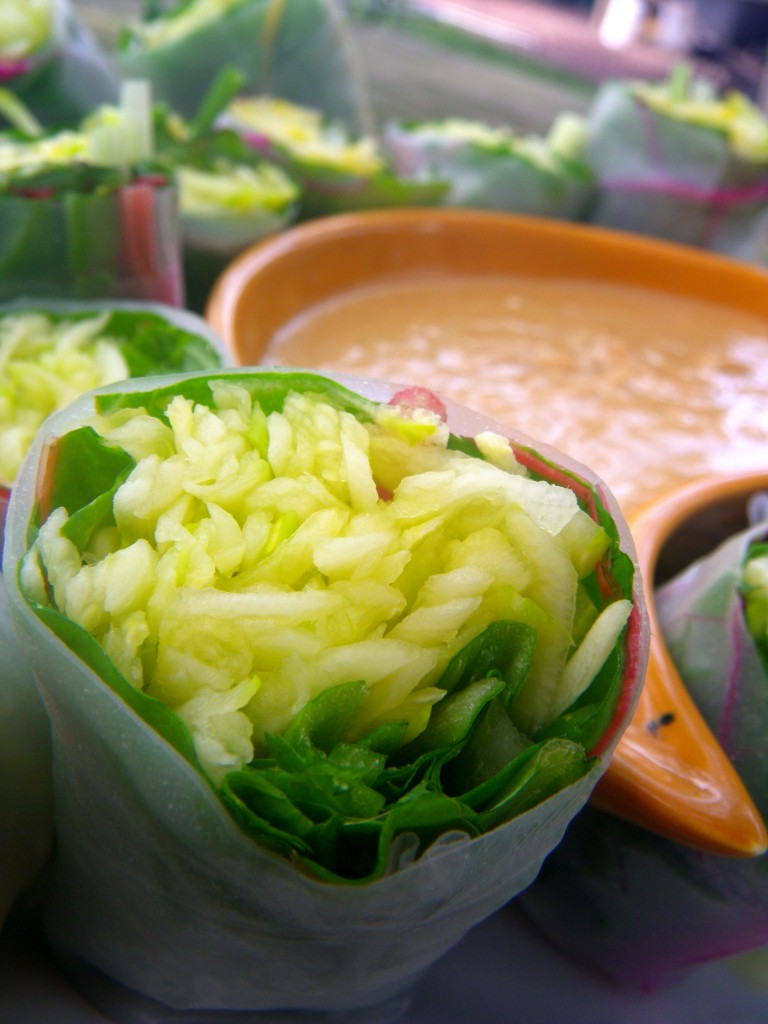
Summer Squash Spring Rolls

Start by preparing the filling ingredients:

2 medium summer squash, grated
2 spring onions, cut into long thin strips
6 swiss chard leaves, de-stemmed and cut in half
1 bunch cilantro, de-stemmed
1 bunch basil and/or mint (optional), de-stemmed

Place these in piles on a cutting board or plate. Now, prepare an assembly station: Fill a baking pan with a bit of hot water. Next to the water, you’ll need two clean plates — one to work on and one to put the finished product on. Now you’re ready to roll!

Begin with a package of Spring Roll Wrappers (also known as rice paper wrappers, found in the Asian section of most grocery and health food stores). Soak one rice paper wrapper in the water for about 15 seconds, until it is soft and pliable. Lay the wrapper flat on the plate and fold in the right and left sides. Stack the filling, starting with swiss chard, on top of the wrapper — kind of like you would do a burrito.

Wrap the bottom edge over the veggies, rolling it up as tight as you can. The wrapper will stick to itself as it dries. Repeat with the rest of the wrappers. Cut each roll in half. Serve with Peanut Dipping Sauce. Makes 24 rolls

Peanut Dipping Sauce

Whisk together:

1/2 cup peanut butter
2 teaspoons sesame oil
2 tablespoons soy sauce
3 tablespoons vegetable broth or coconut milk
1 tablespoon rice wine vinegar (substitute white wine vinegar if needed)
1 tablespoon sweet chile sauce, or 1 teaspoon tabasco
Juice of 1 lime
1-inch piece of fresh ginger, grated or finely minced

Serve with spring rolls. Use any leftovers as a dip for other fresh veggies like kohlrabi and turnips.

Recipe contributed by Kate Darlington – Blooming Glen Farm intern, Colorado native, and food lover.