Author: bloomingglenfarm

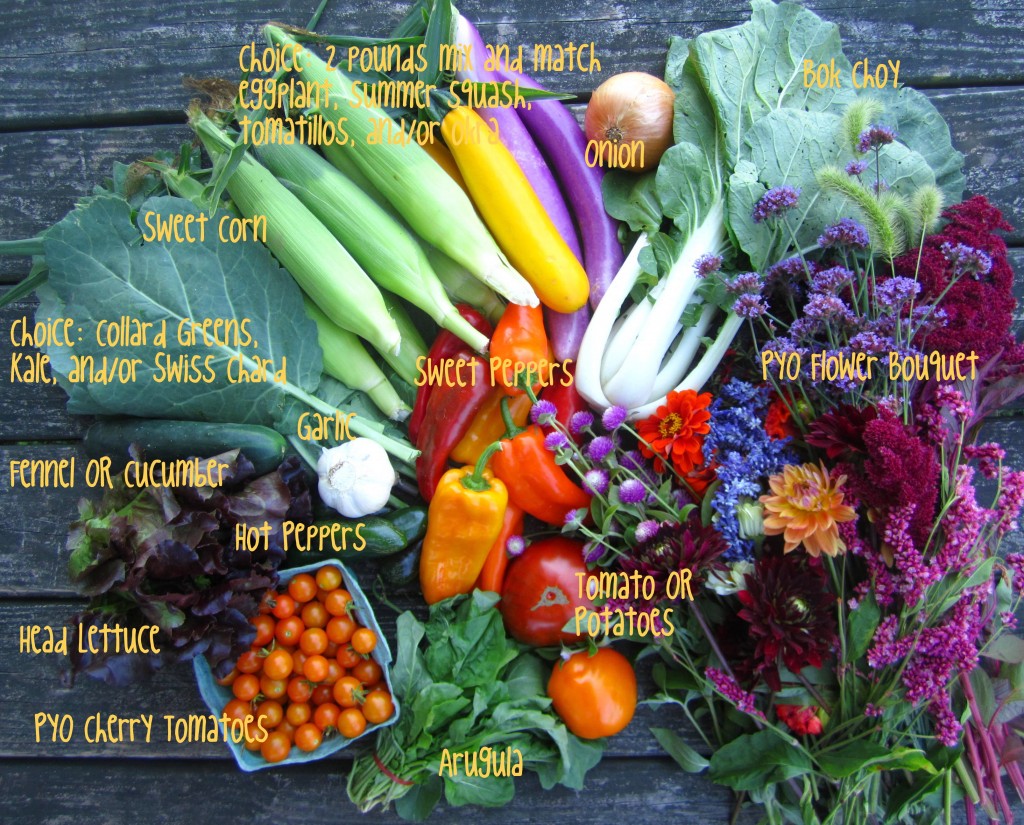
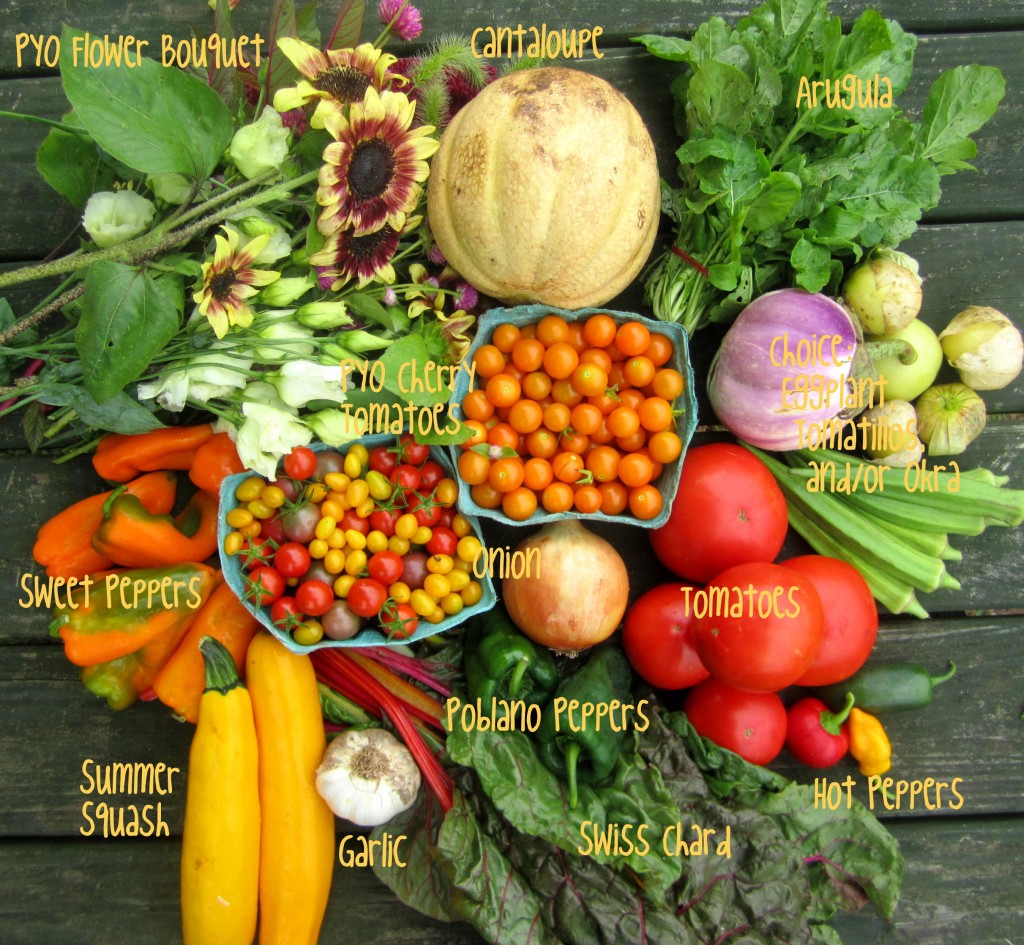
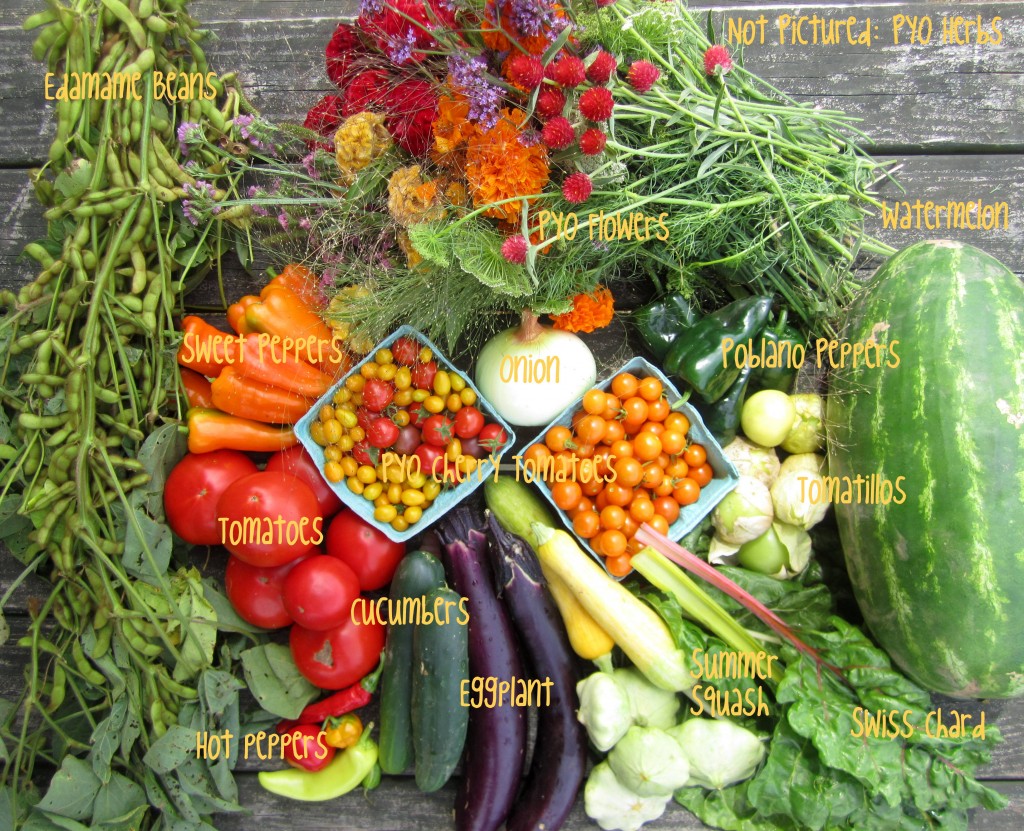
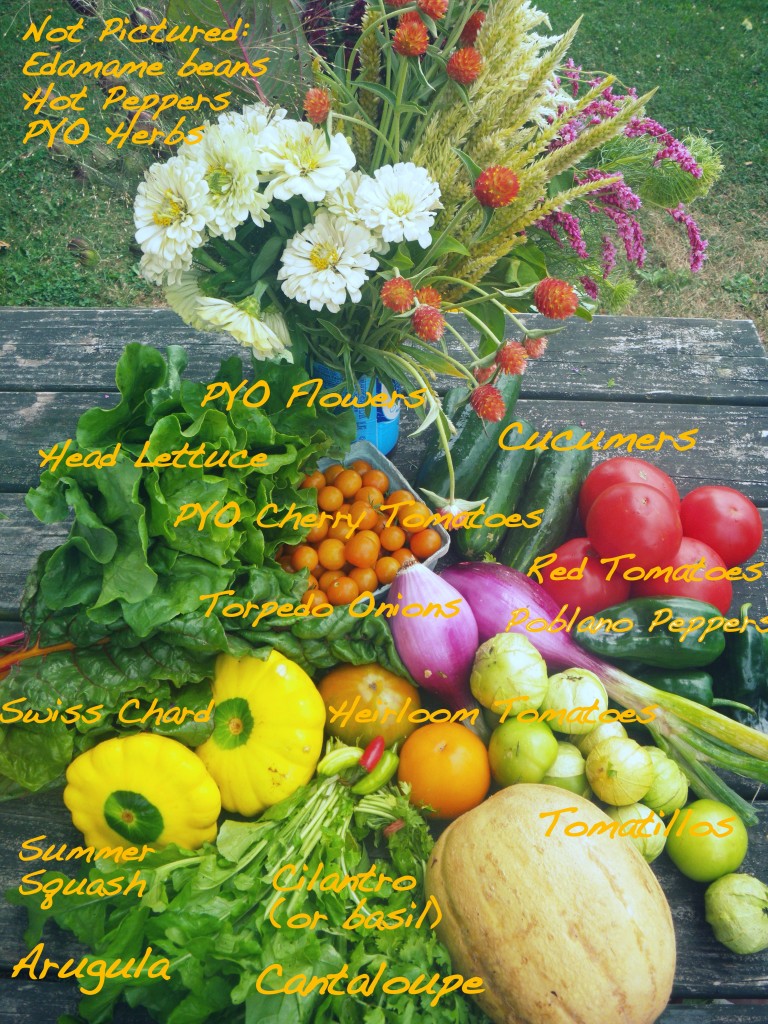
The field tomatoes have popped, the heirlooms are rolling in, second and third plantings of cucumbers and squash are happening, as well as the first cantaloupes, and soon, watermelon! Summer crops are here in full force! I love to go overboard eating tomatoes now, so when it’s wintertime, I won’t be tempted to eat those bland, shipped in fruits masquerading as tomatoes. This week’s share contains edamame beans (on the stalk- just pull the pods off). As many of you may know, a wonderful simple way to eat edamame is to boil or steam the whole pods until they are tender and bright green, then plunge in cold water, salt the pods, sit down with a bowl-full and use your teeth to remove the beans. Quite an addictive snack, and great with a cold beverage!

CSA share, week 11, 7/24/12

This season, Farmer Tom grew field tomato varieties based on flavor, not necessarily yield. Happily, we have both. Soon we will be able to offer plum tomatoes for canning by the 1/2 bushel (that’s 25 pounds!), but for now we have some tasty meaty beefsteaks in the share, and available for purchase for those interested in canning, freezing or bulk salsa making! Send us an email if you are interested in reserving a box. The cherry tomatoes are also on the menu this week- the ever popular sungolds, as well as reds, and soon the rainbow mixes- a variety of colors and flavors.

For those new to canning, the lovely Marisa McClellan, of the popular local Food in Jars blog, and cookbook author, is hosting a food canning workshop at the farm Saturday August 18th, from 10-2pm. Details and registration information are on our website. Each participant will take home 2-3 quarts of whole peeled tomatoes, along with all the knowledge you need to replicate the same feat in your own kitchen. This will be a fun day- don’t miss it!

Photos and text by Tricia Borneman, Blooming Glen farmer and co-owner.
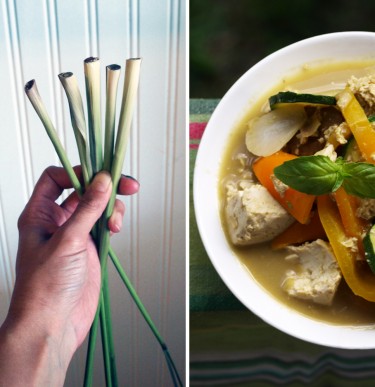
You might have seen them at the market or in your CSA share, and wondered what are those flying-saucer shaped squashes? Depending on where you’re from, they go by any number of different names. When we farmed in Oregon it was called sunburst squash, here we call it pattypan squash, but it also goes by scallop squash, white squash, button squash, granny squash or custard squash. Their light green or bright gold rinds remain thin and edible. Their insides are white, with a mild, buttery flavor. It’s shape is whimsical and versatile- you can chop it up and use it like regular zucchini, or if you want to preserve its character, stuff it whole.

Stuffed Pattypan Squash

I used three pounds of pattypan squash, 8 squash, each about the size of my fist, or smaller. You could do less, larger squash, and just adjust the cooking time accordingly.

Cook 1/2 cup quinoa in 1 cup water, or for more flavor I used homemade chicken broth. Feel free to substitute your grain of choice.

Meanwhile pre-boil the whole patty pan squash for about 5 min, just to soften them a bit and make cutting them easier.

To cut, just imagine you are carving the top off a pumpkin. Insert your knife at an angle and remove the cap. Scoop out the insides with a spoon, being careful not to pierce the wall. (Though have no fear, I did, and things still turned out just fine). Put prepared pattypans in a baking dish. I oiled the inside of each and salt and peppered them.

Add a tablespoon or two of olive oil to a pan, heat up and saute 1/2 of a large sweet onion, diced, 4 cloves fresh garlic, diced, and cook until the onions begin to sweat. Add 1 asian eggplant, diced, and one chopped tomato. Cook for a few minutes then add 1 1/2 cups Swiss Chard, cut into thin strips. You can also add any fresh herbs you like- I used a few sprigs of basil and thyme. Salt and pepper to taste.

The great thing about making a stuffing for a squash, or even stuffed peppers, you can pretty much use whatever you have on hand. If you prefer to go the meat route, I think sausage or ground beef would work well also.

After sauteing the vegetables, stir in the quinoa, taste and adjust seasoning to your preference. Fill the squash to the brim with the quinoa mixture. To top it off, I combined a cup of bread crumbs with some melted butter and parmesan cheese. Then after oiling and seasoning the lids, I re-capped the cuties, added a bit of water to the bottom of the baking dish, and covered with foil. Bake at 375 for 35 minutes or so, until squash is soft, but not mushy. I removed the foil for the last 10 minuted to get a bit of browning.

Enjoy!

Photos and text by Tricia Borneman, Blooming Glen farmer and co-owner.

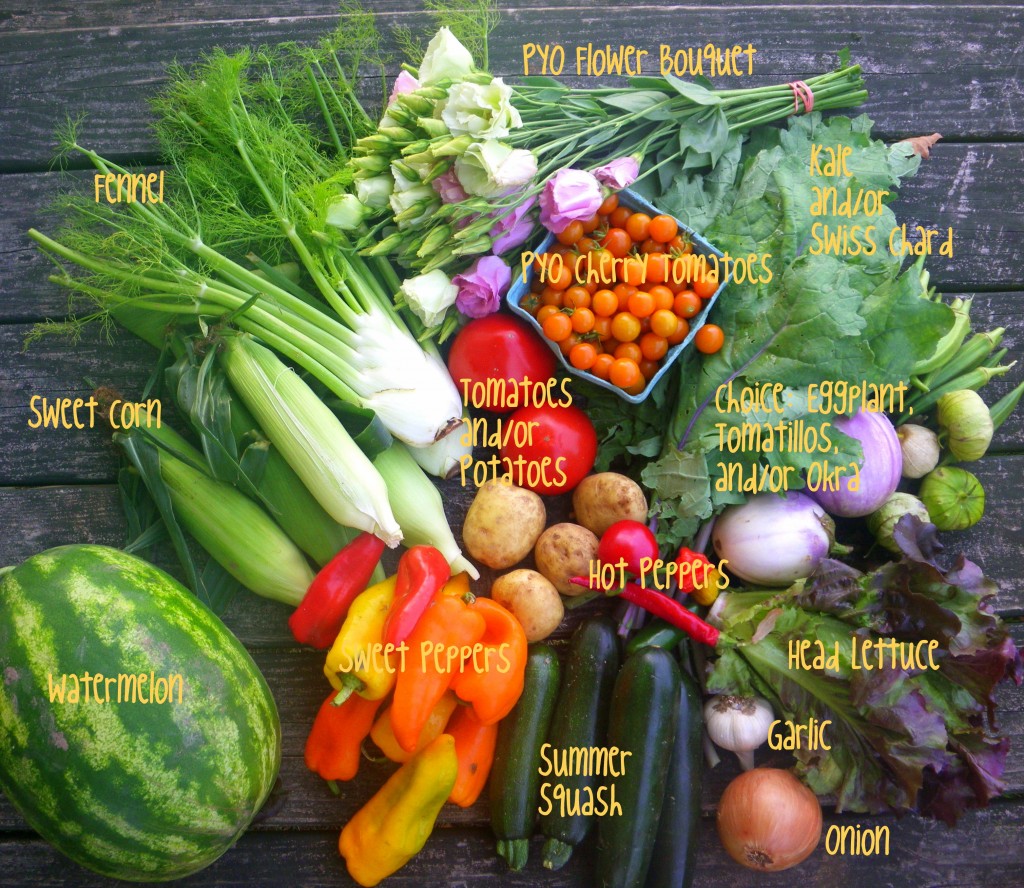
The last few days on the farm have been a challenge. With the temperature soaring, the crew is feeling the heat, but the crops still need to be picked. Just as the garlic harvest is complete, the storage onion harvest begins. The second planting of cucumbers is just about ready for harvest, and we are well into an every other day picking schedule of the summer squash. The field tomatoes are trickling in, and CSA members and market shoppers are enjoying the bounty of the heirloom tomato harvest.

CSA share, week 10, 7/17/12

We grow a handful of different heirloom tomato varieties, all with nuances in flavor and appearance. Though we don’t grow tomatoes for their stories, my favorite just happens to have a great one. The Russian heirloom variety Paul Robeson may not be the most productive tomato of all, but its rich chocolate brown color mirrors its deep earthy flavor.  I like to talk it up at the farmers market as the “BLT tomato”- but thanks to its smoky undertones you can skip the bacon if you so desire.

And if the color and taste weren’t enough to make this luscious tomato a favorite, it is named for a local hero. Paul Robeson (born in Princeton, 1898 and died in Philadelphia, 1976) was an accomplished athlete at Rutgers University, famous actor (played Othello in the longest-running Shakespearean production in Broadway history), singer (world famous for his vibrant baritone renditions of Negro spirituals), orator, cultural scholar and linguist (fluent in at least 15 languages). If that’s not enough, Robeson was an outspoken crusader for racial equality and social justice, all the while battling overt racism against himself throughout his life and various endevours. 

Revered by the left, reviled by the right, Robeson was blacklisted during the McCarthy Era and beyond, harassed by the FBI, his passport revoked for eight years, his career stifled. How a tomato developed in the Soviet Union came to be named after him is uncertain, except that perhaps his connection with Communism made it a safe bet for Russian scientists looking for a politically correct name choice. I don’t recall ever having learned about this great man in school, so I have farming, and the story of this delicious tomato, to thank for a new knowledge of Paul Robeson, a man who’s achievements were unparalleled and were all the more incredible given the barriers of racism that he had to surmount.

So that’s your history lesson of the day! Of course, all the heirloom tomatoes we grow have amazing flavor and stories (The Cherokee Purple and Green tomatoes are said to trace back to seeds given to someone in Tenessee by Cherokee Indians in the late 1800’s), and everyone here at the farm has a different favorite- Farmer Tom even prefers the red field tomatoes that you’re about to see in the share. Hopefully you can try a few different tomato varieties and find your own favorite!

Photos and text by Tricia Borneman, Blooming Glen farmer and co-owner.

While the farm crew was wilting in last week’s hot weather, our heat-loving summer crops were having a hay day. You’ll notice one of them, eggplant, in this week’s share for the first time. The elongated Oriental variety can be used just like the classic Italian eggplant, and I actually prefer it because it is thinner skinned, more convenient to cut, and has fewer seeds. This recipe takes inspiration from the vegetable’s Asian heritage and from the giant basil patch open to the CSA this week.

Stir-Fried Eggplant and Basil

In a very hot skillet or wok, heat 1/4 cup coconut oil (or other light oil suitable for high-heat frying). When the oil is hot, throw in 5 cloves of thinly sliced garlic, 1 tablespoon minced fresh ginger, and 2 Asian eggplant, sliced into 1/4 inch coins. Sprinkle with a small pinch of salt. Stir eggplant so that oil is evenly distributed.

Continue to cook on medium-high heat, stirring occasionally, until eggplant melts down and garlic becomes golden and slightly crispy. Toss in 1 cup basil leaves, stripped from stems. Remove from heat.

Drizzle lightly with soy sauce and sesame oil. Serve over rice or other grain of choice (I chose amaranth, a great pseudo-grain that actually grows as a weed on the farm, but whose seeds are high in protein and have a porridge-like consistency).

Text and photography by Kate Darlington – Blooming Glen Farm second year intern, fresh food enthusiast, and budding food blogger. She also writes for the Digging Deep Campaign as well as for her personal blog, Growing Things.

Not much has changed on the farm since last week- still hot, still dry, and still irrigating.  This week’s share sees the first eggplant of the season, as well as the first heirloom tomatoes. Our heirloom tomatoes are grown in unheated greenhouses where they can flourish under controlled irrigation. They are grafted, pruned and trellised and generally spoiled, and in return they ripen a bit earlier then our field tomatoes. The red field tomatoes are still a week or two away, but we are seeing the first ripening cherry tomatoes, so it won’t be long before they are on the pick-your-own list.  

CSA share, week 9, 7/10/12

The farm crew, and some wonderful volunteers, began the garlic harvest today, 9 months to the day after it was planted in the ground, on October 11th to be exact. I must confess, garlic is my favorite crop to grow on the farm- it is a very hands off crop- plant it, mulch it with straw, let it go all winter, then give it a little fertility and attention in the spring, and voila, come July, gorgeous fragrant bulbs of garlic. Maybe it’s the mom in me, but there is just something magical about a 9 month overwintered crop, grown from a tiny clove that sits drawing energy from the earth through the cold winter months then emerges green and vibrant in the warm spring. And I do really love the community effort that goes into the harvest. All the garlic is pulled by hand (after being loosened by a tractor drawn implement), then bundled and hung in the barn to dry and cure. The curing process will dry the skins and enable it to be used well into the winter months- returning to us all that wonderful healthy healing properties of the earth that it absorbed all winter. Join us this Saturday if you’d like to be a part of this fun farm experience!

CSA member volunteers help with garlic harvest.

Photos and text by Tricia Borneman, Blooming Glen farmer and co-owner.

Roasted and fresh fennelFennel is a spice commonly used in Mediterranean cuisine. Both the bulb and fronds of the versatile fennel can be used, and it’s enjoyed both raw and cooked. Fennel is a very good source of fiber, vitamin C, folate, potassium and manganese, but its real star power comes from its unique combination of phytonutrients. Like radicchio, kale, and Swiss chard, the phytonutrients in fennel gives it “strong antioxidant activity.”

We’ve posted a few recipes here on the blog that feature fennel. It’s used raw in a crunchy and bright Escarole Salad with Fennel and Orange recipe, and it’s used cooked in a sweet Caramelized Fennel and Onions recipe. The couscous salad recipe below feature roasted fennel and capitalizes on its Mediterranean roots, while also including several other items from this week’s share (Swiss chard, Walla Wall onion, cucumber, and basil; sweet peppers will be in the share soon). It makes for a great addition to any potluck, picnic, or brunch table!

References and recommended links:

Couscous fennel salad ingredients

Roasted Fennel Couscous Salad

Ingredients
Dressing:
1/2 tsp cumin
1/4 tsp cinnamon
1/3 cup fresh lemon juice
1/3 cup fresh orange juice
zest from 1 lemon
1 tbs fresh ginger, minced
1 tbs agave
1/4 cup olive oil

Salad:
2 cups whole wheat couscous
3 cups water
1/4 tsp tumeric
2 fennel bulbs, chopped
1/3 cup fennel fronds, chopped
2 red, yellow and/or orange sweet peppers, diced
1/2 cup Swiss chard, stems removed, leaves sliced very thinly, chiffonade-style
1/2 cup Walla Walla sweet onion, chopped
1/2 cup cucumber, diced
1/2 cup dried Turkish figs, sliced
1/2 cup dried Turkish apricots, sliced
1/2 cup raisins
1 cup pistachio kernels, chopped
1/2 cup fresh basil, chopped
zest from 1 orange

Method
In a saucepan boil water. Add turmeric and couscous. Reduce to a simmer, cover, and cook until the water has been absorbed, about 10 – 15 minutes. Remove from heat, let sit covered for 10 minutes, and then fluff with a fork to break up any clumps of couscous.

Preheat oven to 350-degrees. Spread fennel onto a baking sheet, lightly spray with grapeseed oil, and sprinkled with salt and pepper. Roast in oven until edges begin to brown and bulbs begin to soften, about 15 minutes.*

Soak the raisins in warm water until they’re plumped up, about 15 minutes.

Combine all dressing ingredients and whisk together. Add salt and pepper to taste.

Combine the couscous and fennel with the remaining salad ingredients and stir to combine. Toss the dressing with the salad until until all the dressing is absorbed.

* Note: Make an extra batch of roasted fennel while you have the oven on!  Roasted fennel is a yummy addition to just about any green salad or grain dish.  It also sits atop a pizza or in a quiche very well.  Most simply, it’s tasty as is.

Post and photos by Mikaela D. Martin: Blooming Glen CSA member since 2005, board-certified health counselor, and co-founder and -owner of Guidance for Growing, an integrative wellness practice in Souderton. Read more about healthy eating and living on her site, http://guidanceforgrowing.com!

It’s heating up at the farm, and we are working around the clock to keep the farm irrigated. Anyone with a garden, or a lawn, can see that we are in need of some nice steady rainfall. As we irrigate, mostly through drip tape, you can almost watch the plants instantly respond and spring up a few inches. Our intern and irrigation manager, Mike, can be seen buzzing around the farm in the little orange Kubota car (nicknamed “The Shark”), turning water on and off, and fertigating through the drip tape with sea minerals, sea weed and fish emulsion. He and Tom develop a complex set of weekly and daily “directives”, with the field map color coded and highlighted. To keep everything watered, and to take advantage of the cool nights, fields turned on at sunset need to be switched over around 3am, then the next set of fields turned over in the morning, and so on throughout the day. Managing the watering needs of 30+ acres in a dry spell is no small task but Mike, and Tom, are doing an amazing job! Let’s hope for some rain (no thunderstorms please!), to give them a reprieve.

Baby cantaloupes, and irrigation manager/intern Mike Lasecki.

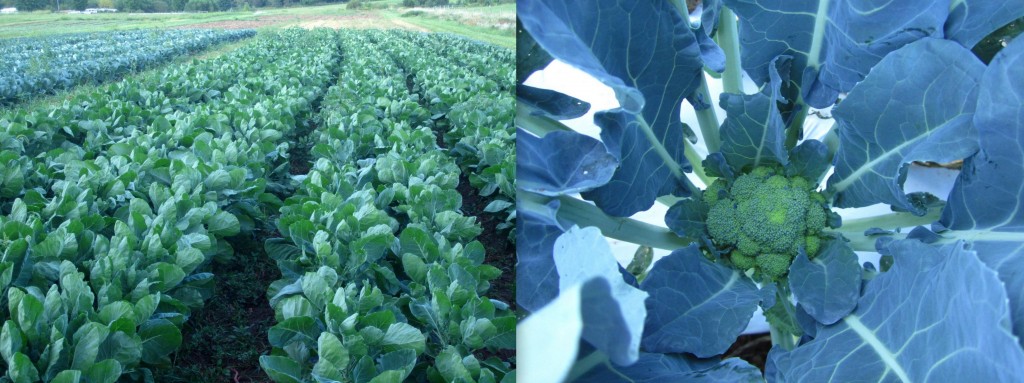
Our crew spent yesterday planting fall brassicas: brussel sprouts, cabbage, and broccoli. Next week, cauliflower. As we are on the cusp of harvesting our summer crops (tomatoes!!), we are also looking ahead 8 weeks to the fall crops. These fall crops are planted on white plastic mulch to help them deal with the strong summer heat, so they will flourish when they hit the cooler fall months.

Weeding basil and planting fall cabbage.

Have a wonderful fourth of July, and enjoy this week’s share. I made a garlicky pesto over the weekend and tossed it with lightly cooked yellow beans- delicious, and perfect for a barbecue!

CSA share, week 8, 7/3/12

Photos and text by Tricia Borneman, Blooming Glen farmer and co-owner.

We are into week seven of CSA pick-ups and by now you’ve probably realized cooking greens (namely, kale and swiss chard) are a part of nearly every share. If you are a new member, you might be wondering what the heck to do with it all. Hopefully you’ve come up with a few favorite ways to prepare them by now. If not, here are a few tips and ideas even the most seasoned veterans might be able to use:

  • The stems of both kale and chard are perfectly edible. They require more cooking time than the leafy parts, but when included in cooked greens, they provide a nice crunch to contrast the wilted leaves. To include them, just strip the leaves from the stems, chop the stems, and add them to the pan 3-5 minutes before the chopped greens (see recipe below).
  • Chard is a great substitute for spinach. In its raw state, I find the flavor to be a bit stronger, but when cooked, if behaves very similarly. Like spinach, it is high in iron and other valuable vitamins and minerals. When replacing spinach with chard in a recipe, use only the leaves (no stems) for a similar texture.
  • Kale is a super food. It has more nutrients per calorie than any other commercially grown vegetable. It has more protein than beef, more calcium than milk, and a good dose of immune boosting vitamins like A and C. And even though it is a “cooking green” it is delightful raw if you know how to prepare it—I love it as a salad and a nutritious addition to my morning smoothie (recipes below).

Sautéed Chard or Kale with Garlic

Remove stems from leaves of ¾ pound swiss chard or kale by holding on to the stem and stripping the leaf off with your hand from bottom to top (or cutting down the side of each stem). Chop stems like you would celery. Roll leaves up into a loose tube and cut into thick strips. Set aside.

Heat a large skillet with enough oil (I like organic sunflower seed and coconut oil for their stability at high heat) to coat the bottom of the pan. Add 4 cloves of thinly sliced garlic and the kale or chard stems and cook on medium heat until garlic begins to brown and stems soften a bit. Add leaves of kale or chard in batches, adding as many greens to the skillet as will fit, stirring as it wilts. When all the leaves are just wilted, sprinkle in a bit of balsamic or red wine vinegar and salt to taste. Remove from heat. Serve as a side dish or topping for whole grain pasta, rice, or quinoa.

Variation (particularly good with kale): Add 1 tablespoon minced ginger along with the garlic. Replace vinegar with a sprinkle of soy sauce.

Super Food Smoothie

In a blender, combine 1 cup frozen berries (the frozen part is key for a milk-shake like consistency since I don’t add any extra ice), ½ cup plain yogurt, ½ -1 cup orange juice, 1 ripe banana, 2 tablespoons unsweetened shredded coconut, and 3-4 leaves of kale, stems removed. Puree until liquefied, adding more juice if needed.

The Raw Kale Salad

This is the salad I make for kale newbies. It will make a kale convert out of anyone. It is simple, delicious, and infinitely adaptable. The key to eating raw kale is to dress it at least 15 minutes (and up to a few hours) before you actually want to eat it. I like using Tuscan kale for this one, but any kale variety will work.

Remove stems from ¾ pound Tuscan kale. Stack leaves on top of one another and cut into thin strips (julienne, if you will).

In a small bowl, whisk together 3 tablespoons extra virgin olive oil, 3 tablespoons raw apple cider vinegar, 1 tablespoon Bragg’s Liquid Aminos (you can use tamari or soy sauce as a substitute, but I highly recommend investing in a bottle of this stuff), and ¼ cup nutritional yeast (also known as brewer’s yeast, available in a health food store near you).

In a large bowl, toss kale with dressing, “massaging” the leaves, encouraging some of the toughness to break down. Add whatever toppings your heart desires. My favorites include: chopped apples or pears, raisins or dried cranberries, goat cheese, and walnuts or almonds. Let sit for at least 15 minutes before devouring.

Text and photography by Kate Darlington – Blooming Glen Farm second year intern, fresh food enthusiast, and budding food blogger. She also writes for the Digging Deep Campaign as well as for her personal blog, Growing Things.

This week’s share included the first “new potatoes” of the season, as well as fresh basil, sweet onions and very sweet and tender pick-your-own green beans. New potatoes are dug in the spring, and have a thin fragile skin. Unlike fall potatoes that have been cured and stored (their skin toughened to withstand long winter storage), these tender potatoes are meant to be stored in the fridge and eaten relatively quickly and do not need their skins peeled before eating. Our new potatoes go tumbling through a potato digger and then our root washer, which furthers removes some of the skin.

Share week 7, 6/26/12

Another tip for this week’s share: store your basil in a glass of water like a bouquet of flowers, on your counter, out of direct sunlight. It will keep here for a week or more (it may even start to send out roots!) and you can use the leaves as needed. Do not refrigerate basil!!

Enough about the veggies… how about those flowers! With over 50 different varieties of flowers, the pick-your-own flower patch is a patchwork of colors. Make sure you give yourself time to walk through the whole field so you can see all of what’s out there- different varieties are in different stages of bloom. 

Please read the following tips for pick-your-own flowers:

  • Bring your own clippers from home. If you forget, ask another CSA member to borrow theirs, ask a farmer, or come back another day. The flower patch is an especially beautiful place to be in the cooler evenings and early mornings, and is always “open” for cutting, even on the weekends. 
  • Please do not cut flowers from the discovery garden (where you will find the pick-your-own herbs) or walkway. These flowers are for everyone to enjoy in bloom.
  • Read the poster at the farm titled ” How to Cut Flowers”. This diagram shows the best way to cut your flowers in the field. Please teach your children the best way to cut flowers.
  • Bring a vessel you can fill up with water at the farm. (There is always a hose outside the distribution room  in our wash area). Cut your flowers right into your vessel. TIP:  For a portable vase, take a plastic gallon milk or juice container with a handle and cut a larger opening.
  • There are lots of flowers in the flower field, and they are primarily for your enjoyment! Please do not be shy about cutting a generous bouquet. Most flowers do best when the blooms are continuously cut, especially prolific flowers like zinnias. If you are interested in helping to maintain the flower patch by “deadheading” or weeding, let us know!
  • Re-cut your stems at an angle when you get home.
  • Strip the stems. No leaves under water!!
  • Make a home made preservative: Mix 1 tsp vinegar, 1 T sugar, and 1 aspirin tablet to 24 ounces of water.
  • Cut stems again every other day, and change the vase water.
  • Do not use public water– it may contain chlorine.
  • Don’t put your vase in direct sunlight or near a bowl of fruit.

Love the flowers and want to learn more?? At Blooming Glen Farm on Thursday, July 19th at 6pm, join flower professional Lyn Hicks of Harmony Hill Gardens for “Creating with Flowers”. Lyn will offer you tips to making beautiful centerpieces for your home. A passionate GREEN spokesperson, student and educator, Lyn Hicks leads the Green Collaboration, and is Flower Expert for The Green Bride.

This fun hands-on class with Lyn will help you understand harvest and post harvest to keep your flowers longer, you’ll learn the magic of putting together your own floral piece step by step, and you will leave with a self created centerpiece and the knowledge to present your flowers in a new way throughout your summer. All flowers and containers are included. Go to the calendar of our website for more info and to pre-register.

Important reminder regarding pick-up logistics: we realize that things do happen during pick-up days that can prevent you from being able to come get your share. However, over the years we have developed the policy, as stated in the CSA Rough Guide, that once the pick-up is over, pick-up is OVER. If you are unable to pick up on Tuesday, that does not mean you can come on Thursday, or vice versa. (**We can accomodate switches with prior notice, by 7 pm Sunday of the week you want to switch.)  Even if you encounter an emergency (as we all do at times), we are not able to hold food for you to pick-up at a later time or day. Please understand that we are sympathetic to your emergency, but we have found logistically it is important for our sanity to have a policy in place for missed pick-ups. At our discretion, some or all of any extra food will be donated to a local Food Pantry. Our crew is often in the fields until 6:30pm or later, and the farm family often works later then that. As you can imagine with over 150 people picking up on any given distribution day, there can be a half a dozen pleading phone calls on our answering machine every pick-up evening when we finally are able to come in for dinner. Please find an “emergency” friend or neighbor that you can call that can come pick up the share for you on your allotted pick-up day between 1 and 8pm. In the case that you are just unable to get your share or find anyone to help you, you are always welcome to come and do the pick-your-own crops before the next pick-up week begins- the information will still be on the board until the following Tuesday. Thank you for your understanding.

Photos and text by Tricia Borneman, Blooming Glen farmer and co-owner.

RadicchioRadicchio (pronounced rad-EE-key-o) is a leaf chicory common in Italian and Mediterranean cooking that is familiar to us mostly because of its inclusion in “spring mix” salads. Nutritionally, radicchio is low in saturated fat, and very low in cholesterol. It’s a very good source of vitamins C, E, and K, folate, potassium, copper, and manganese, and a good source of fiber, vitamins B5 (pantothenic acid) and B6, iron, magnesium, phosphorus, and zinc.  The presence of vitamins C and E, zinc, and carotenoids, give radicchio antioxidant properties. Antioxidants protect and repair cells from the damage caused by free radicals that contribute to many chronic diseases (including heart disease), cancers, inflammatory conditions (including arthritis), and immune system dysfunction.

While radicchio is clearly a great veggie to include in our diets, one issue that most people have with it — myself included! — is its bitter flavor.  This bitterness is actually due to intybin, a substance in radicchio that is beneficial to our blood and digestive systems, and is traditionally used for its sedative, analgesic, and antimalarial effects. There are two ways to diminish the bitterness: either soaking in ice water for 30 minutes (for salads and slaws), or cooking. The recipe below uses the latter method, and also the common practice of including sweet ingredients (fresh citrus, honey, raisins and figs are common in radicchio dishes) to further cut any bitterness. Note that simply soaking or cooking in no way eliminates radicchio’s bitterness, but simply lessens it.

References and recommended links:

Sautéed Radicchio & OnionsSautéed Radicchio & Sweet Onion
Ingredients
1-1/2 tsp olive oil
1 large Vidalia onions (or other sweet onion), sliced (~2 cups)
1 head radicchio with outer green leaves, cut into ribbons (~4 cups)
3 tbsp balsamic vinegar
3 tsp agave (or other sweetener)
Salt and pepper to taste

Method
Heat oil in large skillet over medium heat. Add onions and cook until they become soft and translucent, stirring often, about 7 minutes. Add vinegar and stir to blend. Add radicchio, agave, salt, and pepper. Continue cooking, tossing frequently, until radicchio is tender, about 5 minutes.  Serve hot, at room temperature, or chilled. Serving suggestions include:

  • On it’s own, topped with sunflower or sesame seeds, as a small dish or snack (pictured)
  • As a side dish, topped with chopped nuts or cheese, for diner
  • With smoked mozarella or gruyère as a topping on a white pizza
  • As a filling for an omlete or quiche
  • In a sandwich or wrap
  • With roasted garlic and oil as a pasta topping
  • With roasted veggies as a salad topping

Post and photos by Mikaela D. Martin: Blooming Glen CSA member since 2005, board-certified health counselor, and co-founder and -owner of Guidance for Growing, an integrative wellness practice in Souderton. Read more about healthy eating and living on her site, http://guidanceforgrowing.com!