


29 Oct 2013 Pie Bake-Off Winners!
Folks were lined up in anticipation of our fourth annual Pie-Bake Off contest at the farm’s Harvest Festival on October 12th, waiting patiently for the chance to taste and vote for their favorite pie. Over 100 votes were cast for the People’s Choice, and it’s no stretch to say that we were all winners for the opportunity to taste ten delicious homemade pies.

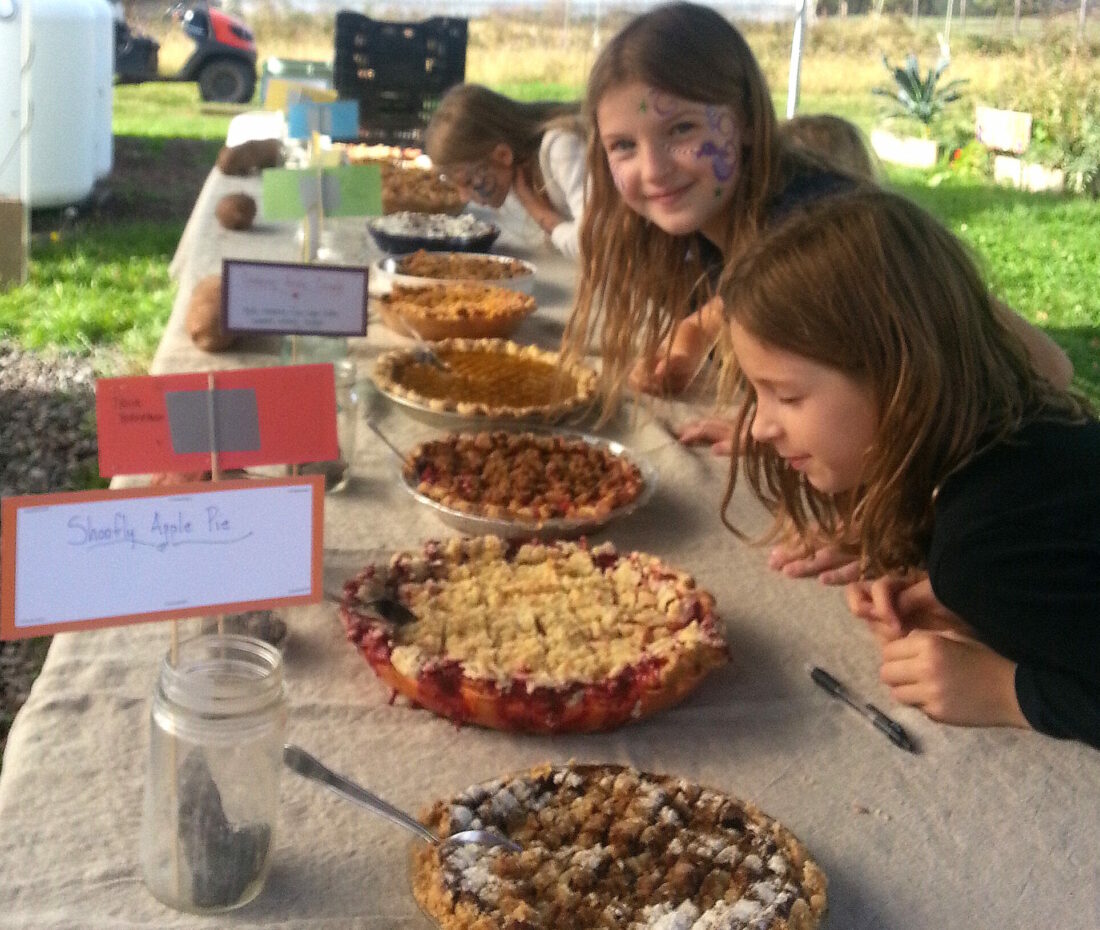
Lining up while the judges make their decision; Patiently waiting!
Bernadette Rodrigo, the landslide winner of the People’s Choice with her scrumptious Cherry Pistachio Pie, was presented with the large ceramic pie trophy made by Katia McGuirk- bragging rights for one year, to be held and passed on to next year’s winner.
New this year we introduced the Judges Vote. Our esteemed panel of three judges carefully savored and compared slices of the competing pies. They were able to quickly come to a concensus on the first and second place pie, with some deliberation involved for the third place win. The judges looked at creativity, flavor, crust and presentation. The winner of the Judges Vote, also Bernadette Rodrigo, was presented with a ceramic pie-plate handmade by potter Christine Hernandez. (*The winners of both the People’s and Judges awards were not announced until later in the day, so no voters were influenced.)

2013 Pie Judges: Thomas Murtha, Iliana Berkowitz, and Susan Kahn
The first pie judge was Thomas Murtha- not Blooming Glen’s Farmer Tom- but his father who shares not only a name but a deep love for pie. Thomas Murtha turns 82 this week, and that adds up to a lot of pies enjoyed over a lifetime (without hesitation he’d choose pie over cake anyday), with many more to taste and enjoy. Thomas, (aka Tom the young, with Farmer Tom being Tom the Younger), or Pop as we like to call him, has a serious soft spot for fruit pies (but don’t tell next year’s contestants ;)).
The second pie judge was Iliana Imberman Berkowitz. Iliana is a professional bread baker at Stephen Starr’s Parc Bistro in the heart of downtown Philadelphia. Previously, she made croissant and other pastries in West Philadelphia at Four Worlds Bakery. “In my spare time I like to bake cookies, pies, brownies, and anything sweet. I’ve got flour in my veins! I was delighted and honored to participate as a judge in this year’s contest, and was impressed by all 10 entries.”
Susan Kahn of Bucks County Cookie Company was the third pie judge. Susan said, “I’ve been baking all my life, well, ever since I was young. I always loved it! I started my cookie business for that reason, actually. Guess I figured I might as well start a business that I loved. So, when I left my full time job, I began BCCC in 2008. Pies are just such a homemade comforting all American dessert. Everybody loves Pie! My favorite pies have a nice flaky crust and the filling can be anything from fruits to custards. It doesn’t matter…I love them all.”

Cherry Pistachio Pie
by Bernadette Rodrigo
Judges Vote: First Place
People’s Choice: First Place
Bernadette Rodrigo lives with her husband and two children in Plumsteadville. She has been enjoying baking and experimenting with ethnic and gourmet cooking since she was a teenager. She finds joy in being able to create food that brings people together and puts a smile on the faces of friends and family. “This pie takes elements from different recipes and combines them. The simplicity of the ingredients and the richness added by the buttery crust are what makes this pie irresistible. I hope you enjoy it.”- Bernadette
Pie Crust
2 1/2 cups flour
1/3 cup sugar
2 sticks chilled butter
3 egg yolks
4 tablespoons ice water
Combine flour and sugar. Chop butter into 1/2” squares and add to flour mixture. Using a pastry cutter or your fingers, blend until it resembles course meal. In a small bowl lightly beat egg yolks and water. Add liquid to the flour mixture, tossing with a fork, until evenly distributes. Mixture will be crumbly. Use hands to press the dough into a ball. Turn out onto counter top and kneed a few times, smearing the butte and forming the dough into a ball. Divide in two. Flatten into two discs. Wrap and refrigerate. This recipe makes enough crust for 2 pies.
Pistachio Paste
3/4 cup pistachios, unsalted
1/4 cup almonds, blanched
1/2 cup sugar
1/2 teaspoon salt
Process above ingredients in food processor until a paste forms. Then add:
4 tablespoons cold butter
1/2 teaspoon vanilla extract
1/2 teaspoon almond extract
Process until all ingredients are incorporated. Set aside.
Cherry Filling
3 cups of cherries, fresh, frozen or jarred
1 tablespoon flour
1 tablespoon sugar
Toss together and set aside.
Crumb Topping
1/2 cup pistachios
1/2 cup sugar
1/3 cup flour
1/3 cup oats
1/4 teaspoon salt
Combine in above ingredients in food processor to mix, leaving oats semi-intact.
Assembly
Roll pastry to fit your pie pan and shape the crust.
Spread the pistachio paste evenly on the bottom of the crust.
Spread cherries evenly over the paste. Then sprinkle crumb topping over the cherries.
Bake at 375 degrees until crust is browned and the center bubbles. Approx. 45 minutes.

Raspberry-Apple Crumb Pie
By Esther Berko
Judges Vote: Second Place
People’s Choice: Third Place
“My inspiration to participate in the contest was because it would make me feel closer to my daughter Lexi’s world at the farm and more than just a spectator. (Lexi is a student at DelVal College and a BGF employee.) Before Saturday I had no thoughts about the pie because I really don’t enjoy baking that much and my sister e-mailed the recipe to me. I have neither baked that pie before Saturday nor tasted it until the pie contest – and, yes, it was delicious!! However, given the positive response, I will definitely bake it again and will consider it my favorite pie in the universe. I will definitely participate again next year and will begin the search for a great pie recipe … or maybe concoct my own! I guess you could say my inspiration to bake more pies has just begun!” -Esther Berko
Crust
1 Pillsbury refrigerated pie crust, softened as directed on box. Do not bake ahead of time.
Filling
3 cups thinly sliced peeled baking apples (3 medium). Add a splash of lemon juice.
½ cup sugar
2 tablespoons all-purpose flour
½ teaspoon ground cinnamon
2 cups frozen raspberries, thawed
½ cup cubed or crumbled almond paste (from 7 or 8 oz. package) *Check the label to make sure it lists almonds as the first ingredient.
Almond Crumb Topping
½ cup all-purpose flour
¼ cup sugar
¼ cup cold butter
½ cup sliced almonds – roast them in a pan a little
Assembly
Heat oven to 350. Place pie crust in a 9-inch glass pie plate as directed on the box for One-Crust Filled pie.
In a large bowl, stir together apples, ½ cup sugar, 2 tablespoons flour and the cinnamon. Spoon filling into crust-lined plate. Sprinkle with raspberries. Sprinkle almond paste over raspberries.
In medium bowl, mix ½ cup flour and ¼ cup sugar. Cut in butter, using pastry blender (or pulling 2 table knives through ingredients in opposite directions) until particles are size of small peas. Stir in almonds. Sprinkle topping evenly over almond paste.
Bake 30 minutes. Cover edge with 2-3” strips of foil to prevent excessive browning. Bake 30 to 50 minutes longer or until apples are tender in center and surface is golden brown. (Put foil underneath to catch drips). Serve warm or cool.
Sour Cream Apple Pie (adapted from The Silver Palate cookbook)
By Alysha Day
Judges Vote: Third Place
“I really enjoy cooking and baking with fresh ingredients for my family and friends. Over the past 2 years my family and I have learned so much about the food we eat by being members of your CSA, and are glad to have the chance to share something delicious with you!” -Alysha Day
Crust
2 ½ cups unbleached flour
5 tablespoons Sugar
¾ teaspoon salt
2-3 teaspoon cinnamon
6 tablespoons unsalted butter (chilled)
6 tablespoons vegetable shortening (chilled)
4-6 tablespoons apple cider (chilled)
Sift the flour, sugar, salt and cinnamon into a bowl. Cut in the butter and sugar with a fork until the mixture resembles rolled oats. Moisten with just enough cider to permit the dough to be formed into a ball. Wrap and refrigerate for 1-2 hr.
After filling is ready cut off 1/3 of the dough and return it to the fridge. Roll out the remaining dough between sheets of wax paper. Grease a 9inch pie pan and line it with dough.
Filling
5-7 tart apples (I mix several varieties.)
2/3 cup sour cream
1/3 cup sugar
1 egg lightly beaten
¼ teaspoon salt
1 tablespoons vanilla extract
3 tablespoons unbleached all-purpose flour
Whisk together all filling ingredients and then toss with the peeled, cored and thinly sliced apples. Spoon into the pastry lined pie. Roll out remaining dough and cut into strips for lattice on top.
Topping
3 tablespoons Brown Sugar
3 tablespoons Sugar
2 teaspoons cinnamon
Set the pie on center rack of a 350 oven (preheated). Bake until juices are bubbling and crust is golden. 50-65 minutes. If crust browns too quickly cover loosely with foil.

Strawberry Crumb Pie
By Tricia Borneman
People’s Choice: Second Place
“Each pie contest so far I’ve found a new recipe and labored over the elaborate ingredients- (homemade gingersnap cookies became a crust with a carmel brittle one year), but this year I just decided to go with my favorite pie to make and eat, especially since it really showcases the taste of the farm’s bounty. The word from the pie servers was this was a favorite with the kids- I can relate- it’s a pie I grew up loving, and one I look forward to making every spring. Thanks to my mom for this recipe- not many people go for the straight strawberry- but we both agree- don’t mess up our strawberries with rhubarb! (Though I do love a straight rhubarb pie!) Enjoy!”- Tricia Borneman
Crust
Pate Brisee recipe from Martha Stewart.com
Crumb Topping
1 Cup flour, ½ cup sugar and 1 stick cold butter. Mix with pastry cutter until crumbly.
Filling
4-6 cups sliced strawberries (I used frozen ones from the farm from Spring)
2 1/2 tablespoons Tapioca
½ teaspoon cinnamon
½ to ¾ cups sugar, depending on how sweet berries are.
Assembly
Mix filling ingredients gently, let set a few minutes, pour into 9” crust. Top with crumb topping. Put pie on cookie sheet to catch drips. Bake at 400 degrees for 10 min then turn back to 350 for approx. 40 min. If crust is getting too done, cover edges with foil. Pie is done when crumb top is golden and pie is bubbly.
Post and photos by Tricia Borneman, Blooming Glen farmer and co-owner.


