Recipes

The knobby warty exterior of celeriac, also called celery root, hides a delightful interior. Peel away the rough skin and inside is the smooth ivory flesh, a wonderful aromatic alternative to starchy potatoes. Celeriac is one of those vegetables that can seem intimidating, but after some experimentation it will quickly become a versatile favorite in your kitchen.

Though celeriac will keep for many months in your refrigerator, and up to 6 months in the right root cellar conditions, hopefully you will be inspired to use it sooner. This first idea, because it really is more an idea than a recipe, utilizes celeriac in its raw state. Thanks to nutrition coach Patti Lombardi, who taught a class here at the farm All About Greens, this is quickly on its way to becoming a lunchtime staple in our house!

Spicy Green Wraps

First take one large flour tortilla– I used the biggest ones I could find at Whole Foods- “All Natural Roll-Ups made with whole wheat flour“. Next, decide what you want to use as the “glue”. Patti suggested organic refried pinto beans– spread evenly over the tortilla, and for a little added flavor and spice, a bit of spicy black bean dip (or salsa if you prefer). Hummus would be another idea.

After painting on the “glue”, roughly chop 1/2 a bunch of arugula and pile it down the middle of the tortilla. (You can also experiment with lettuce or kale, always putting the softer greens down first onto the tortilla).

Next comes the crunch- add some finely chopped cabbage. Grate 1/3  of a celeriac, spread on top of the cabbage. Add three grated french breakfast radishes on top of that, and some thinly slivered fennel. I happened to have some ripe avocado, so that went into the mix. Lightly season with sea salt and squeeze a bit of lemon wedge on top.

Then it’s time to wrap it up. Lift the side of the tortilla closest to you (the edge at the bottom of the photo on the top right). Roll away from you into a big tube, using your fingers to press the greens under the wrap and your thumbs to keep the wrap rolling, pressing down tightly as you roll. Don’t worry if you rip it on your first try (I did), but my second one came out perfect. Cut in half (serves 2).

*In the class Patti held here at the farm, her version contained sweet peppers and grated carrot (no radishes), which was a bit sweeter. The great thing about these wraps is you can adjust to your taste, and use whatever happens to be in the share that week. You could also add chicken or turkey if you desire.

Simple Celeriac Saute

A lot of recipes with celeriac have you partnering it with potatoes in a mash, roasting it with other assorted root vegetables, or adding it to a soup. In this simple stove-top dish, celeriac plays the starring role. Lightly seasoned, the flavor of the celeriac shines through, making for a wonderful side dish. I also imagine it would be great on top of lentils.

Using a paring knife carefully off the rough exterior of one celeriac. Cut into 1/2-inch cubes. Over high heat, put a few tablespoons of olive oil in a large saute pan. Add the cubed celeriac, a handful of thyme leaves, and 2 cloves finely chopped garlic. Season with sea salt and fresh ground pepper. Stir to coat and fry for about 5 minutes. Turn down to a simmer and add 3-4 tablespoons water or stock– I used 3 cubes homemade chicken stock I’d frozen in ice cube trays.  Place a lid on top and cook for around 25 minutes, until tender. You can leave in the celeriac in cubes or smash it a little (somewhere in between a cube and a mash). (*Recipe courtesy of JamieOliver.com)

Celeriac Gratin

So far we’ve done celeriac raw and a simple seasoned stove-top celeriac saute. Now let’s do an indulgent comfort dish, sure to please any picky eaters in your family.

Pre-heat your oven to 400 degrees. Butter a 1 1/2 quart gratin dish, or large deep dish pie plate. Scatter 4 thinly sliced shallots over the bottom of the dish. Take two large peeled celeriacs, cut in half, then cut each half into 1/4-inch thick slices, and julienne. Arrange evenly in gratin dish. Sprinkle 2 sprigs thyme leaves over celeriac.

In a small bowl, whisk together 1 cup heavy cream, 1 tablespoon Dijon mustard, dash of nutmeg, and salt and pepper. Pour over celeriac. Sprinkle on top 3/4 cup grated Gruyere cheese and 1/4 cup freshly grated Parmesan cheese. Cover with foil and bake 20 minutes. Remove foil and continue baking until top is brown and bubbly and cream is thickened and reduced, about 20-30 more minutes. Let cool 10 minutes and serve. (*Recipe from MarthaStewart.com)

Photos and text by Tricia Borneman, Blooming Glen farmer and co-owner.

This week marks the official beginning of fall, and both the weather and veggies seem to agree with the calendar. This is a perfect soup for the transitioning season. It is rich and creamy without being too heavy. When roasted, fennel becomes deeply sweet (totally different from the crisp and refreshing taste of raw fennel) and leeks develop a wonderful caramelized flavor. Celeriac lends body and depth to this creamy soup. A touch of tangy blue cheese and crunchy chickpea crackers make it complete.

Roasted Fennel and Leek Soup

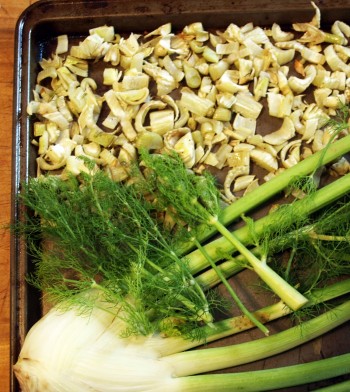
Cut off most of the green parts of 2 fennel bulbs and 3 leeks (save a few of the fennel fronds for garnish). Slice the leeks in half long-ways and run the layers under water to remove grit. Chop fennel bulbs and leeks into 1-inch chunks.

Cut away the ugly outside of  1 celeriac and chop into 1/2-inch chunks. Combine with fennel and leeks and toss with a sprinkle of salt and enough olive oil to coat. Spread veggies in a single layer on a cookie sheet and roast in a 400 degree oven for about 30 minutes (stirring once or twice) until they begin to brown and caramelize.

When the veggies are done roasting, combine them with 4 cups of milk, 1 teaspoon salt, 1 teaspoon cracked black pepper, and 1/2 teaspoon dried mustard powder. Heat until milk is hot, but do not boil. When heated through, use an immersion blender or food processor to puree until smooth. Adjust salt and pepper to taste.

Garnish with chickpea crackers (recipe below), crumbled blue cheese, and a sprinkle of chopped fennel frond for an added touch of the gourmet.

Gluten-Free Chickpea Flour Crackers

Combine 1 cup chickpea flour, 2 tablespoons sesame seeds, 1 teaspoon fennel seeds2 teaspoons olive oil, and 1 teaspoon salt in a small bowl. Slowly stir in 1/4 cup water until a thick dough is formed. Roll dough out into a thin layer (1/8 inch or so) on a cutting board and cut into cracker-sized pieces. Line a cookie sheet with parchment paper or a silicone baking mat. Bake for 20 minutes at 400 degrees until golden brown and crisp (I did this at the same time I was roasting the veggies).

This recipe is easily adaptable–replace fennel seeds with chopped herbs, sprinkle with parmesan cheese, etc. Cut into thinner strips for a salad garnish, or into wedges for dipping into hummus or spinach dip.

Text and photography by Kate Darlington – Blooming Glen Farm second year intern, fresh food enthusiast, and budding food blogger. She also writes for the Digging Deep Campaign as well as for her personal blog, Growing Things.

I always consider green tomatoes a bonus veggie: An unexpected and tasty gift us CSA members get during the summer-fall transition of share season. For the most part, green tomatoes carry much of the same nutritional value as their red counterparts.  They’re both very good sources of vitamins A, C, and K, manganese, and potassium, and both deliver health-boosting fiber.  Green tomatoes, however, have the added nutritional benefit of being a very good source of the B5 vitamin, pantothenic acid, which is essential in aiding in the metabolizing of carbohydrates, fat, and protein.

Green tomatoes are firmer than their red buddies, so they hold up nice to pickling, cooking, and baking without turning to mush. They have a tart flavor when eaten raw, which some people don’t prefer, but pairing them with a sweeter veggie like red tomatoes, corn, and/or onion, creates a great sweet-and-sour balance.  Green tomatoes bring a brightness to soups, sauces, and salsas, where they also pair well with hot peppers and spices.  Of course, fried green tomatoes is probably the dish we’re most familiar with, but green tomatoes actually do really well baked — either as baked green tomatoes or in savory breads and biscuits.  The recipe below is probably my favorite green tomato recipe; it’s a frittata suitable for a quick breakfast, lunch, or dinner.  Check out the links below for more green tomato nutritional info and links to other yummy recipes!

References and recommended links:

Green Tomato Frittata

Ingredients
1-1/2 green tomatoes, sliced about 1/4″-1/2″ inch thick, lightly sprinkled with salt and pepper
1/2 green tomato, chopped fine (about 1/2 cup)
1 frying pepper, chopped fine (about 1/2 cup)
1 poblano pepper, chopped fine (about 1/2 cup)
1 small onion, chopped fine
1/2 cup cornmeal for dredging
3 garlic cloves, minced
2-3 tablespoons fresh herbs (basil, parsley, chives, and/or thyme are all good here)
10 large eggs
Salt and pepper to taste
Cooking spray

Method
Preheat oven to 400-degrees.

Dredge tomato slices in cornmeal. Coat a large oven-safe skillet (cast iron works great) with cooking spray and fry each tomato slice for 2 minutes. Spray tomato again, and flip, frying again for 2-3 minutes. Set slices aside, and wipe pan clean.  Spray skillet again with cooking spray, add onion, and cook until translucent and soft, about 3 minutes.  Add pinch or two of salt and garlic and mix well. Stir in the chopped tomatoes and peppers, and mix until combined well.  Season to taste with salt and pepper, and cook, stirring often, until all veggies are softened, about 10 minutes. Stir in fresh herbs.

Meanwhile, beat eggs and season with salt and pepper.

Add egg mixture to skillet, turn heat up to medium-high, and lightly combine the ingredients, allowing the egg to distribute evenly throughout the filling, and making sure there is an egg coating on the bottom of the pan.  Place the fried sliced green tomatoes on the top of the frittata. Turn heat down to medium, and cook until edges begin to set, about 3-4 minutes. Place frittata in oven and cook until the center is firmly set, about 12 minutes.

Finish frittata under the broiler until it’s lightly browned, about 3 minutes. Remove from the heat, and allow to cool and set for 10-15 minutes. Loosen the edges with spatula and slice for serving.

Post and photos by Mikaela D. Martin: Blooming Glen CSA member since 2005, board-certified health counselor, and co-founder and -owner of Guidance for Growing, an integrative wellness practice in Souderton. Read more about healthy eating and living on her site, http://guidanceforgrowing.com!

Wet weather aside, I’m welcoming the cooler temperatures of late because they have allowed me to reacquaint myself with my kitchen. It seems like I’ve taken a hiatus recently from actually cooking. Instead of cooking meals, I’ve been favoring anything fresh I can throw into the same bowl. Now that it’s not 100 degrees in my kitchen, I’m a bit more excited to prepare a real dinner.

And what better way to celebrate my reintroduction to cooking than with juicy pork chops, fragrant herbs, and creamy swiss chard? This meal is easy, quick, and heavenly. It’s got all the advantages of a one-pot meal, but all the elegance of a steak house entree. The perfect end to a day spent working in the rain. (I could barely manage to squeeze in the photo shoot before scarfing it down).

Herbed Pork Chops with Dijon Swiss Chard

Rub both sides of 2 pork chops with salt, pepper, and 2 tablespoons of fresh chopped sage and thyme (both can be found in the Discovery Garden during your CSA pick-up, or at our farmstand at market).

Heat 1 tablespoon butter and 1 tablespoon olive oil in a heavy skillet over medium-high heat. When butter is melted, add pork chops. Sear chops, about 4 minutes per side, until there is a nice crust of fried herbs and meat is just cooked through. Remove from pan and cover with foil to keep warm.

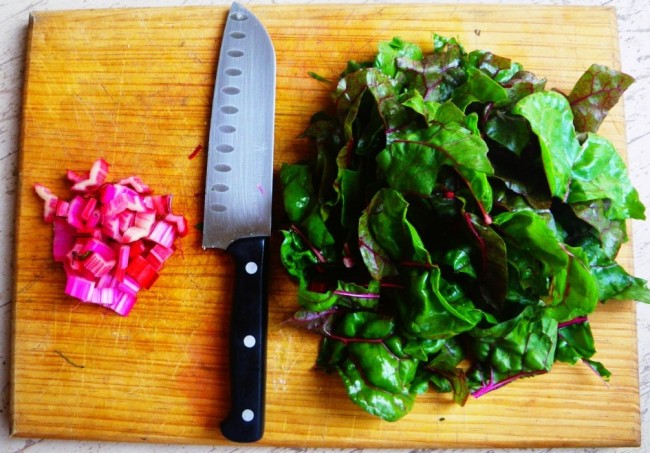
Using the same pan, reduce heat to medium and add  1/2 yellow onion, chopped. Cook until translucent. Add 3/4 pound swiss chard, stems removed and leaves roughly chopped. When chard has partially wilted, stir in 3 tablespoons dijon mustard and 1/4 cup half-and-half or whole milk. Continue cooking the chard until it is fully wilted and the sauce has thickened a bit.

Top a mound of chard with a pork chop and drizzle any remaining sauce from the pan on top. Fluffy homemade biscuits drizzled in local honey make a divine addition to the meal, but it would go equally well with some crusty bread or steamed rice. (Serves 2)

Text and photography by Kate Darlington – Blooming Glen Farm second year intern, fresh food enthusiast, and budding food blogger. She also writes for the Digging Deep Campaign as well as for her personal blog, Growing Things.

Lemongrass and CurryLemongrass is one of the many herbs grown at Blooming Glen Farm. Its lovely scent is due to citral, also the active ingredient in lemon peel, which has strong bacteria- and fungal-fighting antimicrobial qualities. Lemongrass is high in folic acid and essential vitamins, including B5, B6, ND B1, as well as the antioxidants vitamins C and A, potassium, zinc, calcium, iron, manganese, copper, and magnesium.

Native to India, lemongrass is not only nutritious, but tasty, too! It’s commonly used in Thai and Vietnamese dishes, particularly soups and curries. It’s unique citrus flavor really brightens up recipes, and is more versatile than one might think. It pairs well with everything from tofu to beef, and can even be used in tea. See below for a flavorful green curry recipe that not only uses lemongrass, but also lots of other goodies from this week’s share.

References and recommended links:

Summer Veggie and Lemongrass Green Curry

Summer Veggie and Lemongrass Green Curry

Ingredients:
1 can coconut milk
2-3 tbs green curry paste (I use Thai Kitchen, available in the Asian section of the grocery store)
4-5 stalks of lemongrass; trim off the grassy tops so that you’re left with about 6 inches or the stalk, then remove any tough outer leaves and mince.
2 tbs tamari
2 tbs brown sugar
1 lb tofu, drained, pressed, and cubed
2 sweet peppers, julienned
1 zuchinni, sliced into disks
1/2 an onion, julienned
1/2 Chinese eggplant, sliced into disks
1/3 cup basil, cut into ribbons

Method:
Heat coconut milk, lemongrass, curry paste, tamari, and brown sugar in a deep skillet over medium-high heat. Mix well, bring to boil, reduce heat and simmer 5 minutes. Add tofu, simmer 7 minutes longer. Add vegetables, cover, and simmer, stirring occasionally, until veggies are cooked through, about 10 minutes. Stir in basil and serve.

Post and photos by Mikaela D. Martin: Blooming Glen CSA member since 2005, board-certified health counselor, and co-founder and -owner of Guidance for Growing, an integrative wellness practice in Souderton. Read more about healthy eating and living on her site, http://guidanceforgrowing.com!

Mmm… nothing says summer like a refreshing, juicy, crunchy slice of watermelon, does it? Big fat watermelons are in the share and at the markets again this week. This, of course, is a great thing, and not just because of the incredible taste — this big fruit offers up some big nutrition, too!

Watermelon is a natural thirst-quencher that has been shown to decrease the inflammation linked to health conditions from asthma to skin conditions. It also provides several beneficial antioxidants, including vitamin C, beta-carotene and lycopene. And, because of watermelon’s high water content, calorie for calorie, it’s a very good source of vitamin B6 and a good source of vitamin B1, magnesium, and potassium.

Here are two new ways to get this delicious and nutritious fruit into your belly:

Watermelon two ways: Frozen & Grilled


Frozen —
Cut watermelon into chunks, place on a clean cookie sheet (removing seeds as you go) and freeze overnight. Frozen watermelon chunks can then be used to make all kinds of smoothies, just add your favorite juice or water, a bit of sweetener and/or fresh herbs, and blend. Our most recent favorite flavor is a raspberry-lime watermelon smoothie: Mix 2 cups of watermelon chunks, 1/2 cup water, 1/2 teaspoon raspberry agave and a squeeze of lime juice in a in a blender or food processor (or use a hand blender). Garnish with basil — or blend it in!

Grilled — Slice watermelon in 1″ slices. Place on heated grill for 2-3 minutes, flip and heat for another 2-3 minutes. You should see grill marks and the sugars from the fruit should become caramelized. Eat slices as is, or cut into chunks and serve on a bed of spring greens with vinaigrette dressing, a topping of feta cheese and/or nuts.

Post and photo by Mikaela D. Martin: Blooming Glen CSA member since 2005, board-certified health counselor, and co-founder and -owner of Guidance for Growing, an integrative wellness practice in Souderton. Read more about healthy eating and living on her site, http://guidanceforgrowing.com!

As a farmer I consider myself food rich- my currency is not in dollars, but in the bounty and flavors of the season. As the stream of veggies flows by my front door from field to market, I can often get overwhelmed with the impermanence of it all. On those occasions the only thing that helps soothe my nagging thoughts is to put some of that food in jars. Seeing the freezer stocked and some preserves on the shelves brings a satisfaction like no other. I admit, my canning is limited to what I can do with a water bath canner, but that’s okay- there is so much in that realm, and every year I discover a new favorite. I hope to take a class and master the pressure canner someday, but for now I stick to jams, pickles and tomatoes, low in risk and high in satisfaction.

This week, for Farmer Tom, I decided to put up some pickled jalapenos, and for myself, some cantaloupe preserves. (We don’t grow tree fruit on our farm, but thanks to a gift of a box of peaches from our neighbors at Easton farmers market, Scholl Orchards, I also discovered the joy of homemade peach jam! I won’t go into that in this post, but I encourage you to make some- it was amazing! (I used the recipe in Put ’em Up, by Sherri Brooks Vinton.)

I have been canning on and off for the 12 years since we started farming. But I had a eureka moment after attending a class by blogger and cookbook author Marisa McClellan of Food in Jars fame. I had the mentality that canning needed to be an all day production involving crates of vegetables, cases of jars, a hot kitchen and my big black enamelware canning pot. Low and behold, Marisa talked about small batch canning, 3 pints or even better, 6 half pint jars of jam at a time. And, here comes the clincher: using your staple stock pot, not the big black canning pot that takes an hour to get the water to boil.

I ordered a cheap flexible flower-shaped trivet for sitting the jars on in the bottom of my pot and voila, my basic 12-quart stainless-steel stock pot was turned into a maneageable canning pot.  As long as your jars can be covered by an inch or two of boiling water, you can use any size pot you’ve got.

Now don’t get me wrong, there is a place for the big canning pot: salsa, and canned whole tomatoes, and my grandmothers sweet and sour relish, those I like to spend part of a day on and do in big batches. But pickled okra, pickled garlic scapes, pickled jalapeno, bread and butter pickles, and fruit jams with various herbs- now those can be done in smaller amounts in an hour or so. Smaller batches takes some of the pressure off to produce larger quantities and puts the fun back into exploring new flavor combinations. From past experience I’ve learned that you may can a lot of something, but if it’s not a hit, it will sit for a year in your pantry collecting dust. So making smaller batches is a great way to find your family’s favorite preserves, and to focus your precious time on canning what you really can’t make it through winter without!

Pickled Jalapenos

*This basic recipe is from Food in Jars. It makes approx. 5 half pint jars.

Prepare a boiling water bath and boil your empty jars while preparing the other ingredients. Place the lids in a small saucepan and simmer over very low heat.

Combine 2 cups distilled white vinegar, 2 cups water and 2 tablespoons pickling salt in a pot over high heat and bring the brine to a boil.

Meanwhile prepare 1 pound jalapeno peppers (about 1 quart). Wearing rubber gloves (very important!!), slice the jalapenos in half lengthwise, but leave on the seeds and guts- this is where the heat is.

Pack the peppers tightly into the jars. Pour in the hot brine, leaving a 1/2 inch headspace. Gently tap the jars on a towel lined surface to release any air bubbles before using a wooden chopstick to dislodge any more bubbles. Check the headspace and add any more brine if necessary.

Wipe the rims, apply the lids and rings, and process in a boling water bath for 10 minutes.

Let these pickles cure for at least one week before eating. Tom loves these in burritos, on hot dogs or nachos, on scrambled eggs with tomatoes- anywhere you want a little extra heat.

The cantaloupe we are growing at the farm is a new variety this season with a wonderful aromatic sweet flavor. They don’t have the best shelf life, however, so I rescued one that was a bit soft and headed for the compost heap. It made the best small batch of cantaloupe jam. And I figured since cantaloupes have been in the share for the past few weeks, you too might want something new to do with them. The cantaloupe I used was on the larger end, so I even had a few slices left to eat.

Cantaloupe Preserves

*This recipe is from Put ’em Up!

Cut one cantaloupe into 1-inch chunks; you should have about 4 cups. Combine the melon with 1/2 cup water in a large pot and bring to a boil. Stir together 1 cup sugar and 2 teaspoons Pomona’s Universal Pectin powder. Add the mixture to the boiling fruit and stir some more. When the mixture returns to a boil, stir in 2 teaspoons calcium water (included in the Pomona box, with instructions), 1/2 cup bottled lemon juice, and 1 teaspoon cinnamon. Remove from the heat and let rest for 5 minutes, stirring occasionally to enable air bubbles to settle out. Skim off any foam (and enjoy a taste!).

You can refrigerate for up to 3 weeks, or can it using the boiling-water method. Process for 10 minutes- it should fill about 4 half pint jars.

Photos and text by Tricia Borneman, Blooming Glen farmer and co-owner.

Basil Quinoa with Edamame and TomatillosPoblano peppers are one of the most mild of hot peppers, measuring 1,000 to 2,000 Scoville Heat units. This is quite modest compared to, for example, it’s fiery relative the cayenne pepper, which has a heat unit of 30,000 to 50,000! The light spice of the poblano makes it a very versatile ingredient in the kitchen, and since it won’t singe taste buds, you can really taste its flavor.

The heat in poblanos and other peppers is caused by plant compounds called capsaicinoids, which are generally thought to exist as a natural deterrent against animals and fungi. Capsaicinoids have been linked to several health benefits over the years including, improved circulatory and heart function; pain management for arthritis, neuropathy and psoriasis; balanced and healthy cholesterol; increased metabolism; and even prevention against prostate cancer. Of course, poblanos mildness does means it has less capsaicinoids than the aforementioned cayenne or even a jalapeño, but it is worth noting.  And, like most veggies, all peppers are low in fat and cholesterol, high in fiber, and contain free radical-fighting antioxidants — a great addition to any diet!

We’ve posted a few recipes on the blog that feature poblanos; Summertime Chili, Creamed Sweet Corn with Poblanos, and Stuffed Poblanos with Mexican-style Quinoa. The recipe below uses two superfoods, edamame and quinoa, as well as flavorful basil and tomatillos, making it not only a nutritious, but delicious dish.

References and recommended links:

Ingredients:
1 bunch fresh edamame, pods removed from branches
1 cup quinoa
1 tbs grapeseed oil
4-5 tomatillos, chopped
1 onion, chopped
3 garlic cloves, minced
1-2 poblano peppers, seeded and chopped
2 tbs chopped fresh basil, chopped
2 cups No-chicken Broth

Method:
Heat enough water to cover edamame pods and bring to a boil. Add edamame and blanch for 3 minutes. Drain and set aside.

Heat oil in a heavy-bottomed pan or pot (a dutch over works great). Add onions and cook until translucent, about 3-4 minutes. Add garlic, tomatillos, and jalapeño and cook until tender, about 5 minutes. Add quinoa, basil, and broth and bring to a boil. Reduce heat to low, cover and let simmer 10-15 minutes, until quinoa is cooked through.

Shell edamame and put beans aside.

Remove quinoa from heat, stir in edamame and let sit for 5 minutes. Salt to taste.

Post and photo by Mikaela D. Martin: Blooming Glen CSA member since 2005, board-certified health counselor, and co-founder and -owner of Guidance for Growing, an integrative wellness practice in Souderton. Read more about healthy eating and living on her site, http://guidanceforgrowing.com!

With beautiful tomatoes, spicy peppers, pungent onions, and zesty cilantro all in one share, a batch of fresh salsa was calling my name last night.

There are several hot peppers to choose from this week. I used a serrano pepper, a variety of chili that originated in the mountainous regions of Mexico. It is the pepper traditionally used in making pico de gallo and salsa. It is hotter than a jalapeno and has a nice bright flavor for use in raw recipes.

This recipe makes a “medium” salsa, but can be adapted to be as spicy or mild as you like. Omit the hot pepper all together if you’ve got a sensitive mouth, or kick it up a notch by including the seeds or more than one hot pepper.

Salsa Fresca

In a food processor, pulse together: 1 pound red tomatoes (about 2 medium-sized tomatoes), cored and chopped; 1 torpedo onion, greens cut off and bulb chopped; 1 serrano pepper, stem and seeds removed; 1 handful cilantro; 1 garlic clove; juice of one lime; and a pinch of salt, to taste.

Voila! You’ve got salsa!

Now you can top these ultra-simple tostadas with a dollop of the salsa for a quick and fresh dinner. They are a great way to use up leftovers from a roasted Ledamete Grass chicken, and perfect for a summer night when the last thing you want to do is slave away over a hot stove.

Chicken Tostadas

Heat 2 tablespoons vegetable oil in a cast iron or non-stick pan. When the oil is sizzling hot, lightly fry 4 corn tortillas (one at a time) in the oil–about 50 seconds per side, until just golden brown and starting to puff up. Place fried tortillas on a paper towel or newspapers to absorb extra oil.

Top fried tortillas with 2 cups shredded cooked chicken, shredded or crumbled cheese (I like cotija, a mild Mexican cheese, but cheddar, jack, or chevre also work well), a big dollop of your salsa, and a squeeze of lime.

Text and photography by Kate Darlington – Blooming Glen Farm second year intern, fresh food enthusiast, and budding food blogger. She also writes for the Digging Deep Campaign, as well as for her personal blog, Growing Things.


You might have seen them at the market or in your CSA share, and wondered what are those flying-saucer shaped squashes? Depending on where you’re from, they go by any number of different names. When we farmed in Oregon it was called sunburst squash, here we call it pattypan squash, but it also goes by scallop squash, white squash, button squash, granny squash or custard squash. Their light green or bright gold rinds remain thin and edible. Their insides are white, with a mild, buttery flavor. It’s shape is whimsical and versatile- you can chop it up and use it like regular zucchini, or if you want to preserve its character, stuff it whole.

Stuffed Pattypan Squash

I used three pounds of pattypan squash, 8 squash, each about the size of my fist, or smaller. You could do less, larger squash, and just adjust the cooking time accordingly.

Cook 1/2 cup quinoa in 1 cup water, or for more flavor I used homemade chicken broth. Feel free to substitute your grain of choice.

Meanwhile pre-boil the whole patty pan squash for about 5 min, just to soften them a bit and make cutting them easier.

To cut, just imagine you are carving the top off a pumpkin. Insert your knife at an angle and remove the cap. Scoop out the insides with a spoon, being careful not to pierce the wall. (Though have no fear, I did, and things still turned out just fine). Put prepared pattypans in a baking dish. I oiled the inside of each and salt and peppered them.

Add a tablespoon or two of olive oil to a pan, heat up and saute 1/2 of a large sweet onion, diced, 4 cloves fresh garlic, diced, and cook until the onions begin to sweat. Add 1 asian eggplant, diced, and one chopped tomato. Cook for a few minutes then add 1 1/2 cups Swiss Chard, cut into thin strips. You can also add any fresh herbs you like- I used a few sprigs of basil and thyme. Salt and pepper to taste.

The great thing about making a stuffing for a squash, or even stuffed peppers, you can pretty much use whatever you have on hand. If you prefer to go the meat route, I think sausage or ground beef would work well also.

After sauteing the vegetables, stir in the quinoa, taste and adjust seasoning to your preference. Fill the squash to the brim with the quinoa mixture. To top it off, I combined a cup of bread crumbs with some melted butter and parmesan cheese. Then after oiling and seasoning the lids, I re-capped the cuties, added a bit of water to the bottom of the baking dish, and covered with foil. Bake at 375 for 35 minutes or so, until squash is soft, but not mushy. I removed the foil for the last 10 minuted to get a bit of browning.

Enjoy!

Photos and text by Tricia Borneman, Blooming Glen farmer and co-owner.