garlic Tag

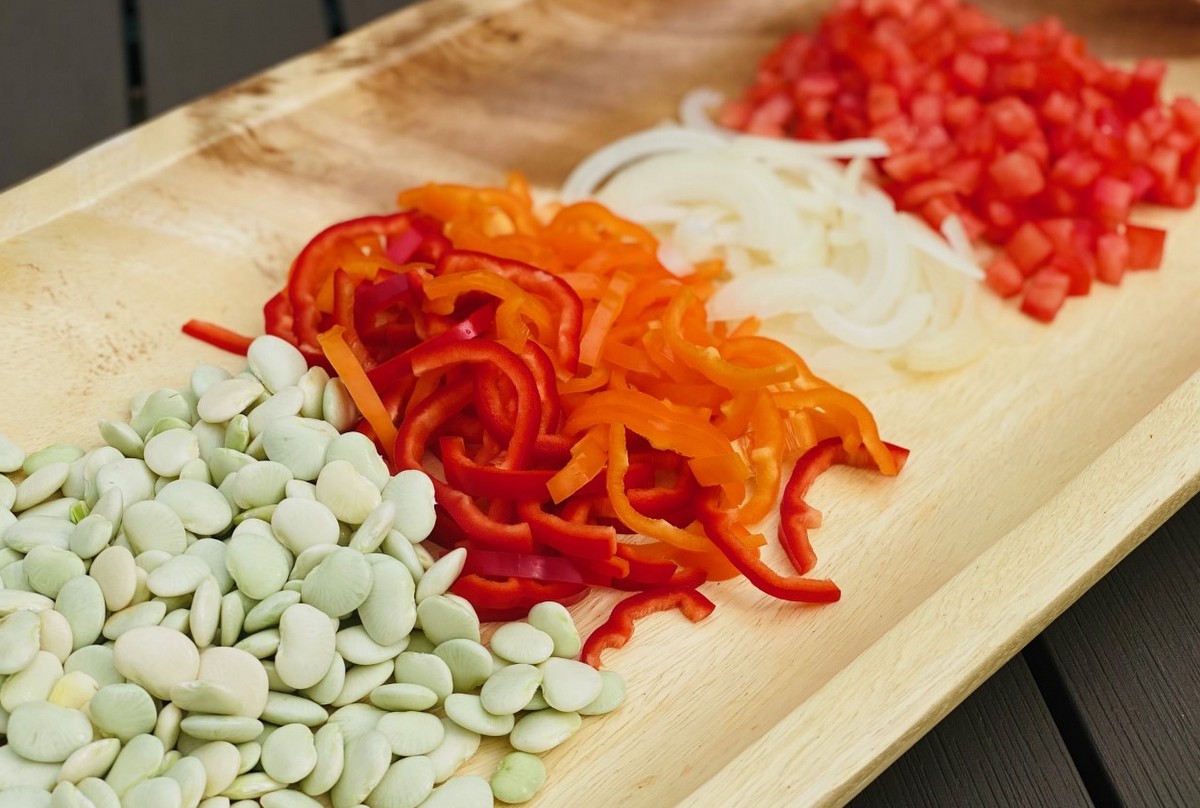
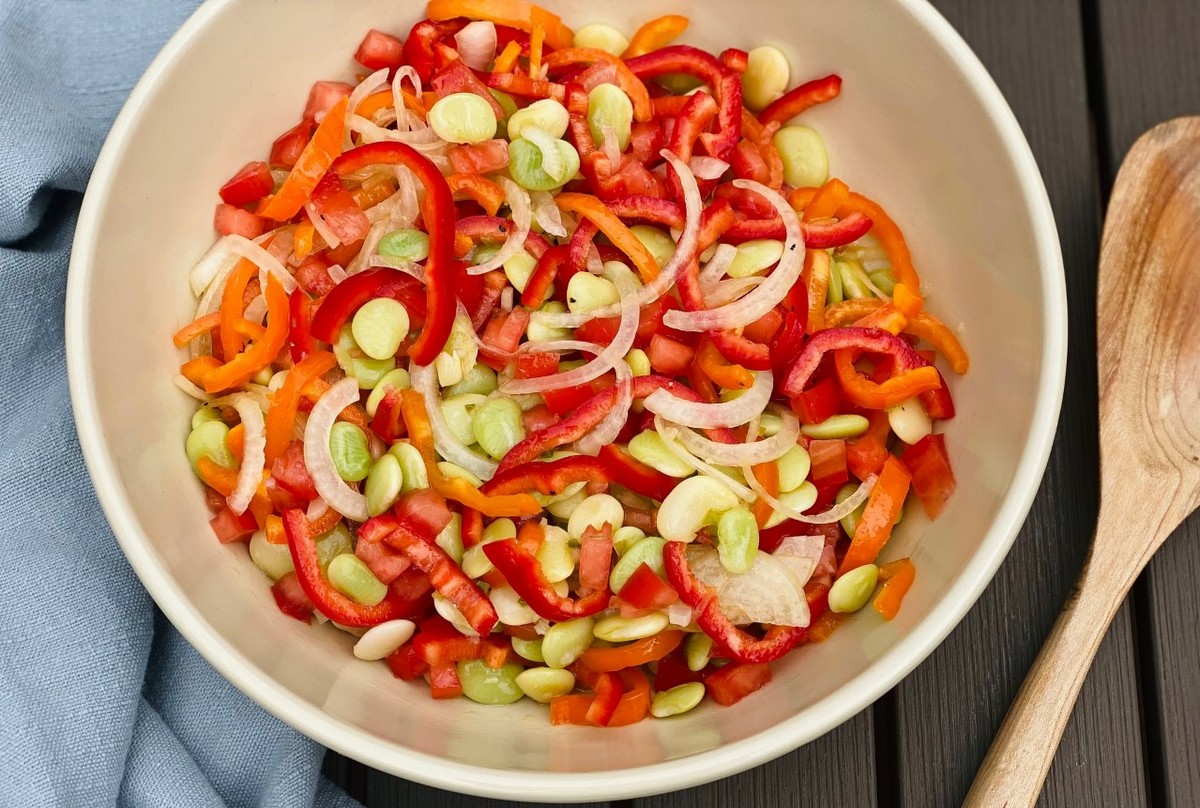
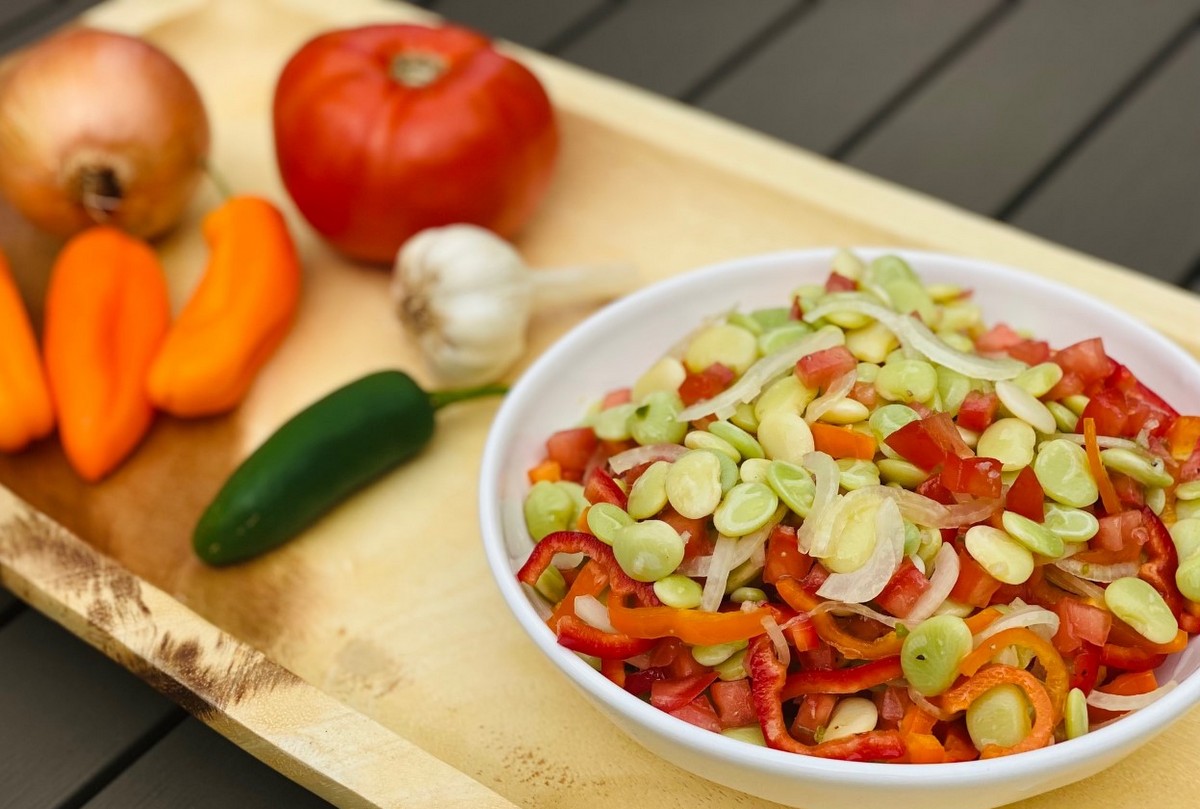
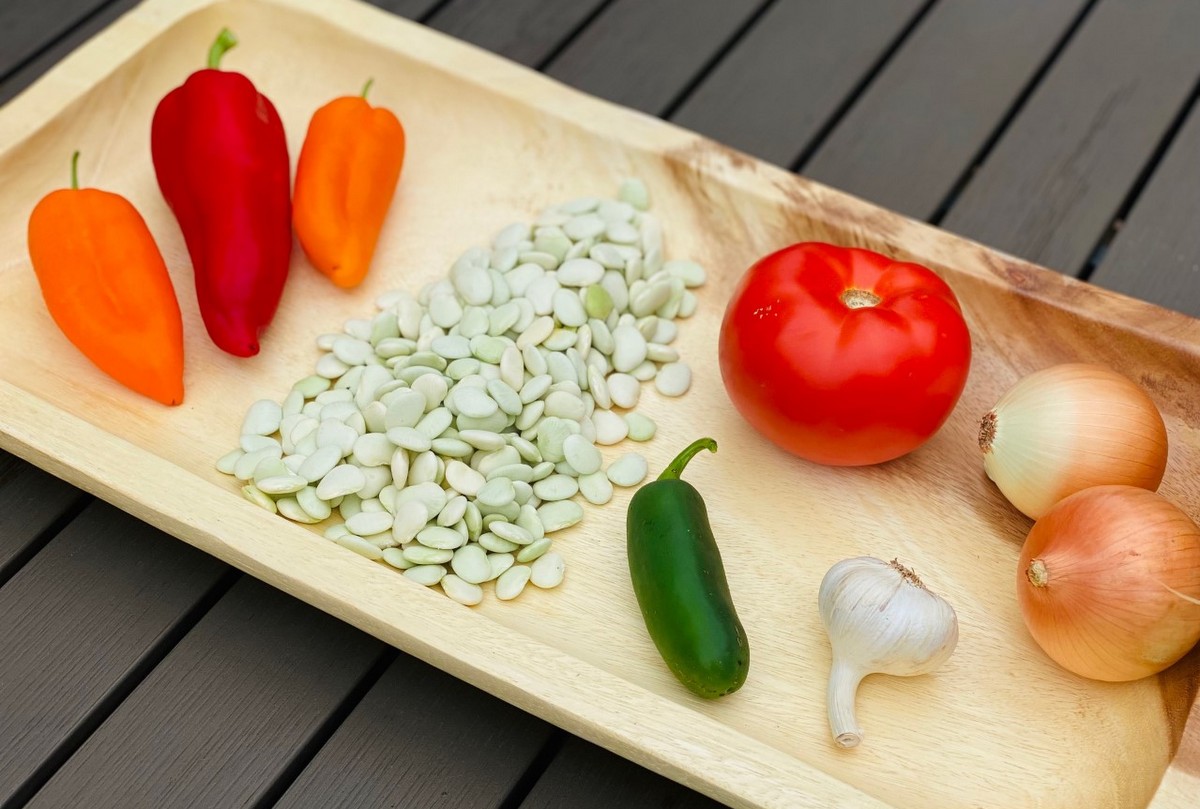
Lima beans are new to the farm this year.  We have been able to head to the fields and pick them ourselves.  This recipe showcases the flavor of these fall harvested beans along with the sweet peppers, sweet onions, tomatoes, garlic and hot peppers in our shares this week.

Fresh Lima Bean Salad with Spicy Garlic Lime Dressing

Ingredients:
1 quart fresh lima beans (in pods, equals about 1 ½ cups shelled beans)
2 sweet peppers
½ medium sweet onion
1 medium beefsteak tomato

Dressing Ingredients:
¼ cup olive oil
Juice of 1 lime (about 3 Tbsp)
1 clove garlic, crushed
½ tsp finely diced hot pepper
½ tsp sea salt
Pinch black pepper

  • Shuck lima beans.
  • In medium pot on stovetop, boil water.
  • Place shucked beans into pot. Bring water back to a boil and then reduce to a simmer.  Cook for about 15 minutes or until beans are tender.
  • Wash, remove seeds, and slice sweet peppers into thin strips.
  • Peel and slice onion into thin slices.
  • Prepare tomato. Slice and remove seeds.  Cut into cubes.  You should have about 1 cup of chopped tomatoes.

  • Place sweet peppers, onion, and tomatoes in medium bowl. Add beans.
  • Make dressing. Combine all ingredients and whisk well.
  • Pour dressing over vegetables and toss to coat.
  • Allow salad to marinate in refrigerator for an hour before serving.

Recipe and photos by Stephanie Borzio.  Stephanie is a mom of three active boys and is an autoimmune warrior.  After battling her own health for several years, Stephanie found healing through food and lifestyle changes, including joining Blooming Glen Farm CSA of which she is a long time member.  She is a Board Certified Integrative Nutrition Health Coach who is passionate about sharing healthy living tips and real food recipes.  Instagram and Facebook: Tru You Essentials; Website: www.truyouessentials.com

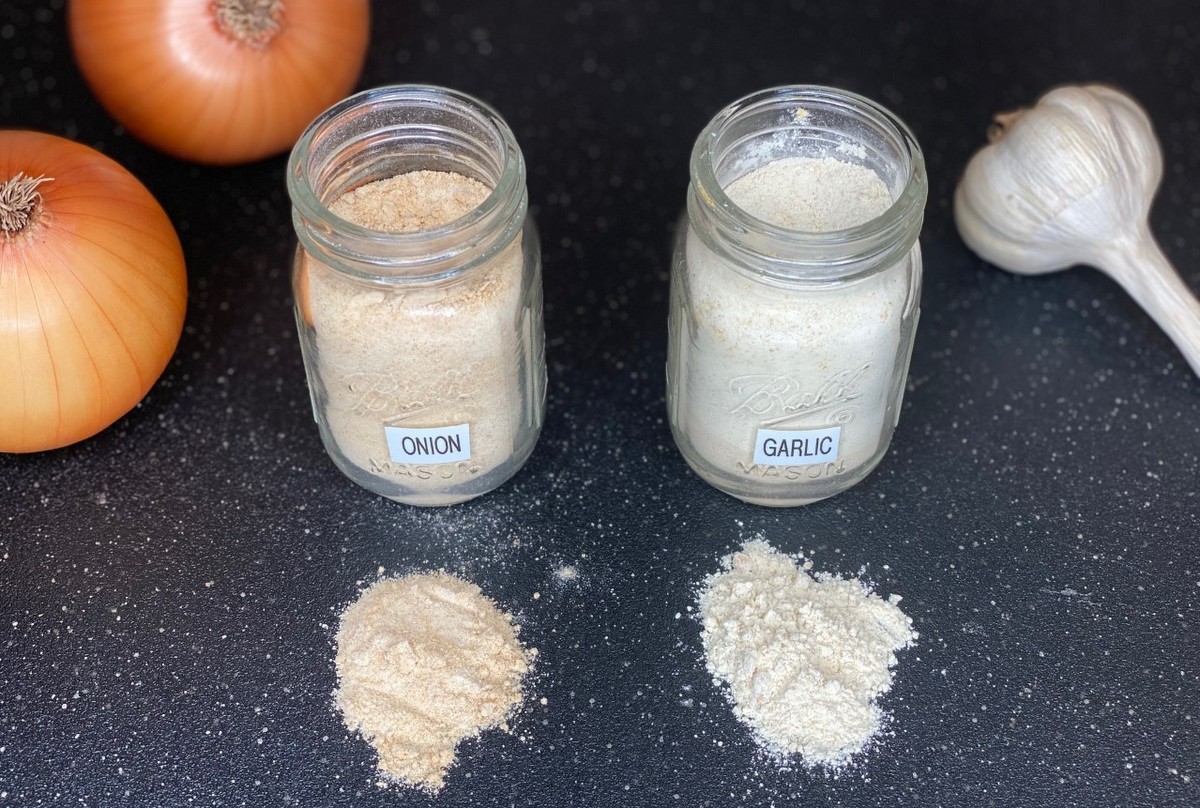
Continuing with our theme of preserving the harvest, this recipe is a great way to savor the amazing flavor we get with farm fresh onions and garlic.  Homemade seasonings are much more flavorful than their store bought counterparts.  This is by far one of my favorite ways to preserve onions and garlic.

DIY Onion and Garlic Powder

Ingredients:
onions (at least 2)*
garlic (at least 2-3 heads)*

*There’s no specific amount you need to have of the onions or the garlic.  However, I highly recommend using at least the quantity listed.  You can always use more!

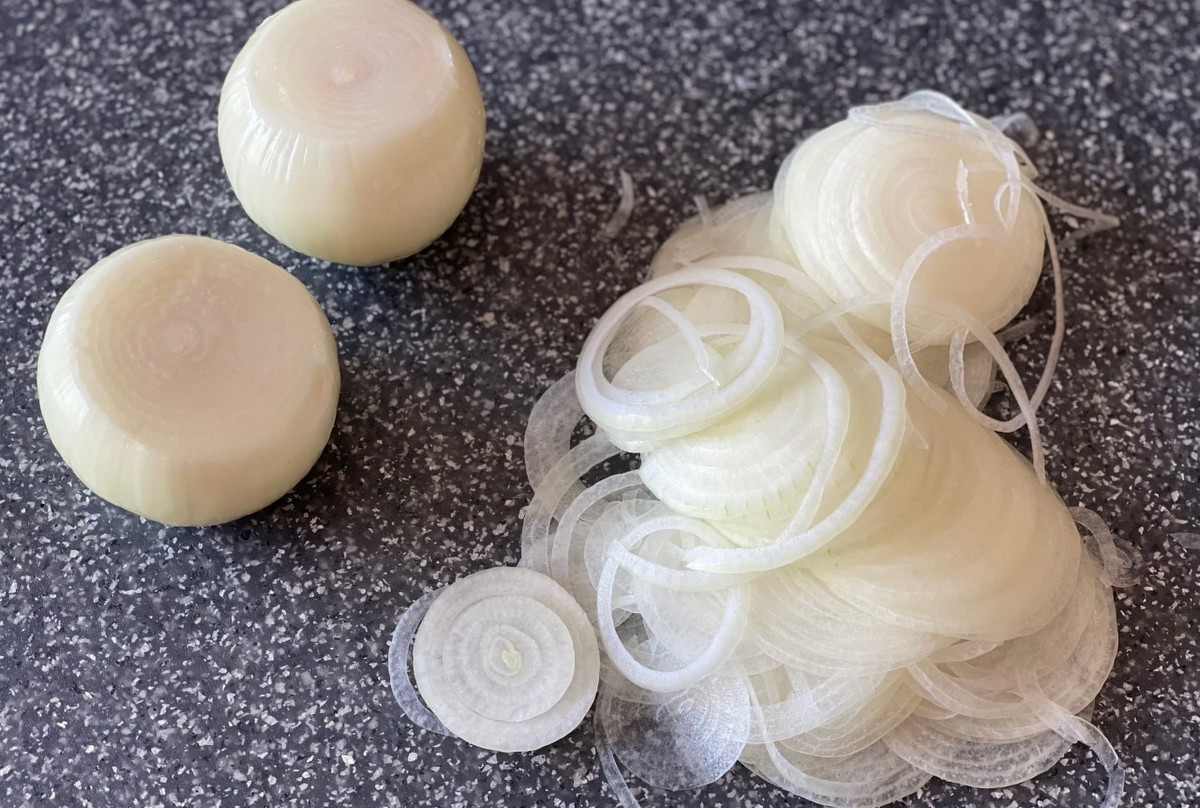
  • Prep onions.
    • Peel.
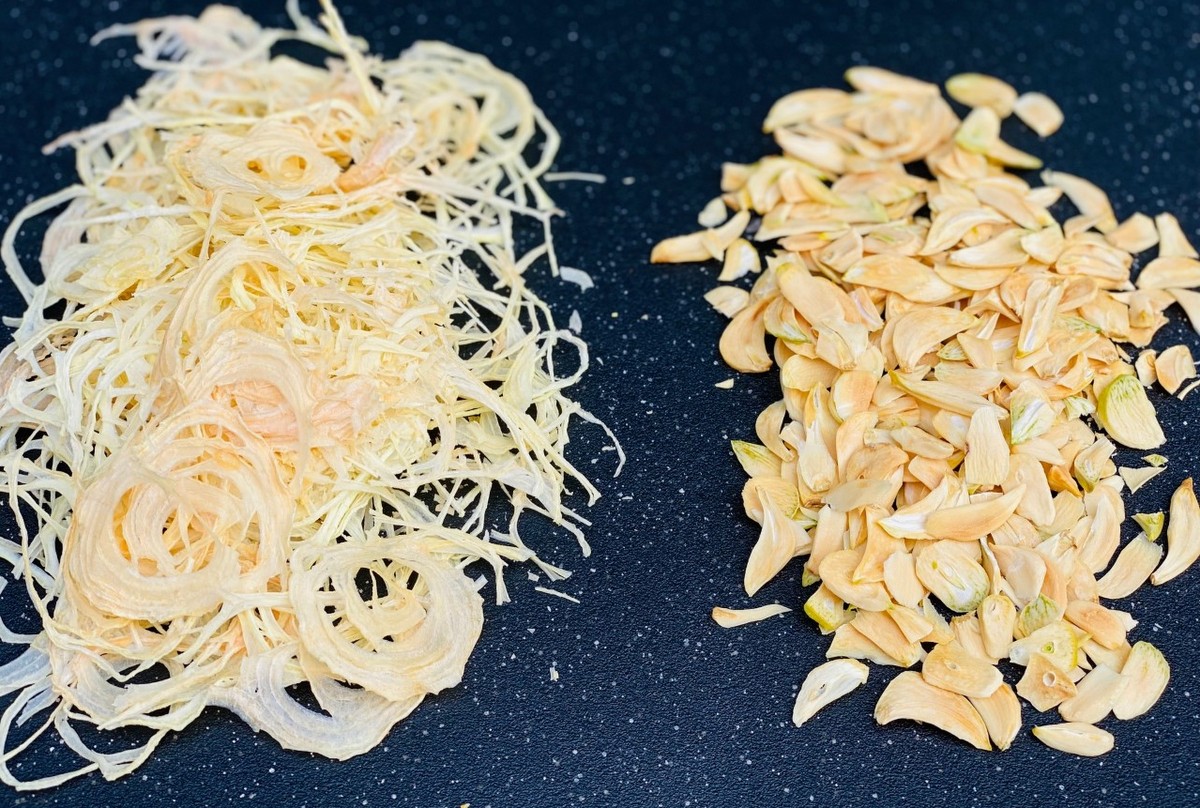
    • Thinly slice. I used a mandolin set on the lowest setting (which was 1/16”).

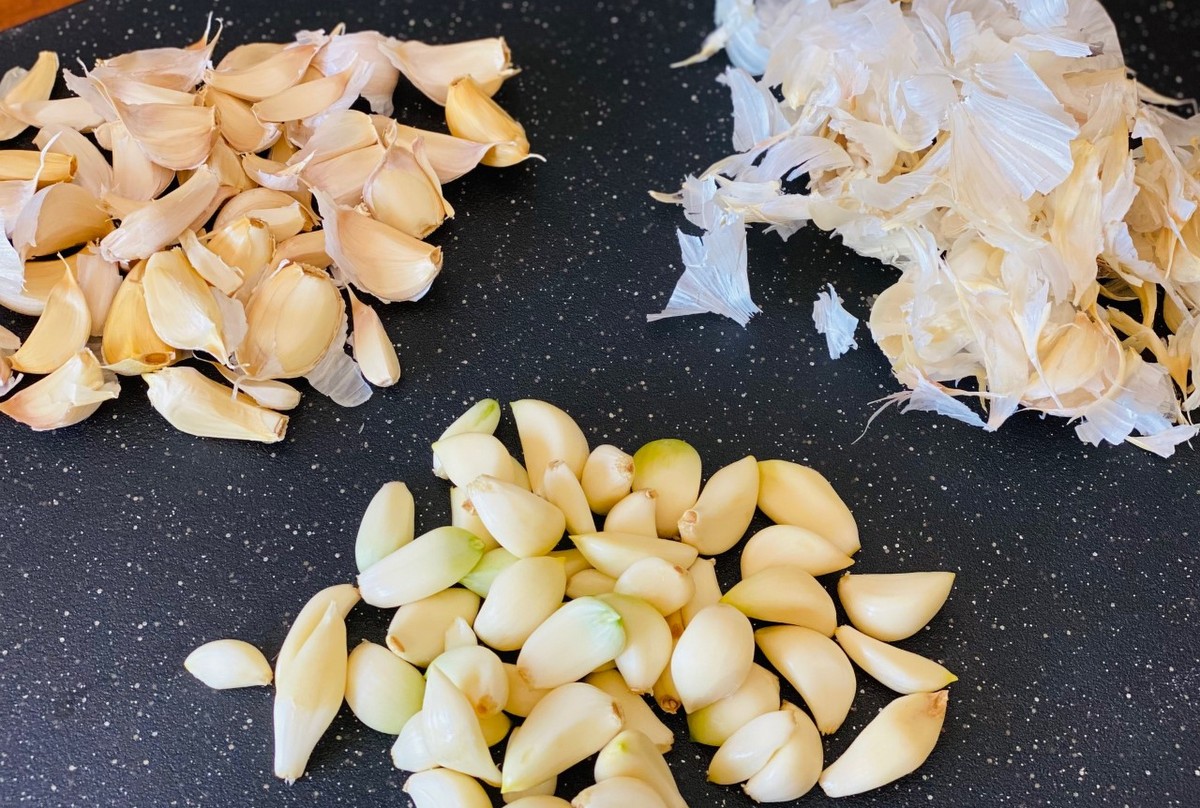
  • Prep garlic.
    • Remove cloves from head of garlic and peel.
    • Slice as thin as possible.

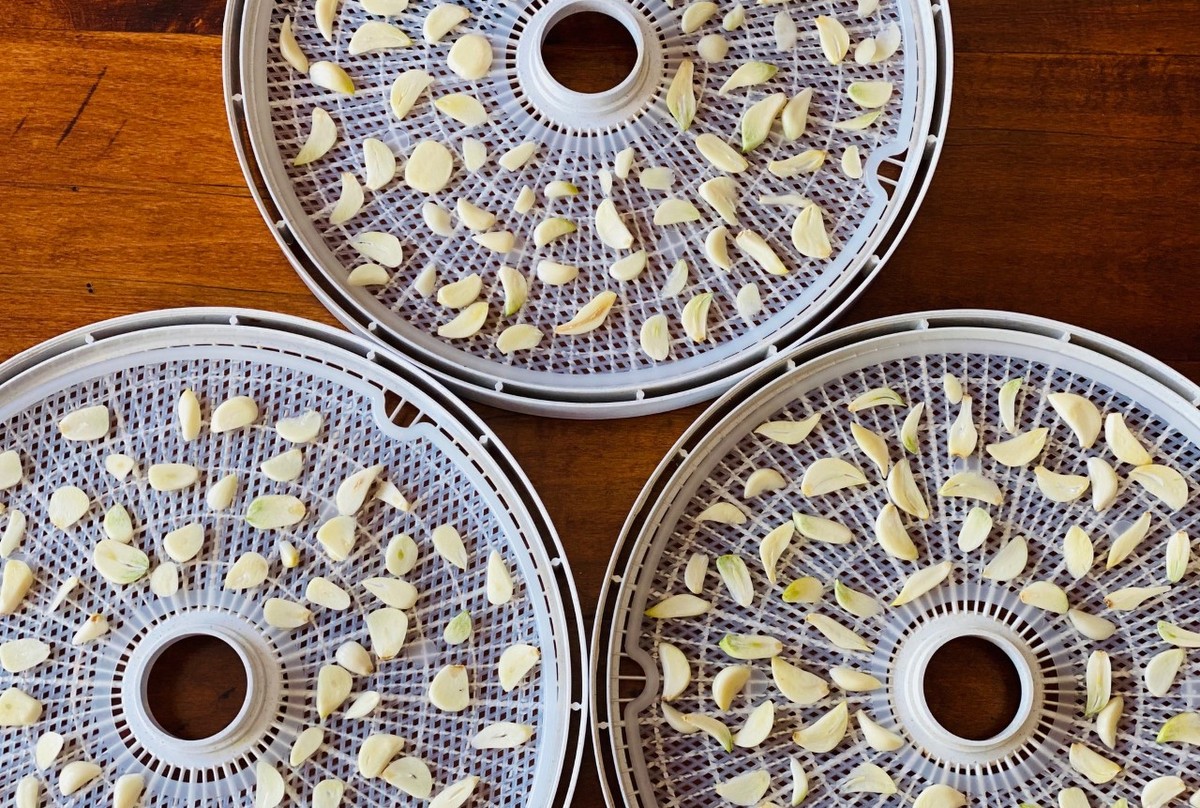
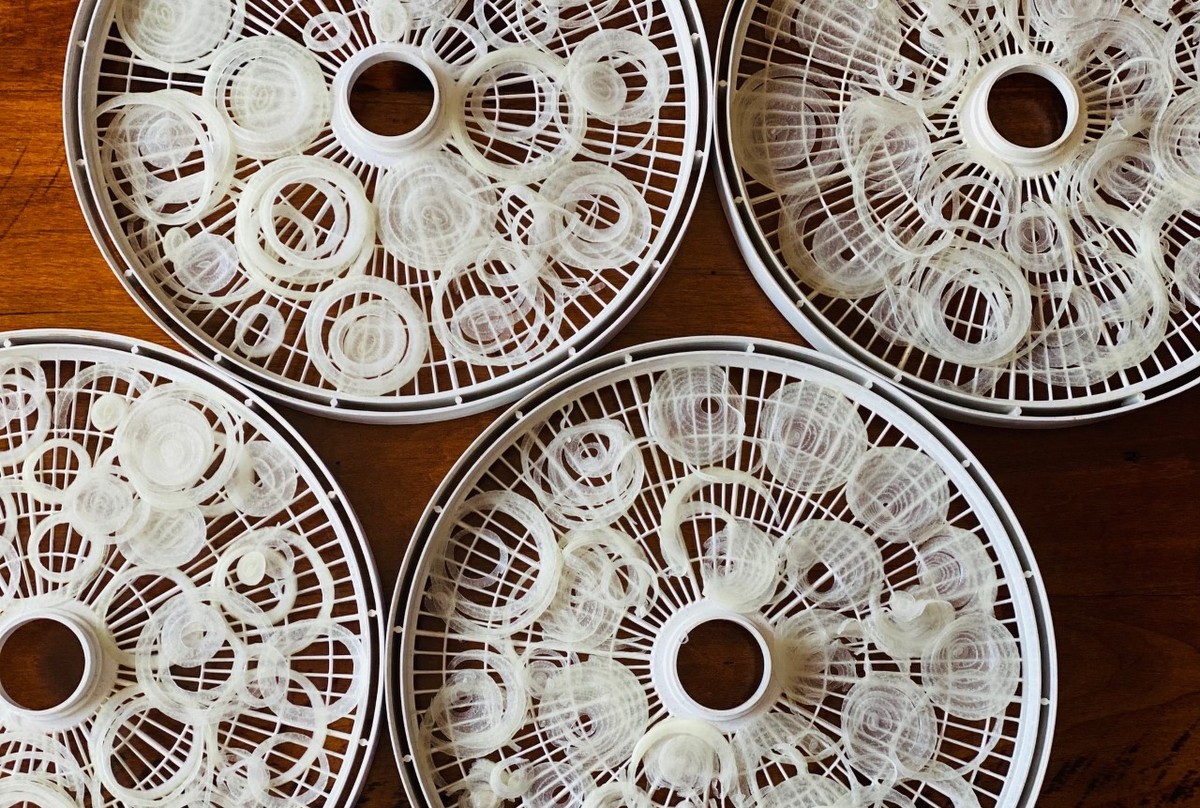
  • Lay out onion and garlic slices on dehydrator racks in single layer. **

  • Place in dehydrator at 135° and allow the magic to happen.

  • Dry time will vary depending on thickness of slices and moisture content of produce.
    • Just to give you an idea of timing, my onions took about 18 hours total. The garlic took over 24 hours (its harder to cut them thin like the onions).
    • The nice part about the dehydrator is you can just set it up, turn it on, and forget about it while the dehydration happens.
  • When the onion and garlic are dry enough, you will be able to pick it up and break it in your hands. If it bends instead of breaks or crumbles, then it is not ready yet.  They should be crispy and brittle.
    • Some pieces may dry quicker than others. If they do, simply remove them and set aside until all of it is done.

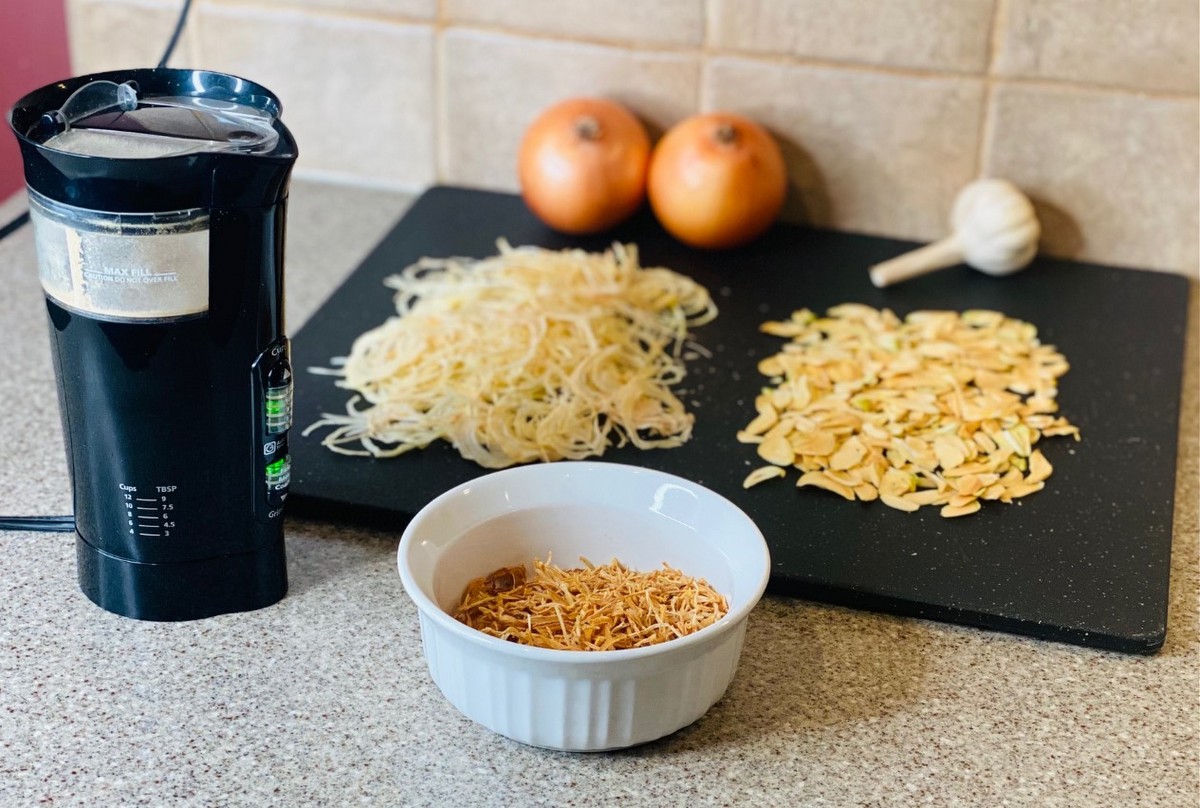
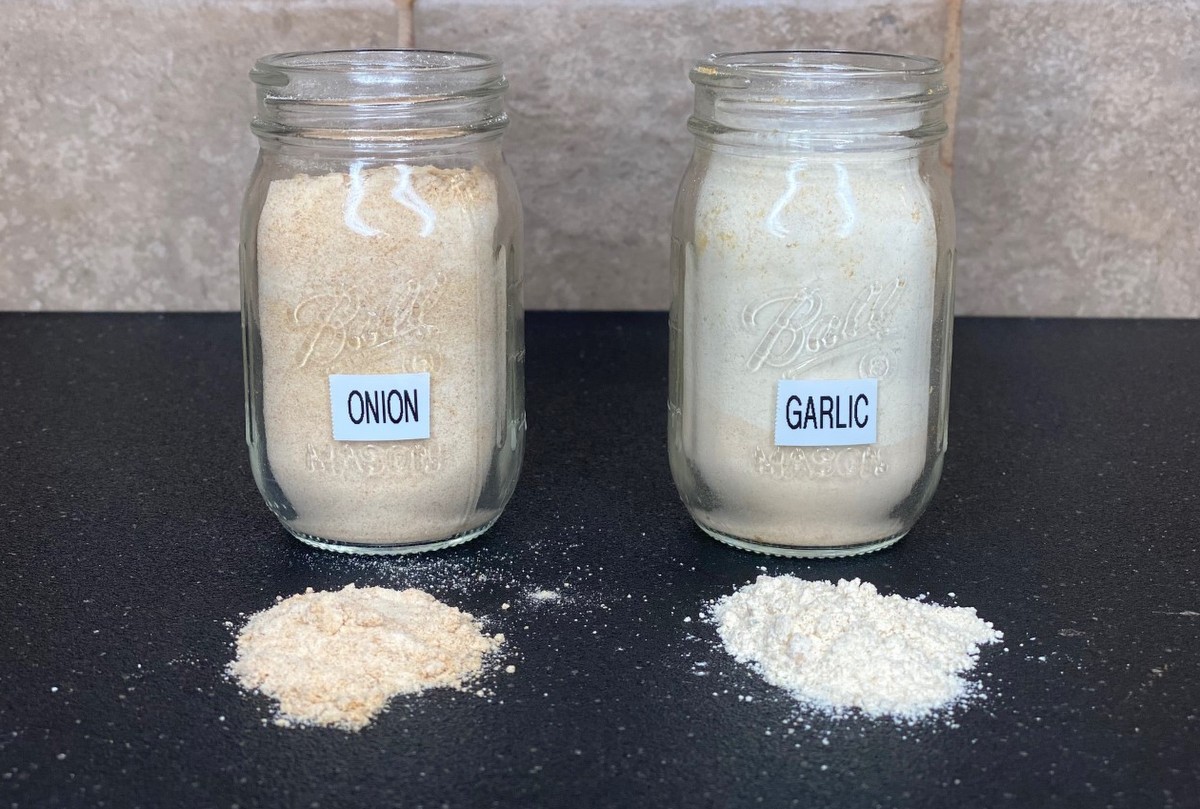
  • Once the onion and garlic are dry enough, you need to process it into powder. The best way to do this is using a clean coffee grinder.  You can also use a blender, food processor, or a mortar and pestle.  Process the dried onions until a nice powder is formed.  Do the same for the garlic.

  • Store in airtight containers.

**If you do not have a dehydrator, you may use your oven.  Set it on the lowest temperature setting possible.  The lowest my oven would go was 170°F.  Lay the onion and garlic slices on parchment lined baking sheets in a single layer.  Just like in the dehydrator, the drying time will vary.  I recommend leaving them for 4 hours and then begin checking every 30 minutes to an hour to test the dryness.  Mine took about 6-8 hours total.

Tips:

  • If you process the garlic or onion and your powder sticks together, pop it back in the dehydrator or oven and continue to remove the excess moisture. It should be nice and powdery.
  • If you don’t want to create powder, you can keep as chopped dehydrated onion and garlic. Still great for seasoning dishes.


Recipe and photos by Stephanie Borzio.  Stephanie is a mom of three active boys and is an autoimmune warrior.  After battling her own health for several years, Stephanie found healing through food and lifestyle changes, including joining Blooming Glen Farm CSA of which she is a long time member.  She is a Board Certified Integrative Nutrition Health Coach who is passionate about sharing healthy living tips and real food recipes.  Instagram and Facebook: Tru You Essentials; Website: www.truyouessentials.com

Shishito peppers are one of my favorite discoveries from the farm.  I didn’t even know they existed before receiving them in our CSA shares at Blooming Glen.  They are generally mild but have the occasional spicy kick- you never know which one you are going to get!  We have been receiving shishito peppers in our shares for a few weeks and I wanted to showcase them in this week’s recipe.  What began as one way to use them quickly turned into three- charred shishitos, quick pickled shishitos, and tempura shishitos!

Shishito Peppers- Three Ways!

#1: CHARRED SHISHITOS
Ingredients:
20-30 shishito peppers
2 Tbsp olive oil
Coarse sea salt

  • Wash and dry peppers.
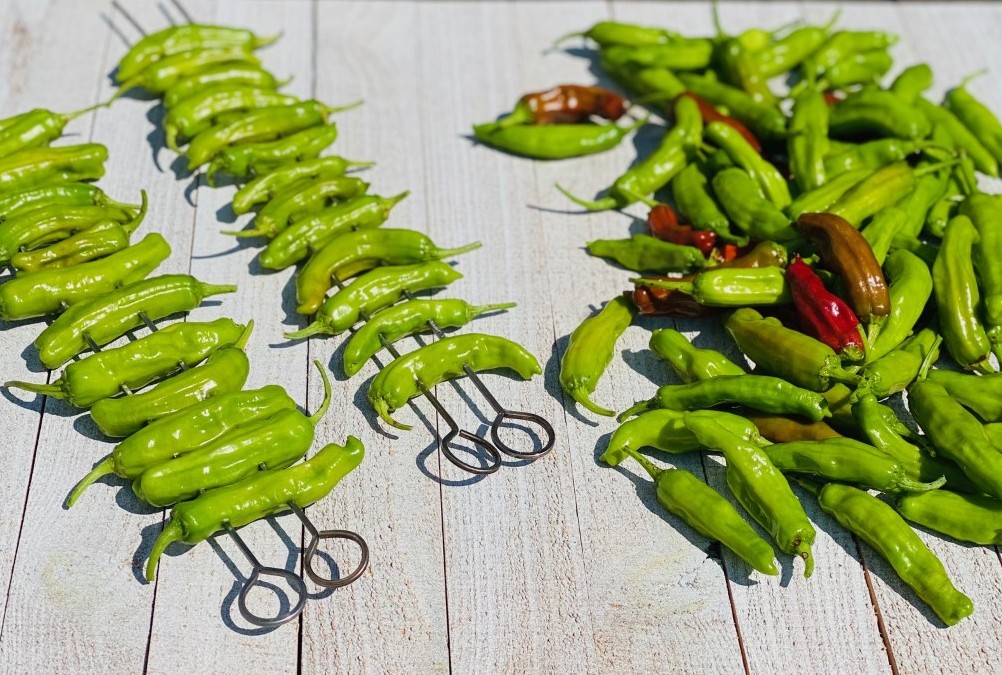
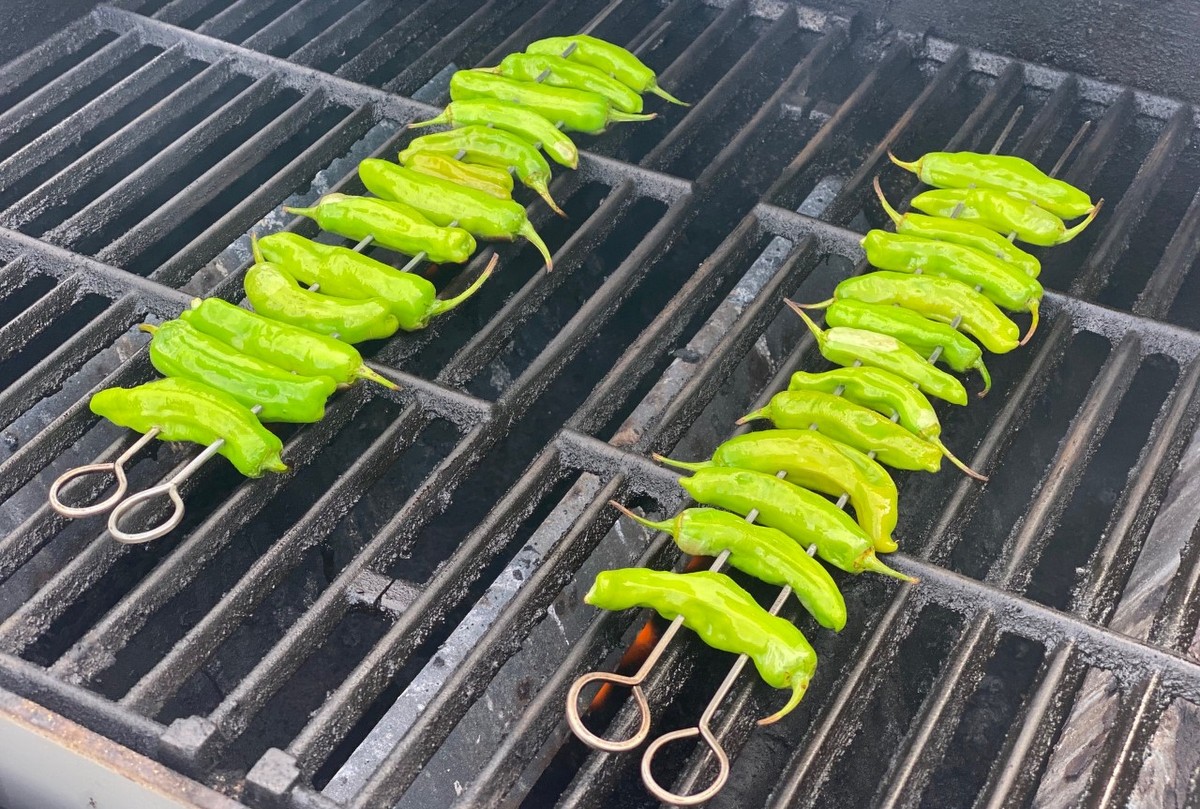
  • Place peppers on skewers. It is best to use two skewers per row of peppers so that they don’t move around.
  • Brush both sides with oil.
  • Heat grill to high. Grill should be about 450°F.
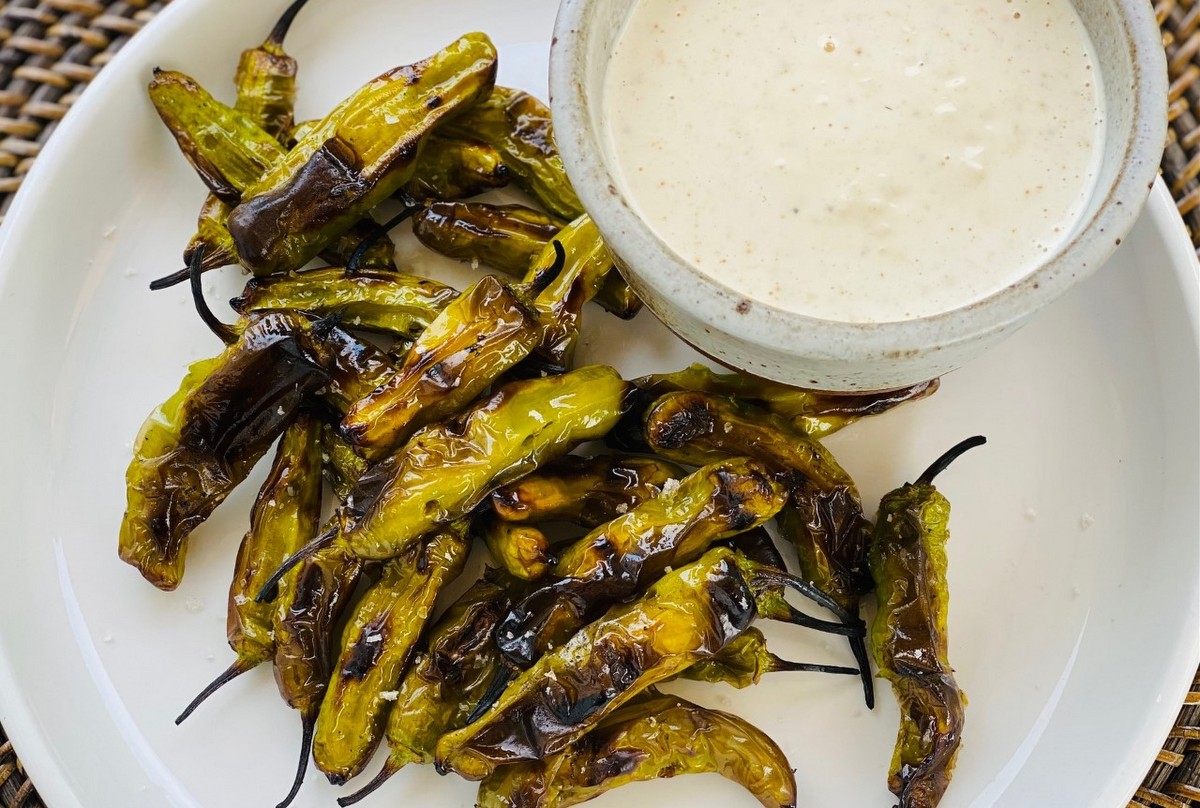
  • Grill skewers for 4-5 minutes on one side. Flip and cook an additional 4-5 minutes.  Peppers should be cooked and charred where they hit the grill grates.

  • Remove from grill and pull the peppers off the skewers.
  • Sprinkle with salt and serve with roasted garlic sauce.

ROASTED GARLIC SAUCE
Ingredients:
1 small head garlic
½ cup mayonnaise
1/3 cup plain yogurt or sour cream
½ tsp sea salt
¼ tsp black pepper
½ tsp onion powder
¼ tsp paprika

  • Wash garlic head and cut off the top. Wrap in foil.  Bake at 350°F for 20 minutes.
  • Remove garlic from oven and let cool for a few minutes.
  • Once you can handle the garlic, remove the roasted cloves from the papery skins.
  • Place the cloves in a bowl and smash them with a fork.
  • Add the remaining ingredients and mix well.
  • Chill before serving.


#2- QUICK PICKLED SHISHITOS
Ingredients:
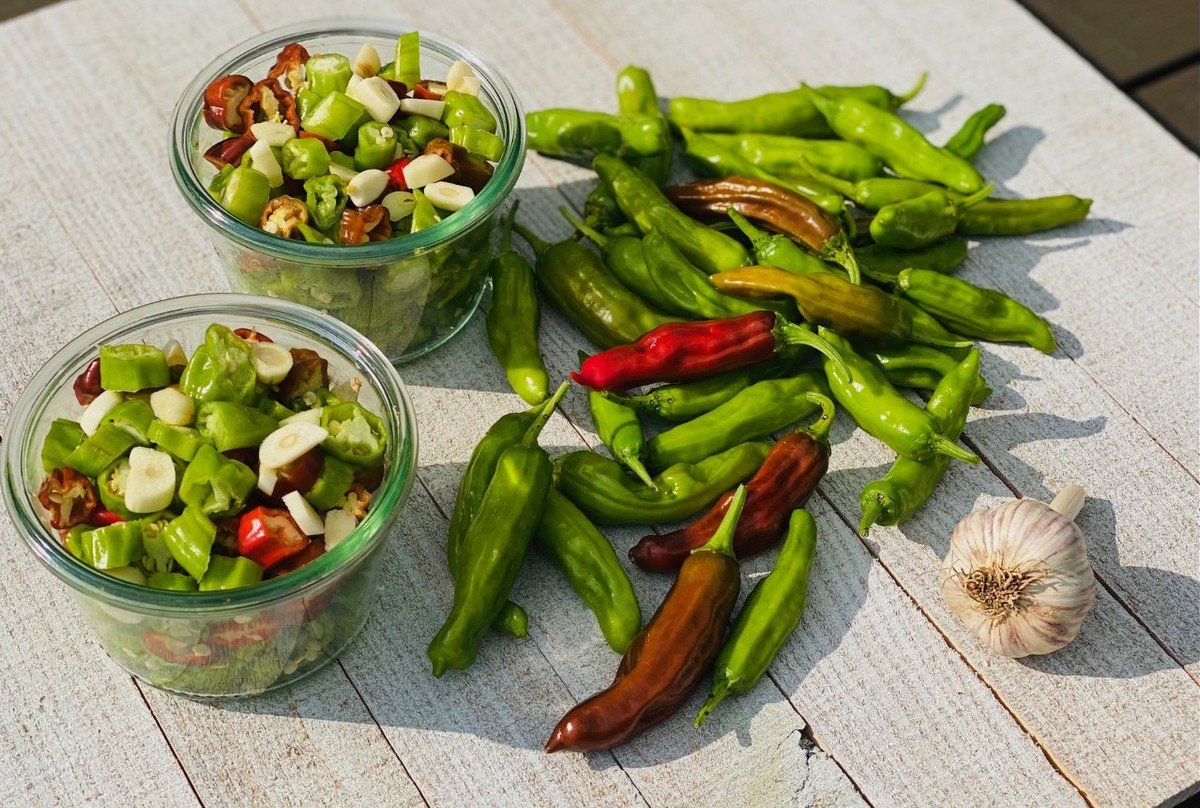
3 cups shishito peppers, sliced into rings
4 cloves garlic, sliced
2 tsp sea salt
1½ cups vinegar (apple cider vinegar, white vinegar, or a mixture of both)
¾ cup water

  • Tightly pack the peppers and garlic into one or two glass jars. Sprinkle salt over top.
  • In saucepan, heat vinegar and water to a boil. Reduce to a simmer and cook for 5 minutes.
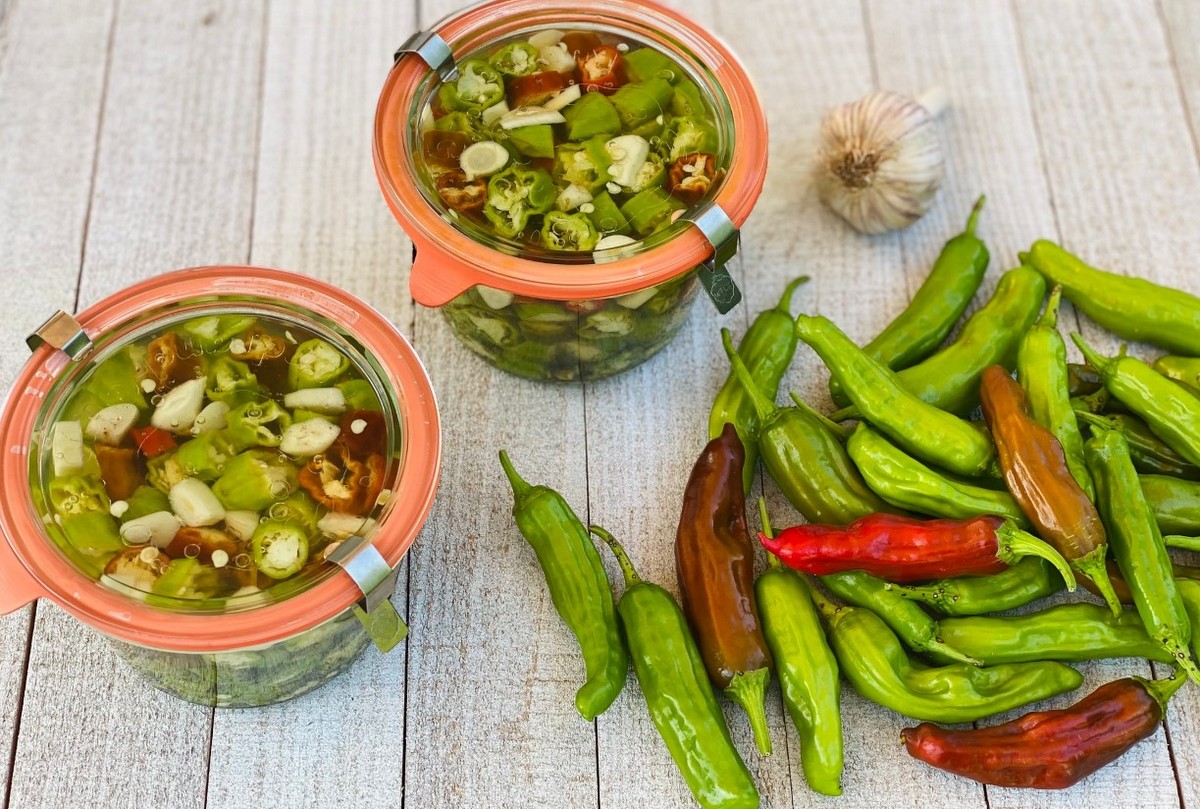
  • Pour hot brine over the peppers and garlic. Liquid should cover all of the peppers and garlic.
  • Cover jars, let cool on the counter, and then refrigerate.
  • Allow to marinate for 24 hours.
  • Enjoy with tacos, on chili, on sandwiches, on salads, or right out of the jar!

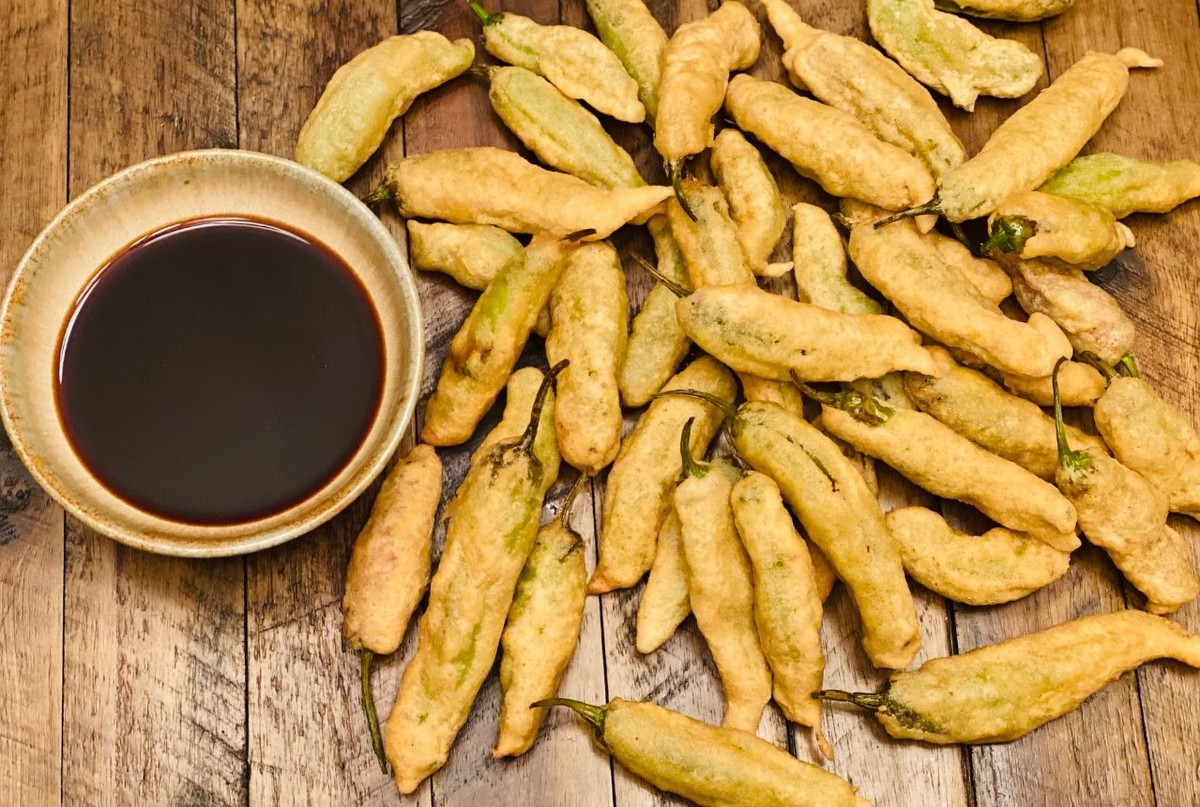
#3- TEMPURA SHISHITOS
Ingredients:
40 shishito peppers
1 egg
¾ cup plain seltzer or sparkling water
1 tsp sea salt
¾ cup all purpose flour (best gluten free option- cassava flour)
4-5 cups frying oil (avocado oil, coconut oil, palm shortening, etc.)
Soy sauce or coconut aminos, for dipping

  • Wash and dry peppers.
  • In a medium bowl, mix egg, seltzer, and sea salt.
  • Add half of the flour and mix well. Add remaining flour and mix.
  • If batter is too thin, add a little more flour 1 Tbsp at a time. If batter is too thick, add a little more seltzer 1 Tbsp at a time.
  • Heat frying oil in large Dutch oven. The oil should be about 1 ½ – 2 inches deep.  The temperature of the oil should be about 360-380°F.
  • Holding the pepper by its stem, dip it into the batter and gently place in the hot oil. Continue to do this until you have about 6-10 peppers frying.  You don’t want to overcrowd the oil.
  • Fry the peppers for about 3-5 minutes or until golden.
  • Remove from oil and place on a paper towel lined plate.
  • Remove any loose batter pieces from the oil before frying the next batch.
  • Continue cooking until all peppers are fried.
  • Serve with soy sauce or coconut aminos.


Recipe and photos by Stephanie Borzio.  Stephanie is a mom of three active boys and is an autoimmune warrior.  After battling her own health for several years, Stephanie found healing through food and lifestyle changes, including joining Blooming Glen Farm CSA of which she is a long time member.  She is a Board Certified Integrative Nutrition Health Coach who is passionate about sharing healthy living tips and real food recipes.  Instagram and Facebook: Tru You Essentials; Website: www.truyouessentials.com

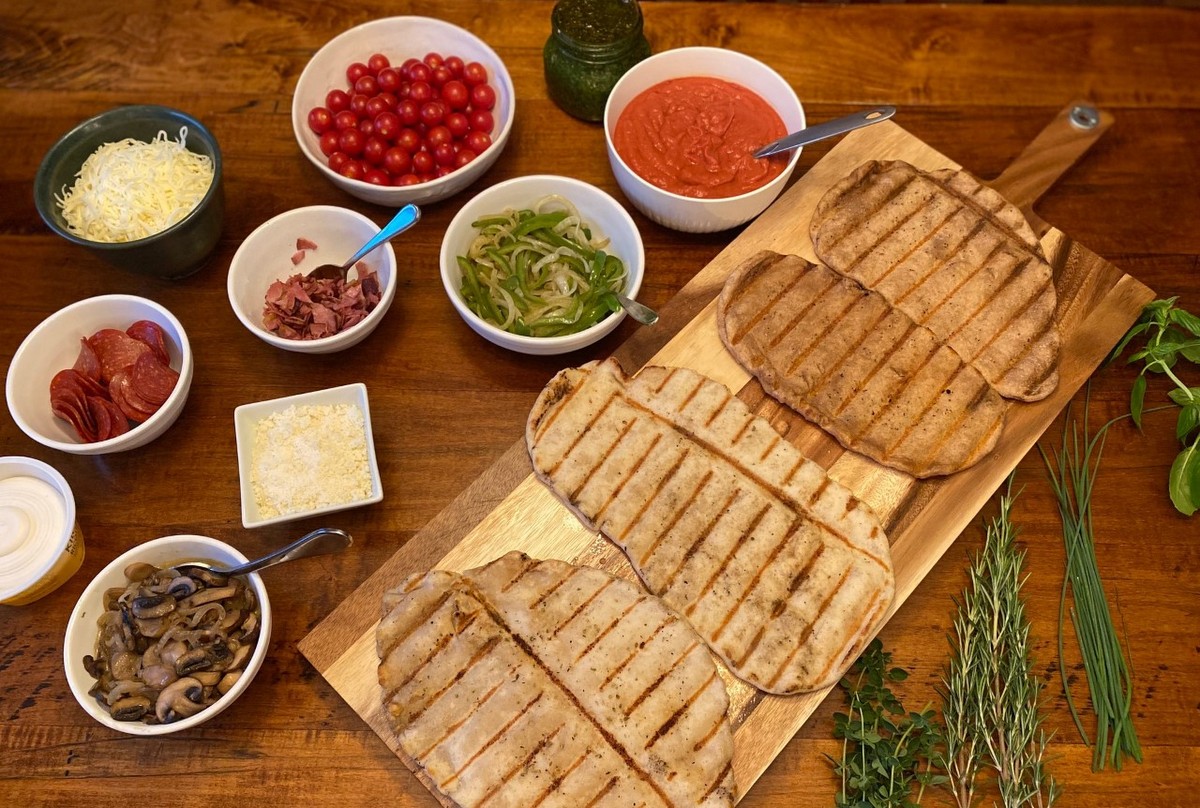
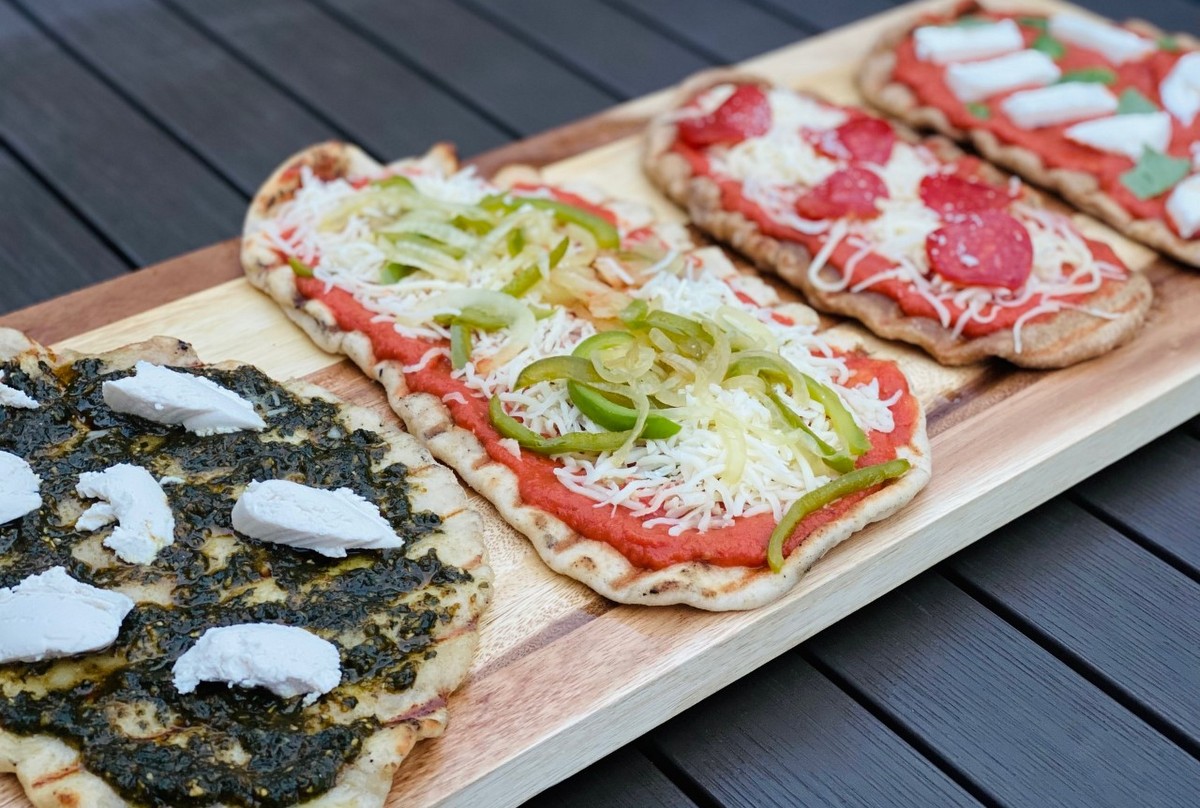
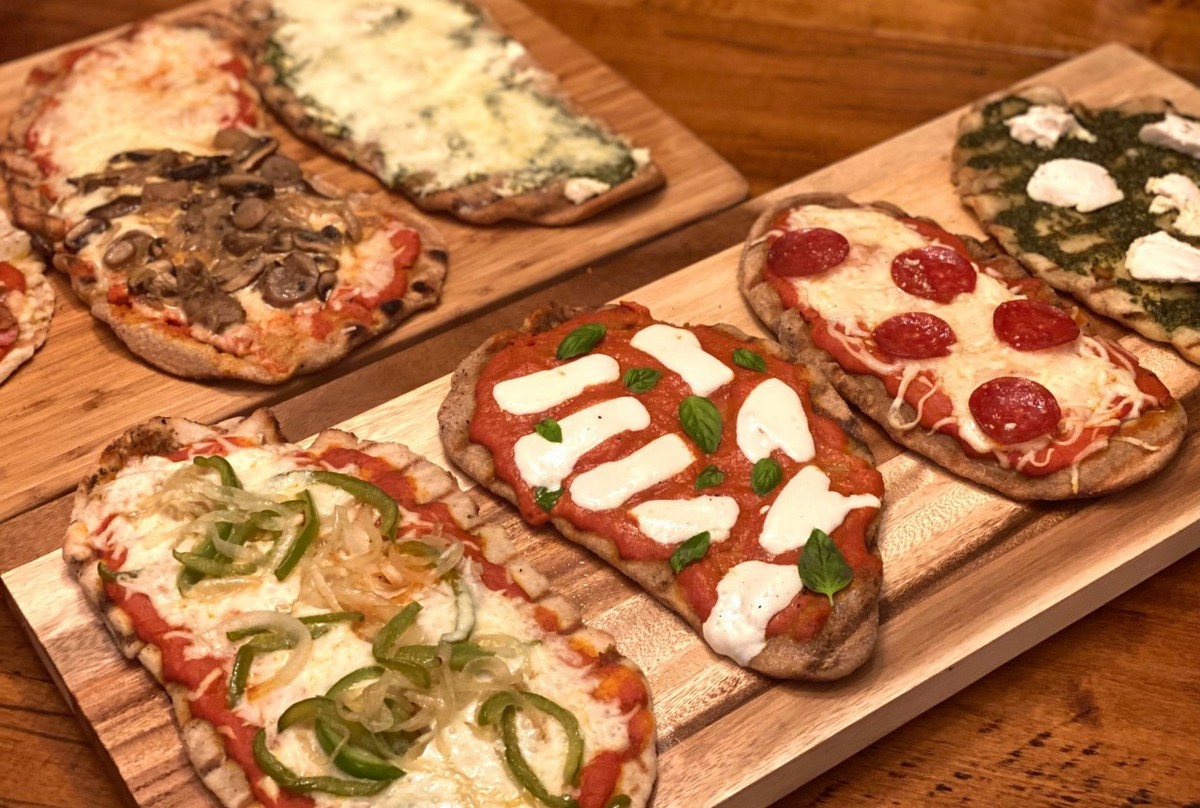
Grilling during the summertime keeps the heat of cooking out the kitchen.  I have been wanting to create a grilled pizza recipe for a while and this one does not disappoint.  While it takes a little time to prepare all of the ingredients, it is a versatile recipe that can serve as a base for you to try all different kinds of pizzas!  Keep it simple with a roasted tomato sauce and freshly grated cheese from our cheese shares or top it with a homemade pesto and a little ricotta.  You can even slice up the peppers, onions, garlic, or other vegetables from our shares and create a veggie lover pizza.  Grilled pizza is amazing- cooking the crust directly on the grill grates gives it a fantastic texture and topping the pizzas with farm fresh ingredients creates an explosion of summertime flavors.

Grilled Pizza

*This recipe makes 4 personal size pizzas.

Ingredients:
2 lbs pizza dough**
3 Tbsp olive oil or avocado oil
1 tsp onion powder
1 tsp garlic powder
½ tsp sea salt
¼ tsp black pepper
½ tsp oregano

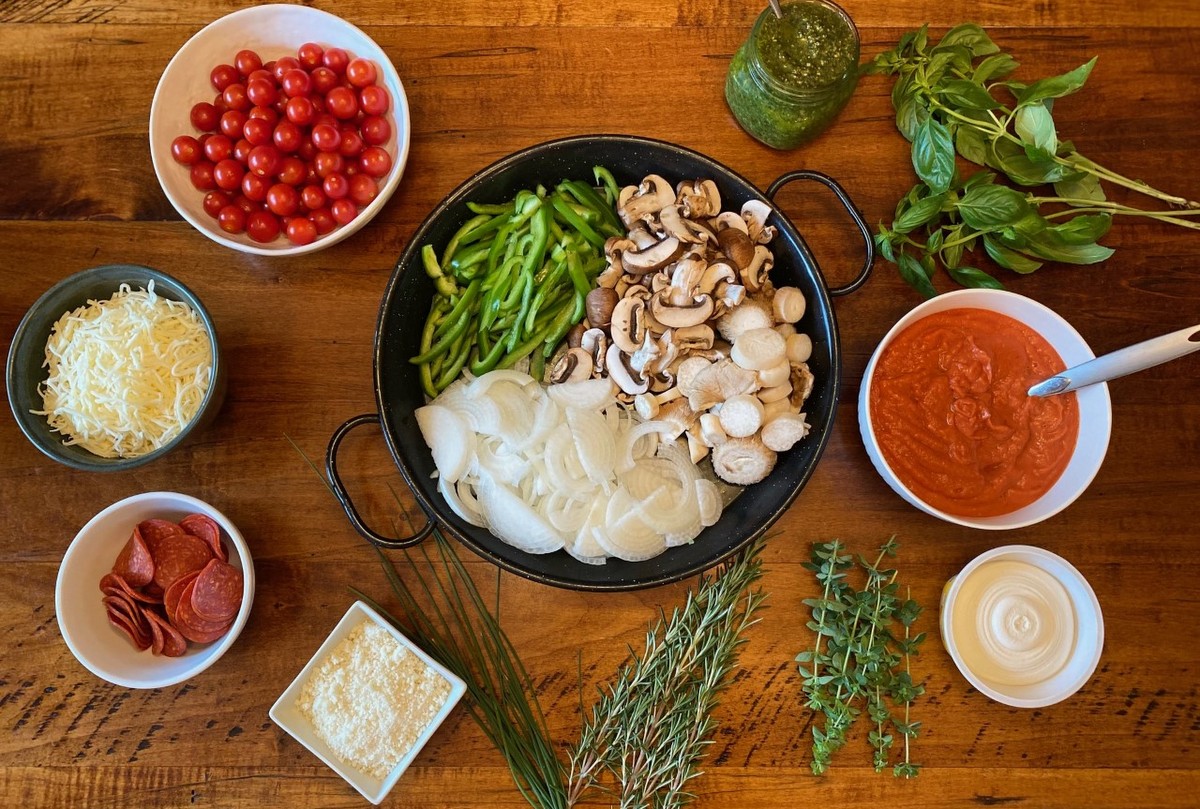
Pizza toppings of choice:

Prepare all pizza toppings first. Sauté or roast vegetables.  Make sauce or pesto.  Slice or grate cheese.  If using meat, make sure it is precooked.  Once you begin cooking, this goes very quickly, so you want to have everything prepared and ready to go.

  • Mix all spices together in a small bowl.
  • Preheat grill to medium heat- you want it about 400°F.
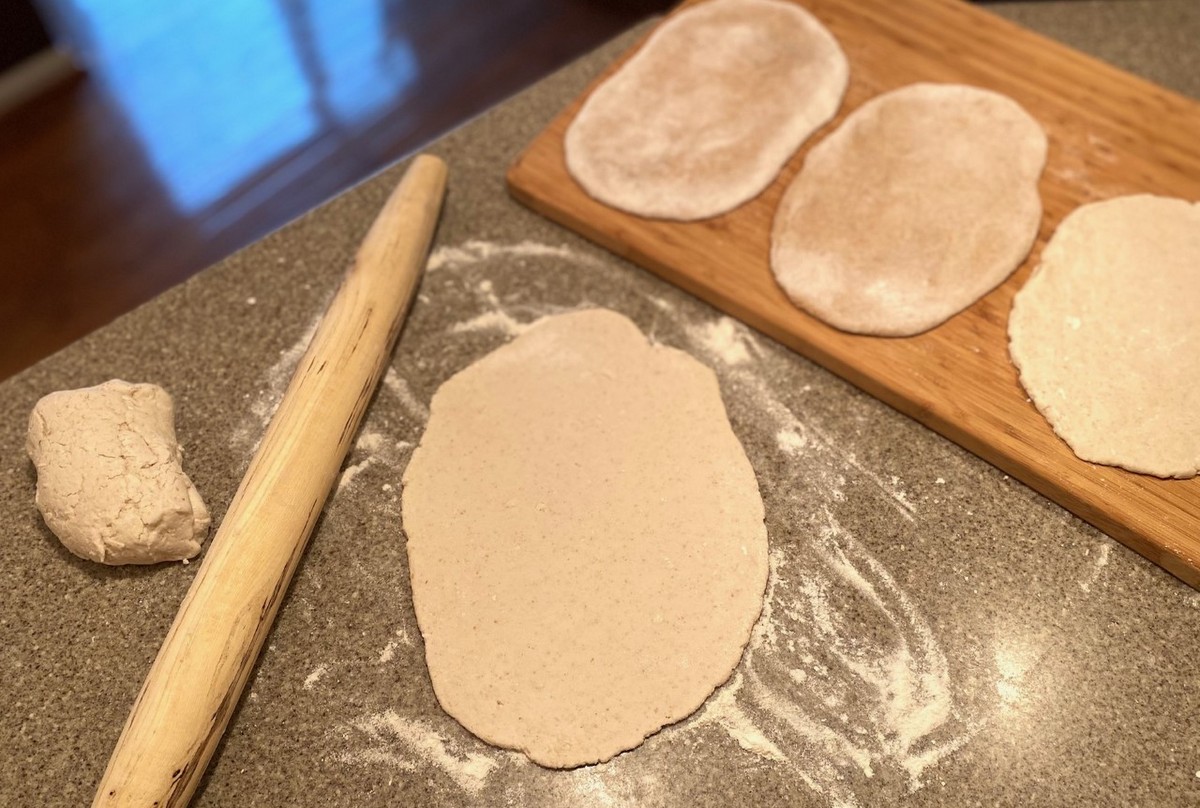
  • Split pizza dough into four equal balls. Roll each ball out onto a floured surface.  You can either create round pizzas (measuring about 8 inches in diameter) or oval pizzas (measuring about 10 inches long).

  • Lay your rolled dough on a flat surface- a cookie sheet or cutting board works great.
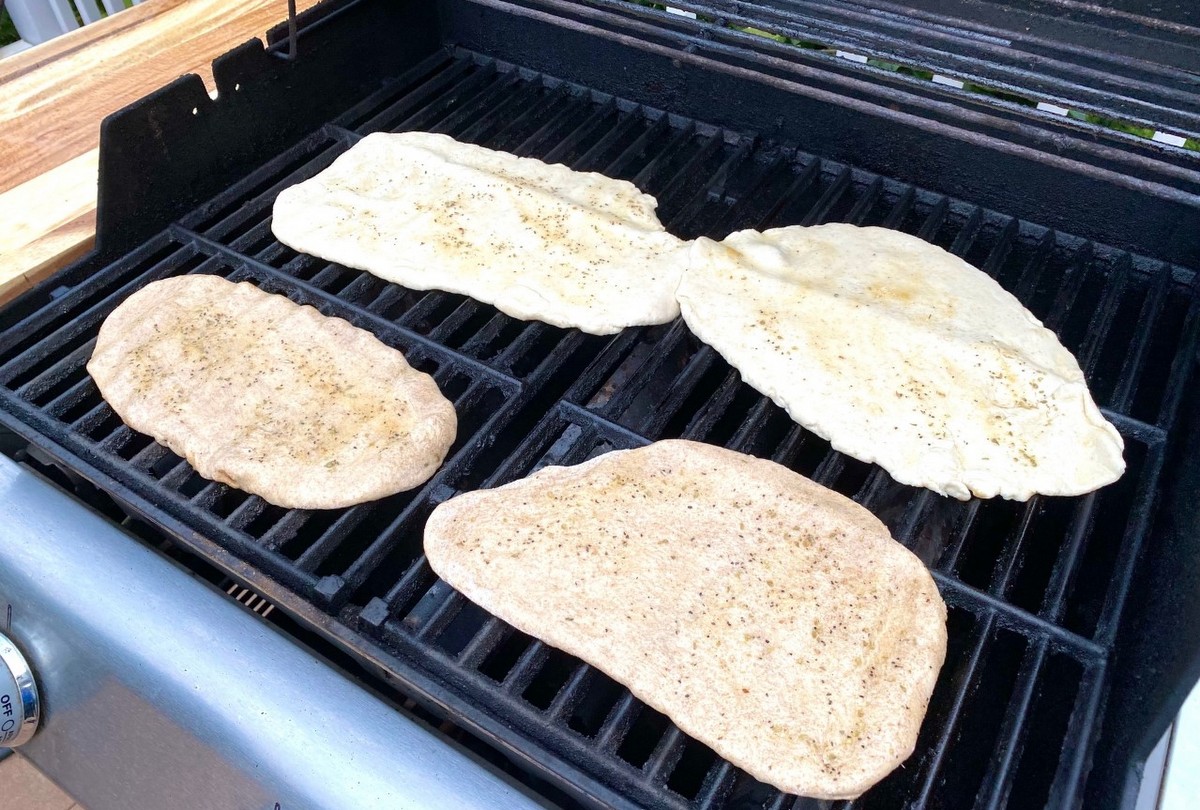
  • Brush each side with oil and sprinkle with the spice mix.
  • Place dough on the grill grates. Grill for 3-4 minutes or until you see nice grill marks on the underside of the dough.

  • Remove from grill.

  • With the grilled side up, add toppings of choice.

  • Place back on the grill and cook for an additional 4-5 minutes.
  • Remove from grill. Slice and serve.

**You can make your own homemade pizza dough or use your favorite store bought one.  For those that are gluten free, I was able to find a frozen gluten free dough that was wonderful at Kimberton Whole Foods!

Recipe and photos by Stephanie Borzio.  Stephanie is a mom of three active boys and is an autoimmune warrior.  After battling her own health for several years, Stephanie found healing through food and lifestyle changes, including joining Blooming Glen Farm CSA of which she is a long time member.  She is a Board Certified Integrative Nutrition Health Coach who is passionate about sharing healthy living tips and real food recipes.  Instagram and Facebook: Tru You Essentials; Website: www.truyouessentials.com

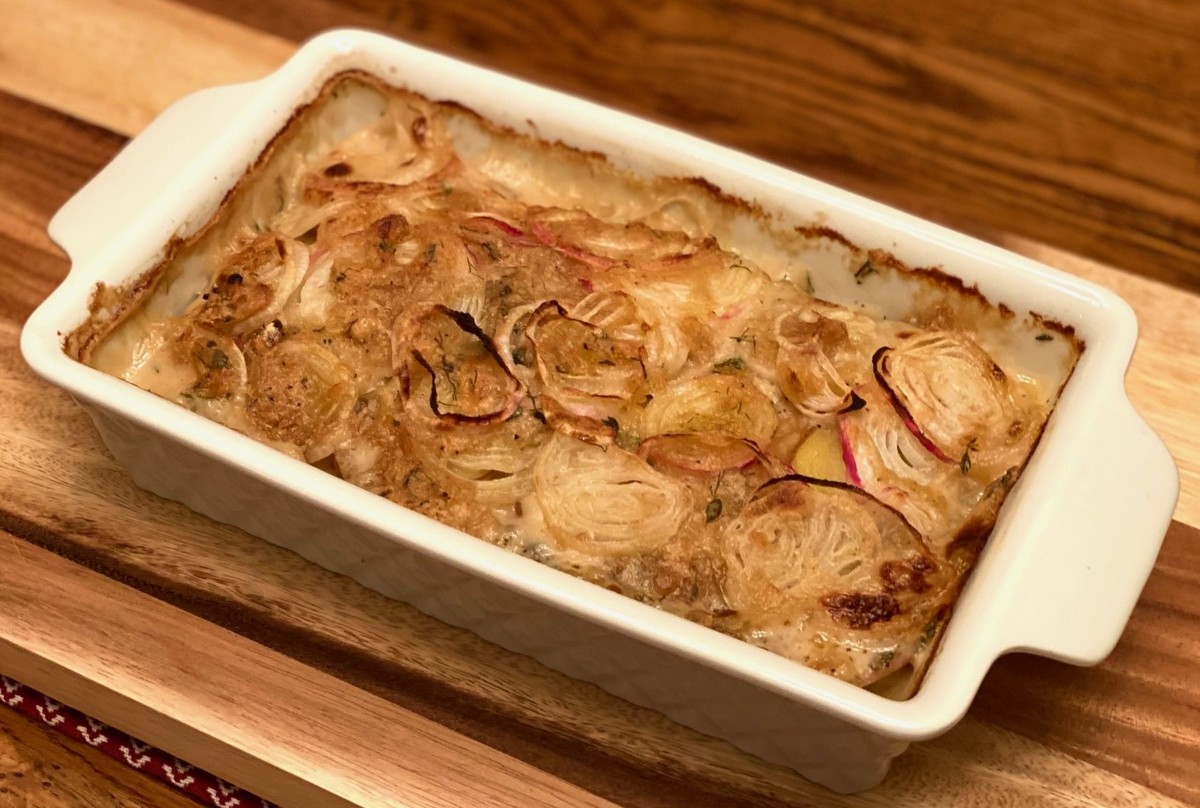
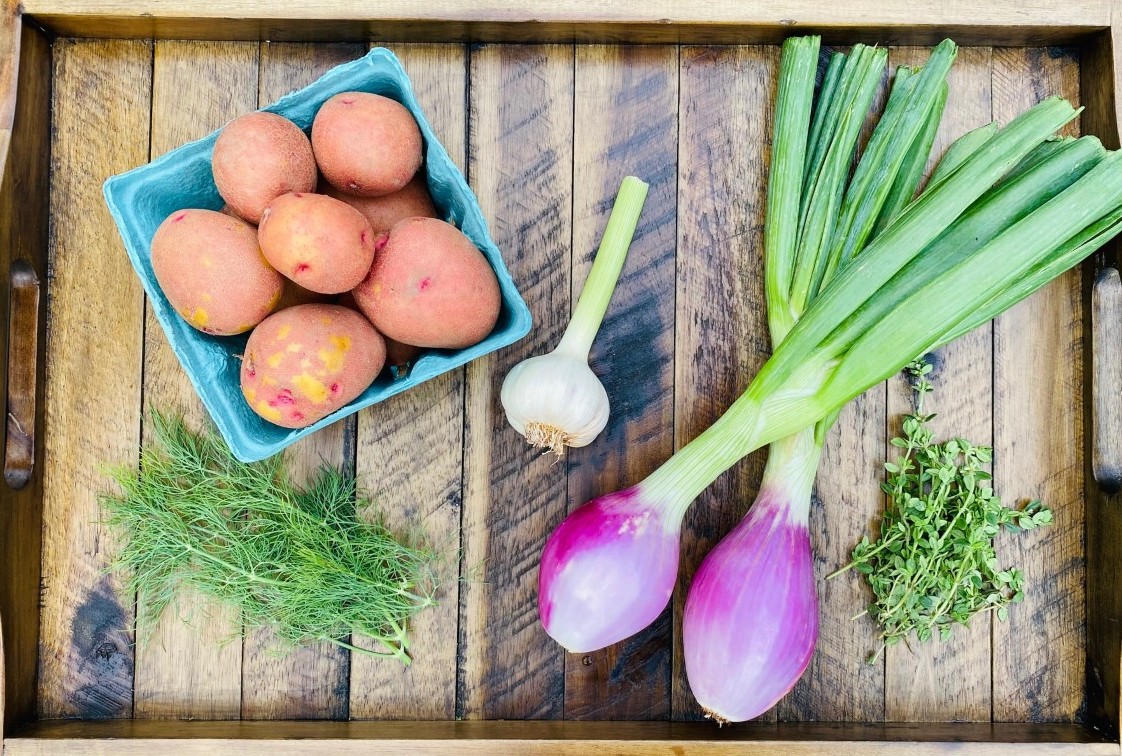
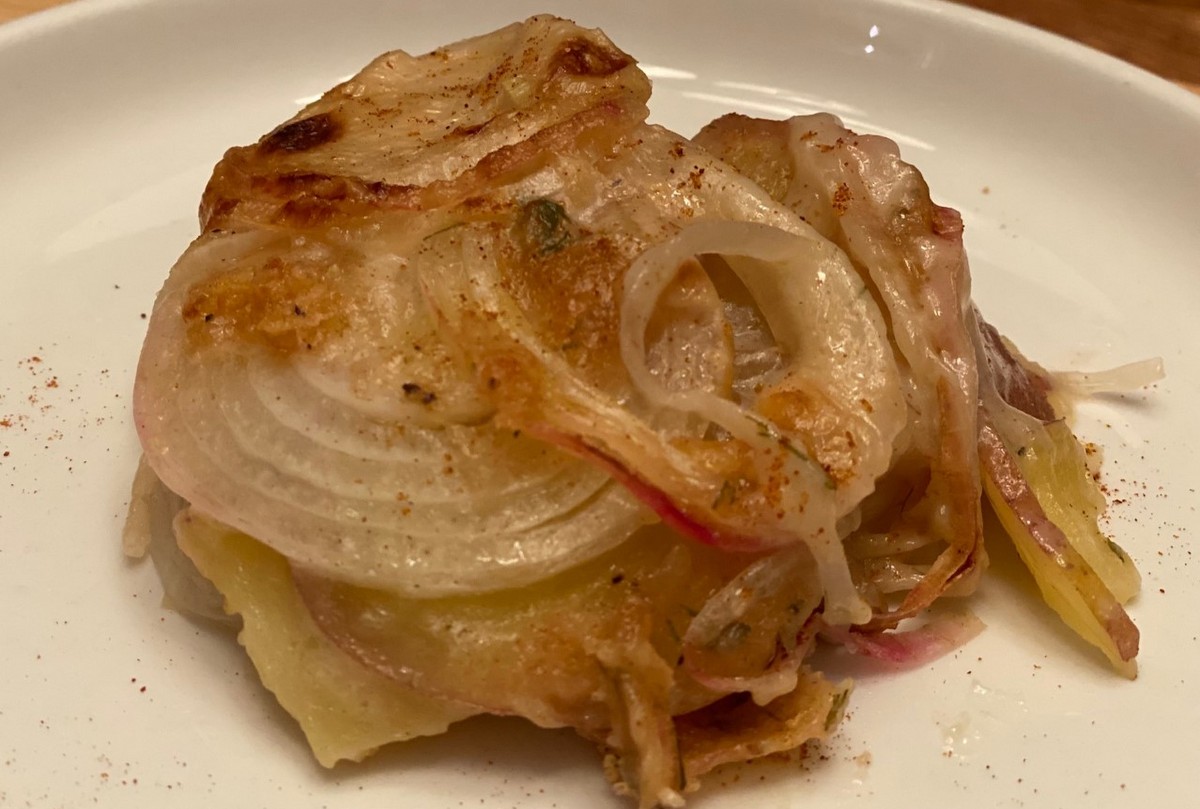
New potatoes are freshly harvested from the ground and are uncured.  Leaving their thin skins on adds color, flavor and nutritional value to culinary dishes.  Combining these potatoes with butter, spices, and fresh herbs in a casserole make a great side dish.

Herb Scalloped Potatoes

Ingredients:
1 lb new potatoes
2 fresh torpedo onions (bulb only- reserve tops for another recipe or broth)
6 Tbsp salted butter, divided
½ cup flour (for gluten free options- use an all purpose blend or cassava flour)
1 tsp sea salt
¼ tsp black pepper
¾ tsp paprika
2 Tbsp + 1 tsp minced fresh herbs (dill, thyme, rosemary, sage, etc.)
2-3 cloves fresh garlic, minced
¼ cup parmesan cheese or nutritional yeast
2 cups milk (dairy or nondairy)

  • Preheat oven to 375°F.
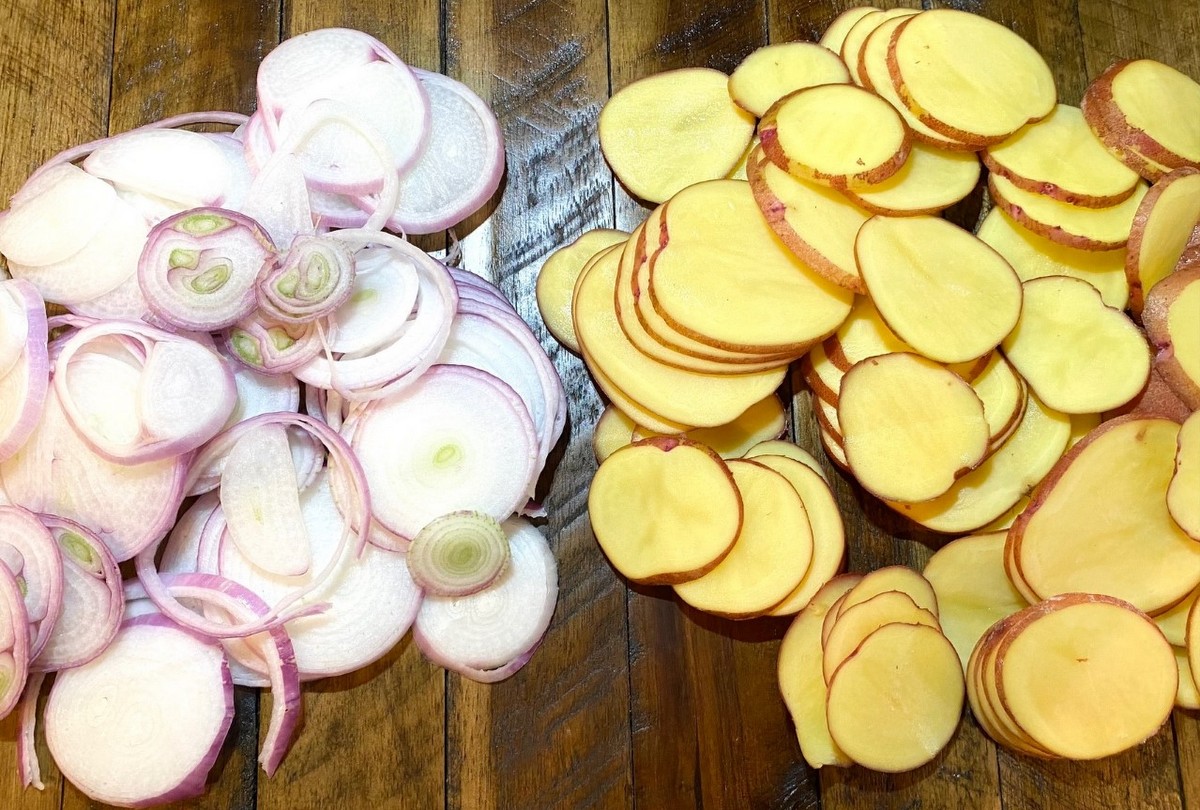
  • Thinly slice potatoes. I used a mandolin set on 1/8 inch setting.

  • Thinly slice onions.
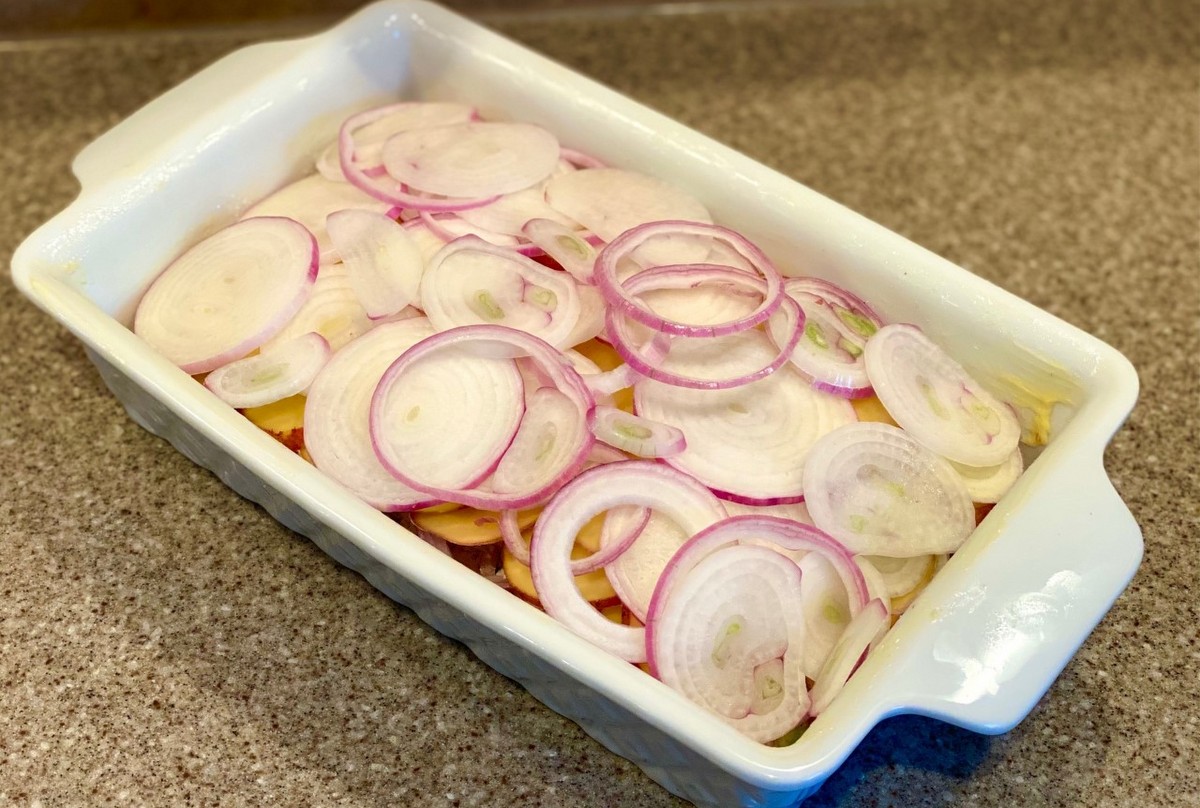
  • Use 1 Tbsp butter to grease baking dish. I used a 6 x 10 inch pan.
  • In the baking dish, layer half of the potatoes and then half of the onions.

  • Cut butter into thin slices and place 3 Tbsp on top of the onions.
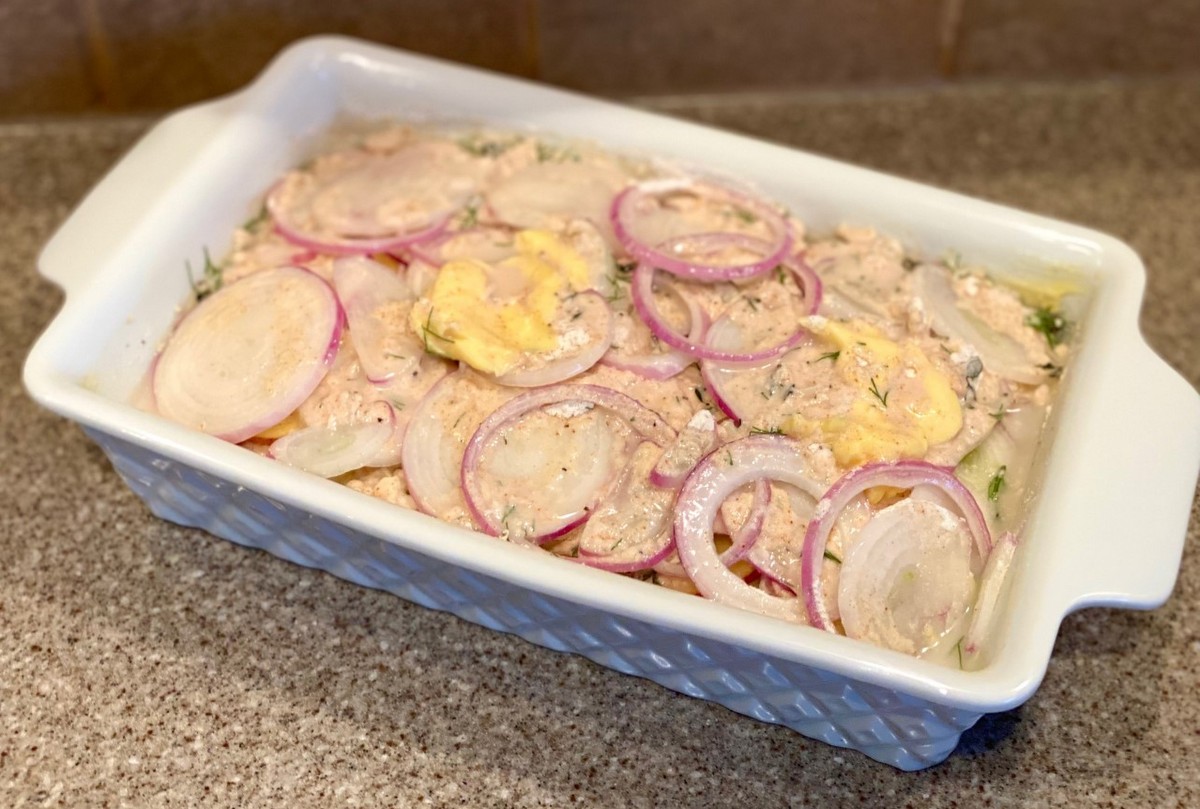
  • In a medium bowl, mix flour, sea salt, black pepper, paprika, 2 Tbsp fresh herbs, garlic, and parmesan cheese or nutritional yeast.
  • Sprinkle half of the flour mixture into the baking dish on top of the onions and butter.
  • Layer the rest of the potatoes, then the rest of the onions, then the rest of the butter (2 Tbsp), and finally the remaining flour mixture.

  • Slowly add milk to the dish.
  • Cover with foil and bake for 45 minutes.
  • Remove foil and bake for an additional 15 minutes.
  • Broil for 3-5 minutes to crisp top. Remove from oven and let stand for 5 minutes.
  • Top with remaining 1 tsp fresh herbs and a few sprinkles of paprika before serving.

Notes:
*To make dairy free- use vegan butter, nutritional yeast, and dairy free milk.
*Can prepare in advance and refrigerate before cooking.
*Leftovers reheat really well.

Recipe and photos by Stephanie Borzio.  Stephanie is a mom of three active boys and is an autoimmune warrior.  After battling her own health for several years, Stephanie found healing through food and lifestyle changes, including joining Blooming Glen Farm CSA of which she is a long time member.  She is a Board Certified Integrative Nutrition Health Coach who is passionate about sharing healthy living tips and real food recipes.  Instagram and Facebook: Tru You Essentials

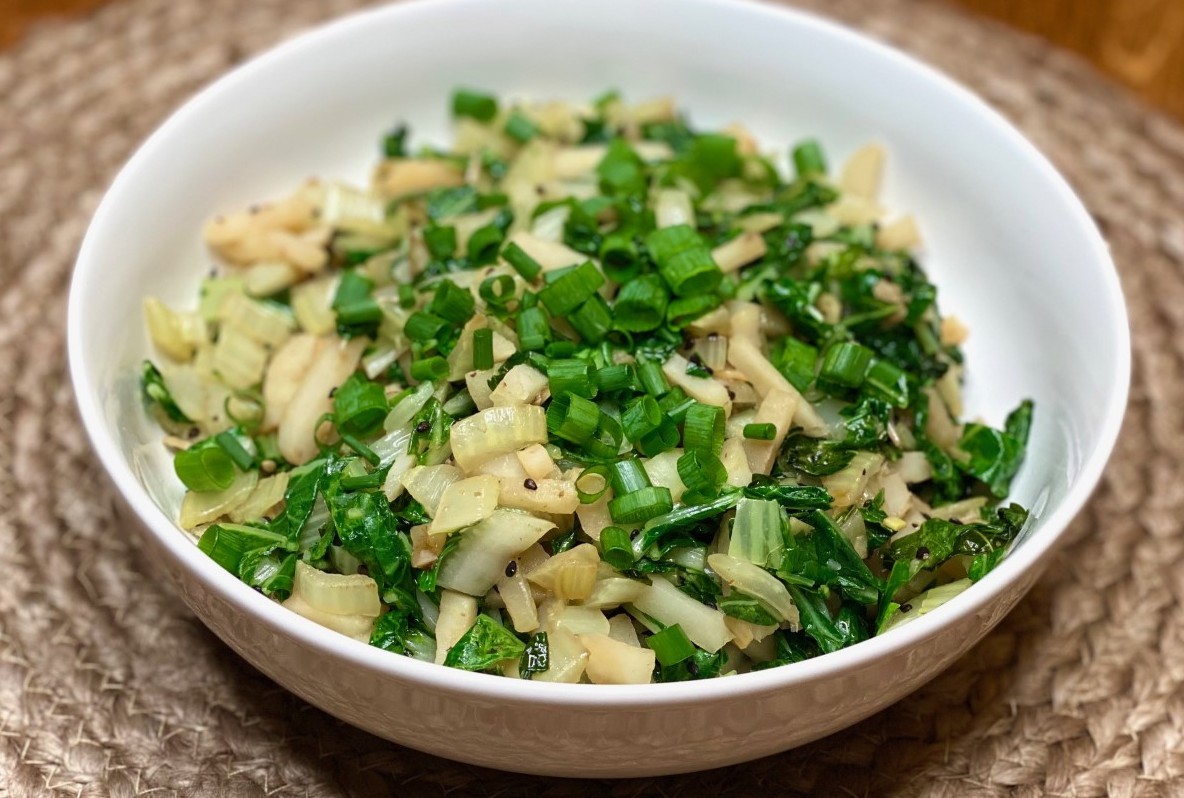
Bok Choy is a nutritious leafy green vegetable that is a member of the Brassica family (like kale and broccoli).  It is high in Vitamin C, K, and A.  It also contains many other beneficial minerals and vitamins.  This recipe showcases this tasty, nutritious vegetable.  Enjoy on top of a bowl of rice or as a side

Sesame Bok Choy
Ingredients:
1 head bok choy, washed
3-4 large cloves garlic (or sub in green garlic or garlic scapes)
1 can (8 oz) sliced water chestnuts
2 Tbsp olive or avocado oil
½ tsp sea salt
¼ tsp black pepper
2 tsp toasted sesame oil
1 ½ tsp sesame seeds (black or white)
2 Tbsp chopped scallions for garnish

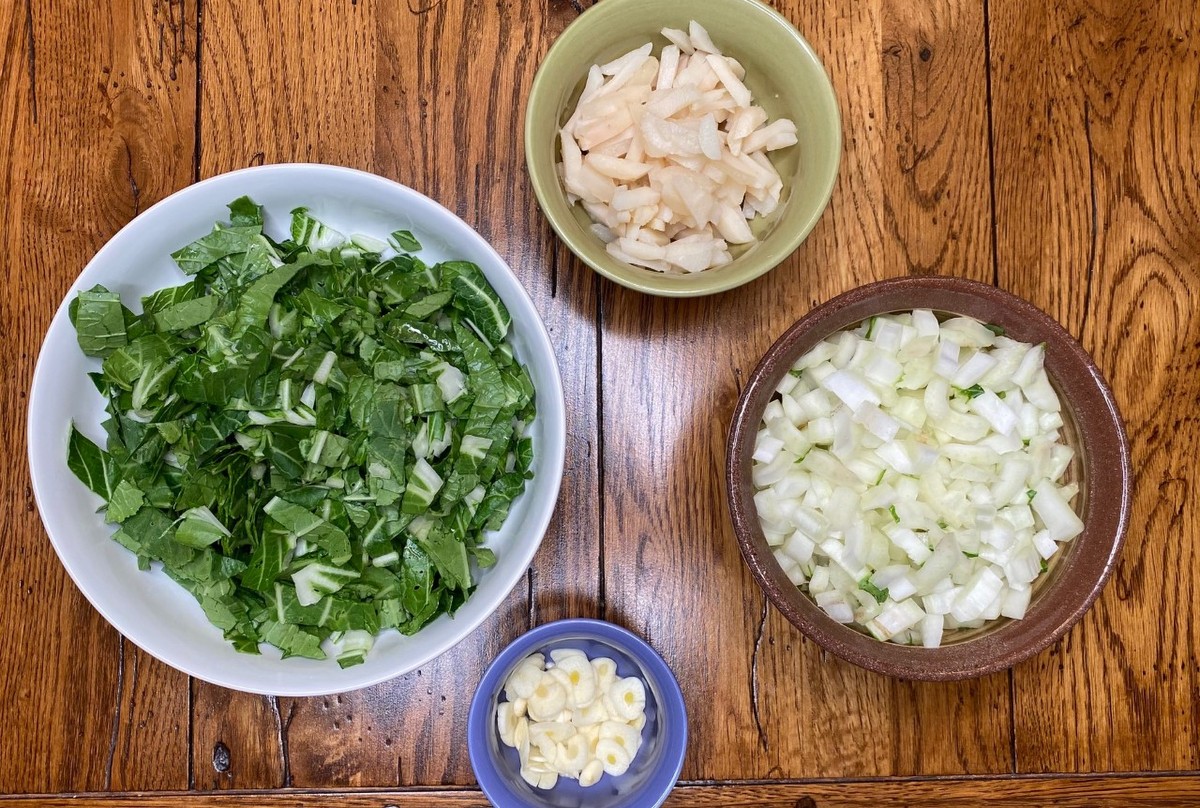
  • Separate bok choy stems from leaves. Chop both and keep separate.
  • Thinly slice garlic cloves and set aside.
  • Chop water chestnuts and also set aside.
  • Heat olive or avocado oil in pan on stovetop.
  • Add garlic and bok choy stems. Sauté on medium low for 5 minutes, stirring to cook through.
  • Add water chestnuts and cook 2 more minutes.
  • Add chopped leaves. Cover and cook about 3 more minutes or until leaves are wilted.
  • Add salt, pepper, sesame oil, and sesame seeds. Mix to combine.
  • Garnish with fresh chopped scallions and enjoy!


Recipe and photos by Stephanie Borzio.  Stephanie is a mom of three active boys and is an autoimmune warrior.  After battling her own health for several years, Stephanie found healing through food and lifestyle changes, including joining Blooming Glen Farm CSA of which she is a long time member.  She is a Board Certified Integrative Nutrition Health Coach who is passionate about sharing healthy living tips and real food recipes.  Instagram and Facebook: Tru You Essentials; Website: www.truyouessentials.com

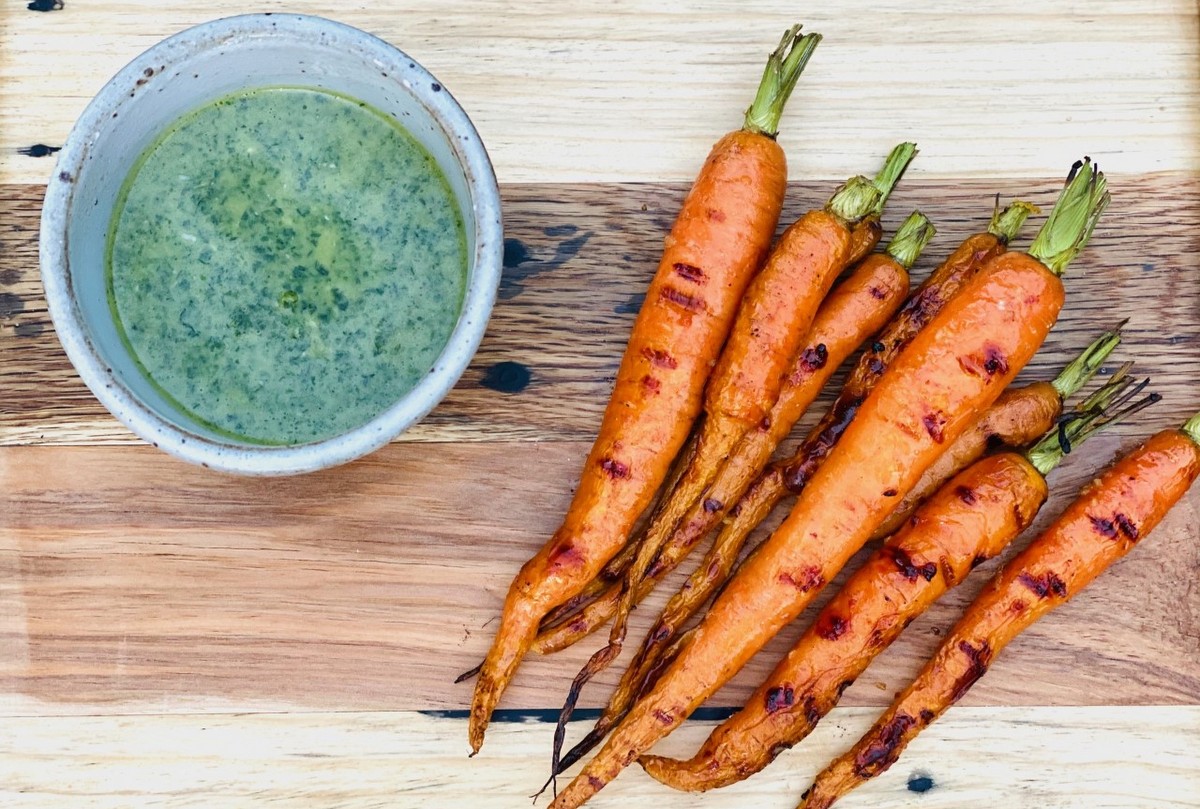
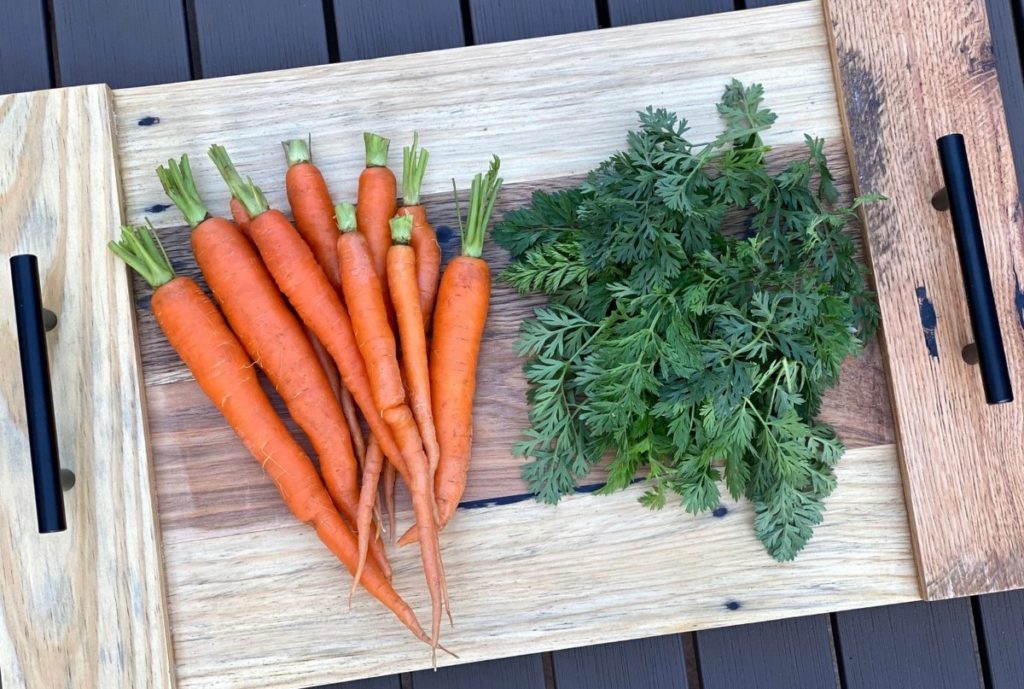
Nothing beats fresh carrots straight from the farm.  The recipes this week use the whole carrot- the delicious orange root vegetables themselves, as well as the beautiful greens that so often get tossed in the compost pile.  When you get a bunch of carrots in your share, remove the greens and store them separately in order to preserve their freshness.  Enjoy these honey ginger carrots and carrot top chimichurri alongside your favorite protein for a complete meal.

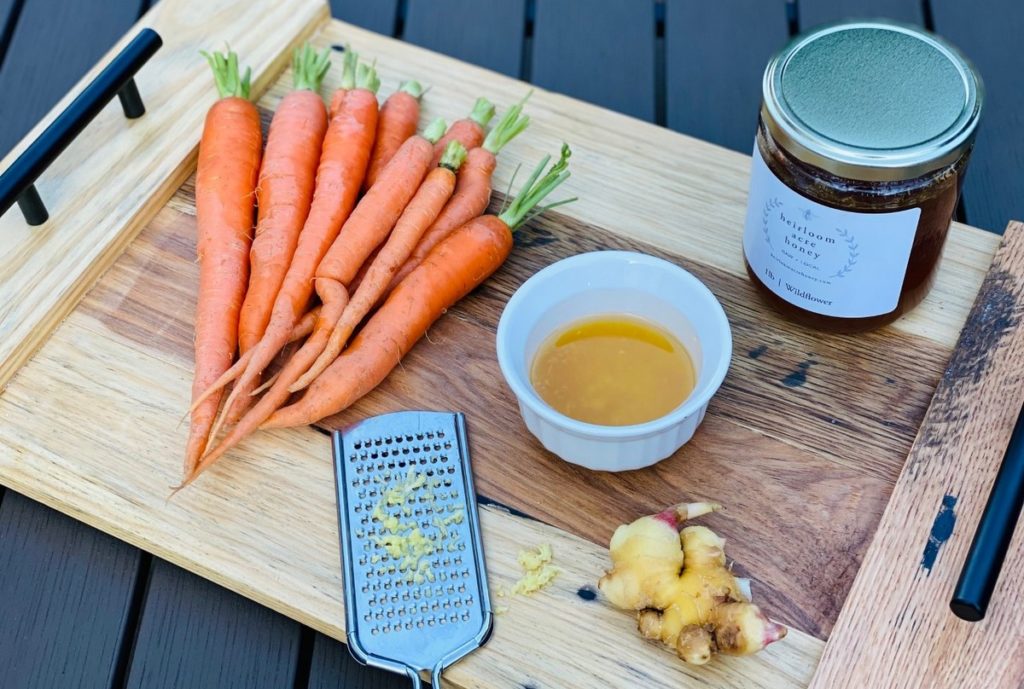
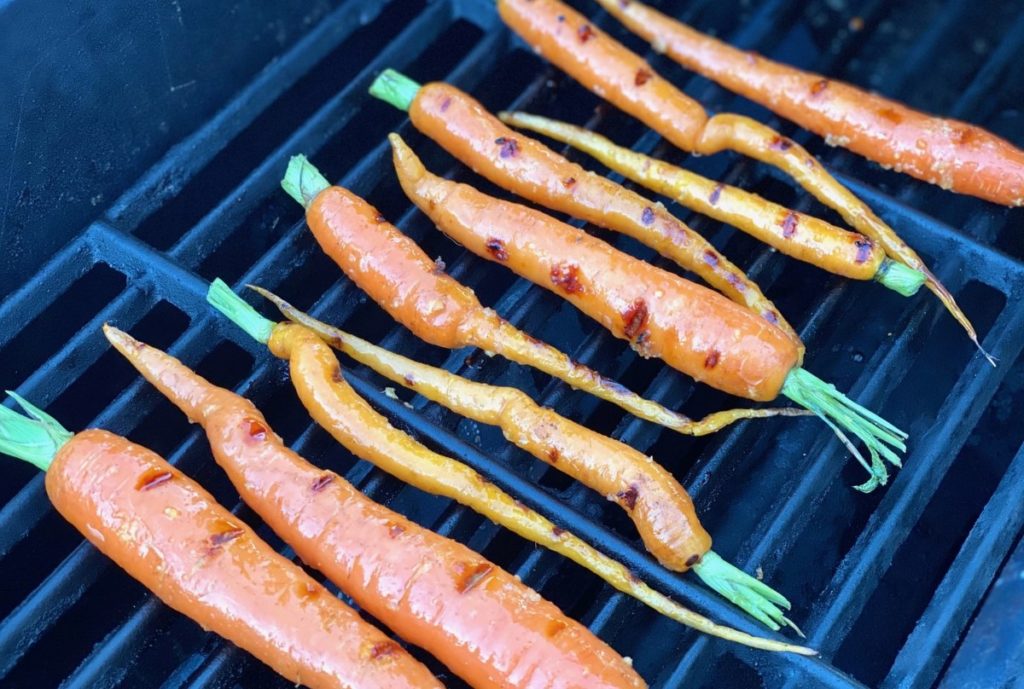
Honey Ginger Carrots

 Ingredients:
1 bunch carrots, about 8-10
1 Tbsp honey
2 Tbsp olive oil or avocado oil
2 tsp fresh ginger, grated

  • Preheat grill or oven, depending on how you are cooking the carrots. Temperature should be around 350-375°F.
  • Clean carrots. You can peel them if you want, but it isn’t necessary, especially with such farm fresh, tender young carrots.
  • Combine honey, oil, and ginger in small bowl. Mix well.
  • Brush marinade on carrots.

  • If grilling, place carrots on grill rack in single layer. Cook for 15-30 minutes or until carrots are fork tender.  The cook time will vary depending on the size of the carrots.  Smaller carrots will cook faster and the larger carrots will take more time.  Rotate carrots halfway through grill time.
  • If roasting, place carrots on a parchment lined baking sheet in a single layer. Roast for 20-30 minutes, rotating halfway through cook time.

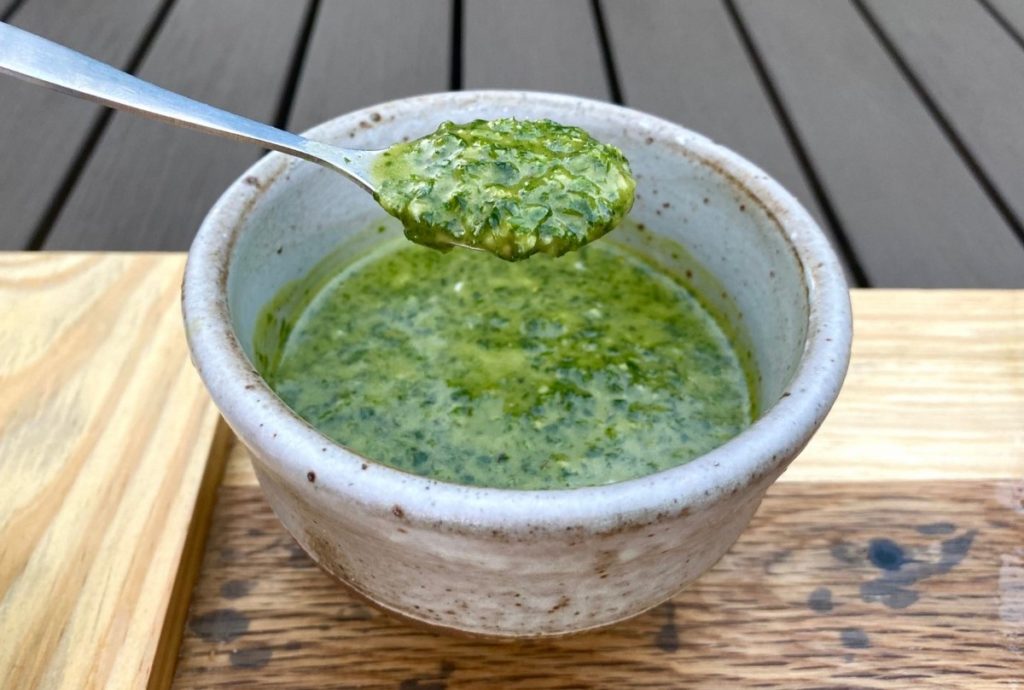
Carrot Top Chimichurri

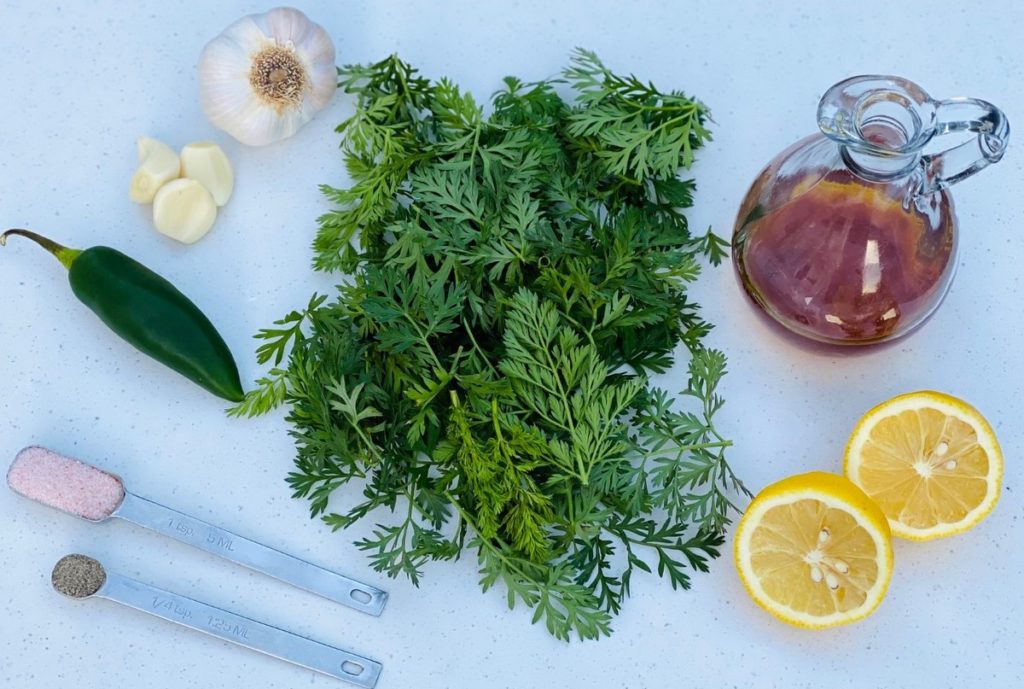
Ingredients:
1 bunch carrot tops, cleaned with main stem removed (should be about 1 cup packed)
½ jalapeno pepper, seeds removed and roughly chopped
2-3 garlic cloves, chopped
1 tsp sea salt
¼ tsp black pepper
¼ cup red wine vinegar
¼ cup olive oil
Juice of ½ lemon, or 1 Tbsp lemon juice
Zest from ½ lemon, or ½ tsp lemon zest

  • Carrot tops require a little more work to clean. Soak them in water, rinse really well, and dry.  I used a salad spinner to remove most of the water from the clean carrot tops.
  • Remove the delicate leaves from the main stems. Discard the tough stem and use the delicate leaves for this recipe.
  • Place carrot top leaves, jalapeno pepper, garlic, sea salt, and black pepper in food processor. Pulse to combine and break down all ingredients.
  • In a small bowl, mix vinegar, oil, lemon juice, and lemon zest.
  • Turn food processor on low, slowly drizzle in the liquid mixture. Scrape down the sides and process one more time.
  • Refrigerate for a few days or freeze for future use.

*This chimichurri is wonderful spooned over beef, chicken, pork, fish, seafood, or roasted veggies.

Recipe and photos by Stephanie Borzio.  Stephanie is a mom of three active boys and is an autoimmune warrior.  After battling her own health for several years, Stephanie found healing through food and lifestyle changes, including joining Blooming Glen Farm CSA of which she is a long time member.  She is a Board Certified Integrative Nutrition Health Coach who is passionate about sharing healthy living tips and real food recipes.  Instagram and Facebook: Tru You Essentials; Website: www.truyouessentials.com
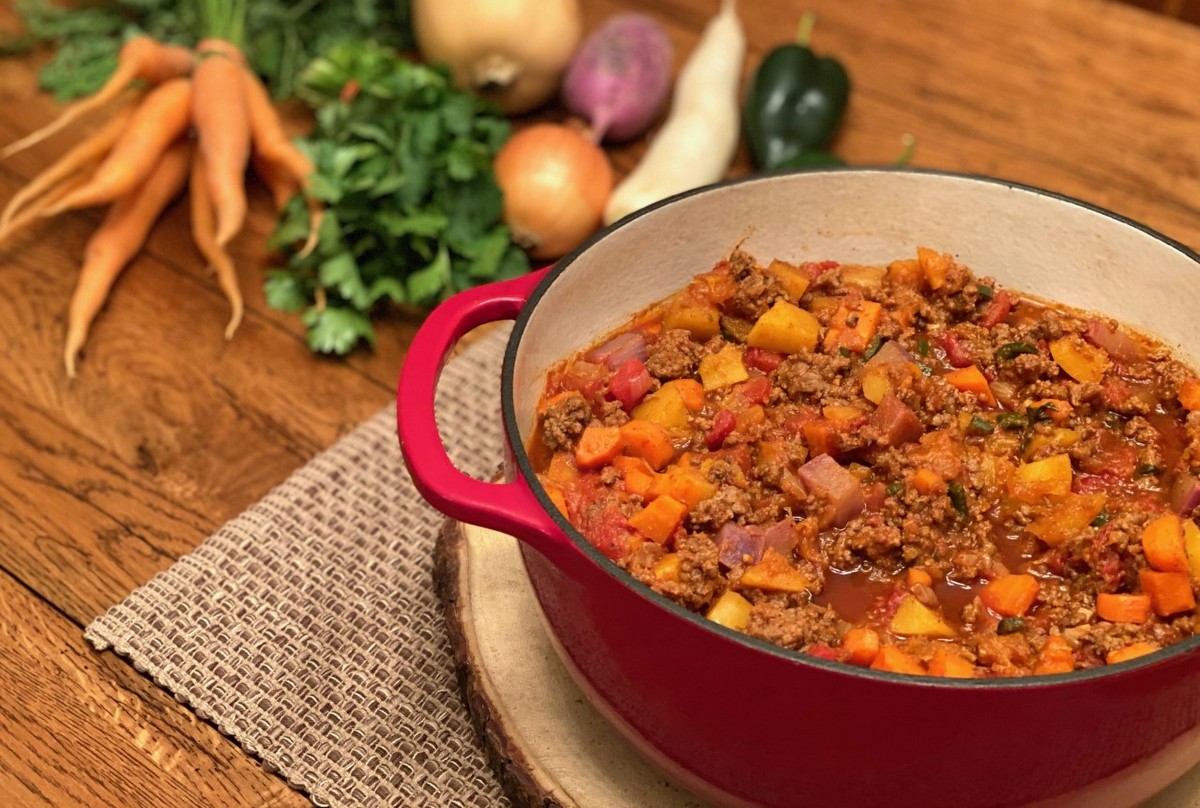
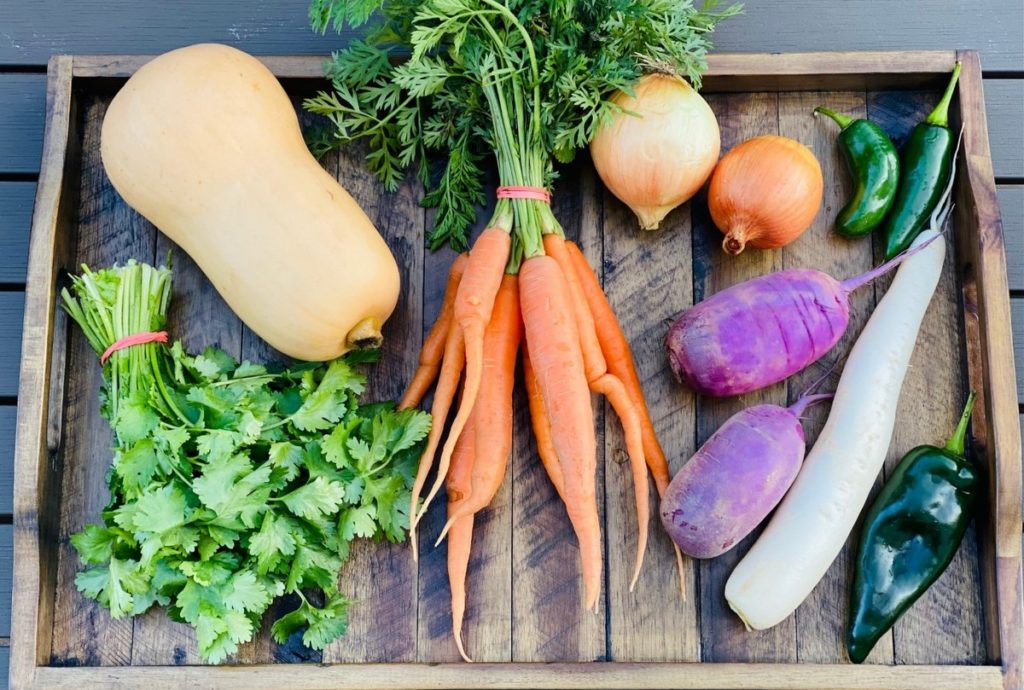
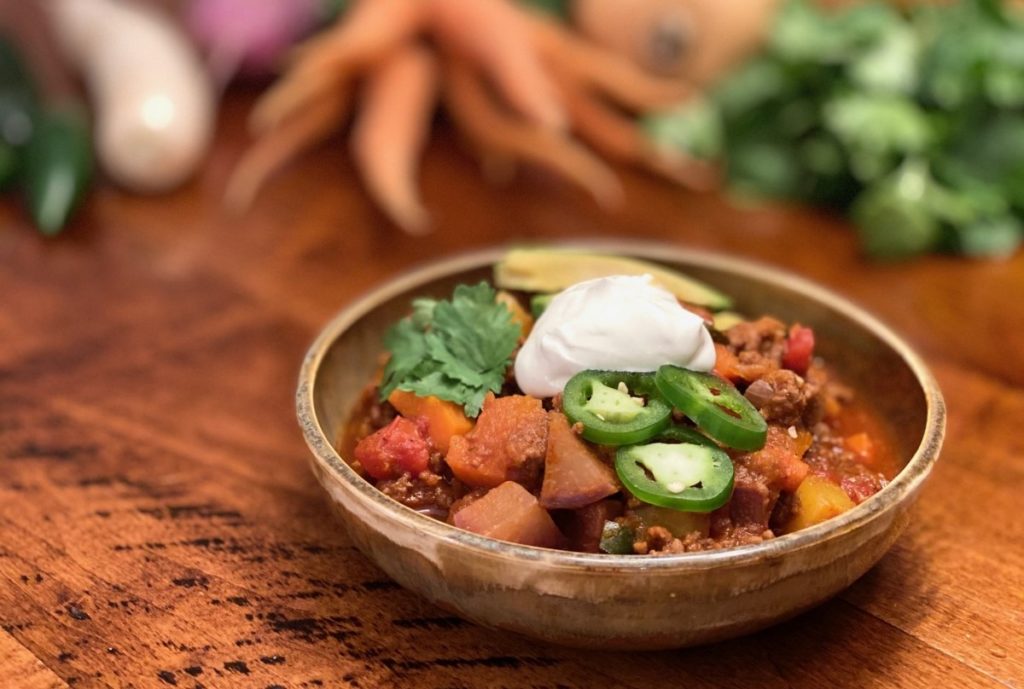
Fall is definitely in full swing as we begin the month of November.  The temperatures have dropped, the air is crisp, and the colorful leaves are blanketing the ground.  This week’s share is full of amazing autumn vegetables that can be combined to create a delicious fall-themed chili.   This chili blends the flavors of butternut squash, carrots, onions, radishes, cilantro, and hot peppers from our shares.

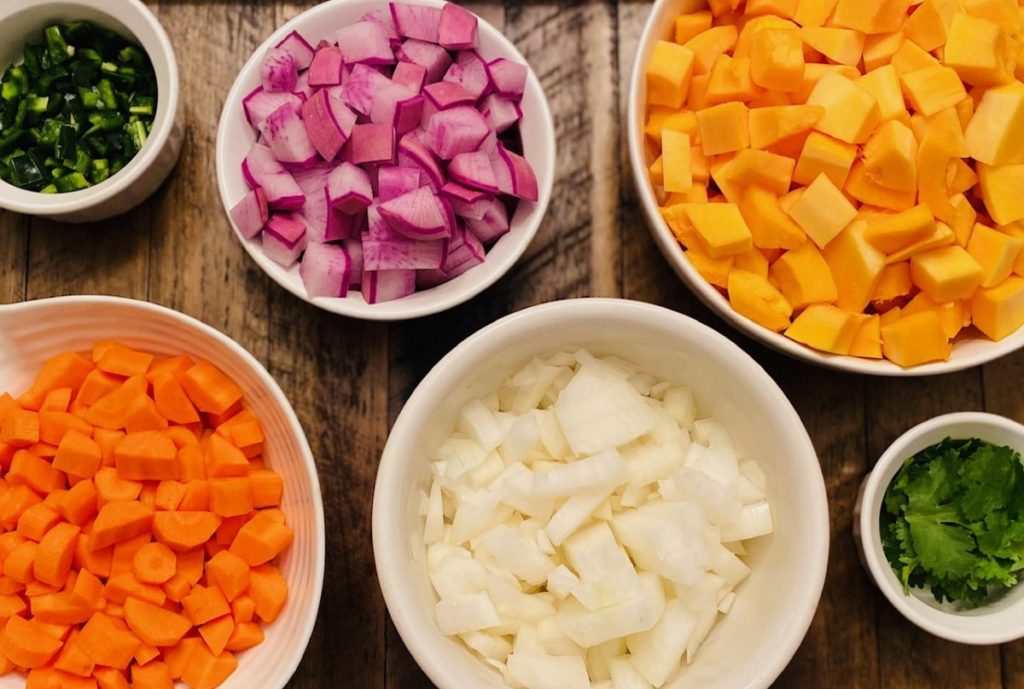
Ingredients:
2 Tbsp olive oil or avocado oil
1 medium yellow onion, chopped
2 cloves garlic, finely chopped
1 lb ground beef
1 cup carrots, diced
2 cups butternut squash, diced
½ poblano pepper, seeds removed and finely chopped*
1 cup daikon radish (white or purple), diced
1 Tbsp fresh cilantro, finely chopped
15 oz diced tomatoes
8 oz tomato sauce
½ tsp sea salt
¼ tsp black pepper
1 tsp cumin
1 Tbsp chili powder

  • Heat oil in Dutch oven or large saucepan.
  • Add onions and cook for 5 minutes on medium heat. Stir frequently.
  • Add garlic and ground beef. Cook for 7-8 minutes or until beef is cooked through.  Stir well throughout cooking time, breaking up the beef as it cooks.
  • Add carrots, butternut squash, poblano pepper, radishes, cilantro, diced tomatoes, tomato sauce, and spices. Cover and cook for 20 minutes, stirring occasionally.
  • Serve with shredded cheese, sour cream, sliced jalapenos (pickled or fresh), fresh cilantro, or sliced avocado.
  • Enjoy!

*Feel free to use other hot peppers instead of the poblanos, but it will affect the spiciness of the chili.

**This recipe freezes well.  I like to double it, serve half and freeze the other half for a future meal.

Recipe and photos by Stephanie Borzio.  Stephanie is a mom of three active boys and is an autoimmune warrior.  After battling her own health for several years, Stephanie found healing through food and lifestyle changes, including joining Blooming Glen Farm CSA of which she is a long time member.  She is a Board Certified Integrative Nutrition Health Coach who is passionate about sharing healthy living tips and real food recipes.  Instagram and Facebook: Tru You Essentials; Website: www.truyouessentials.com
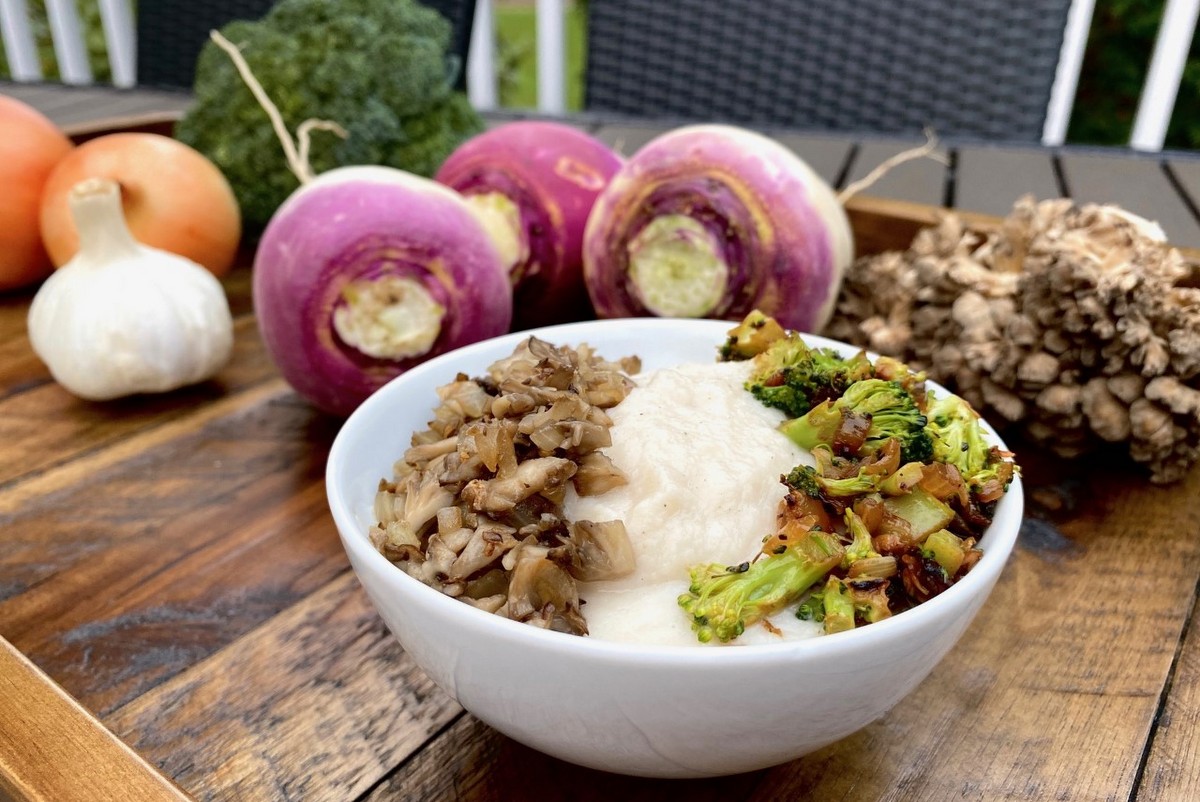
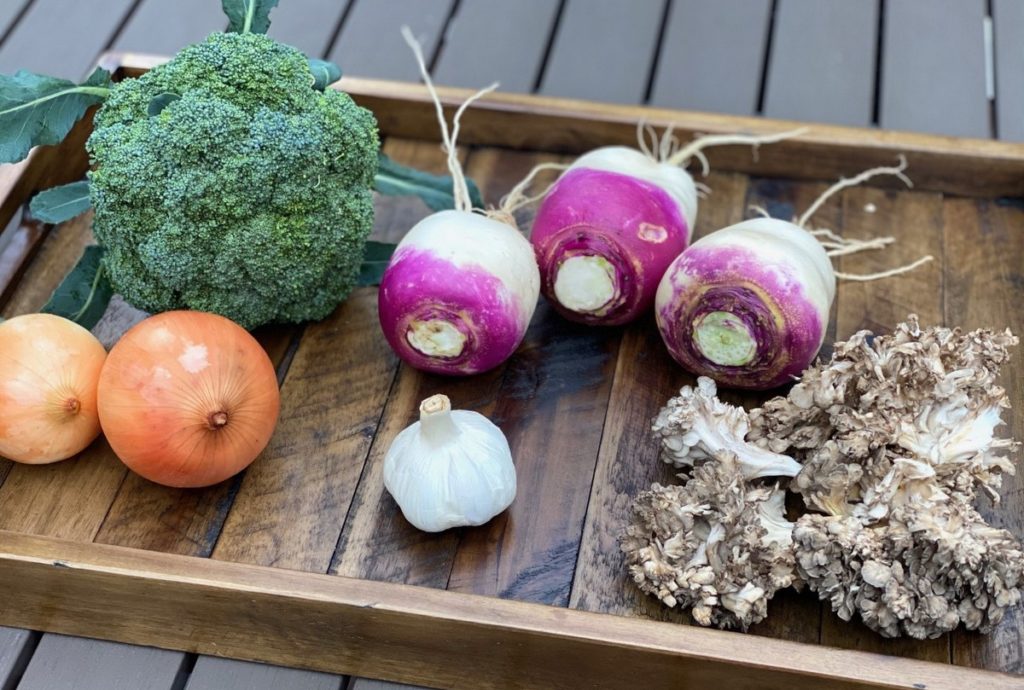
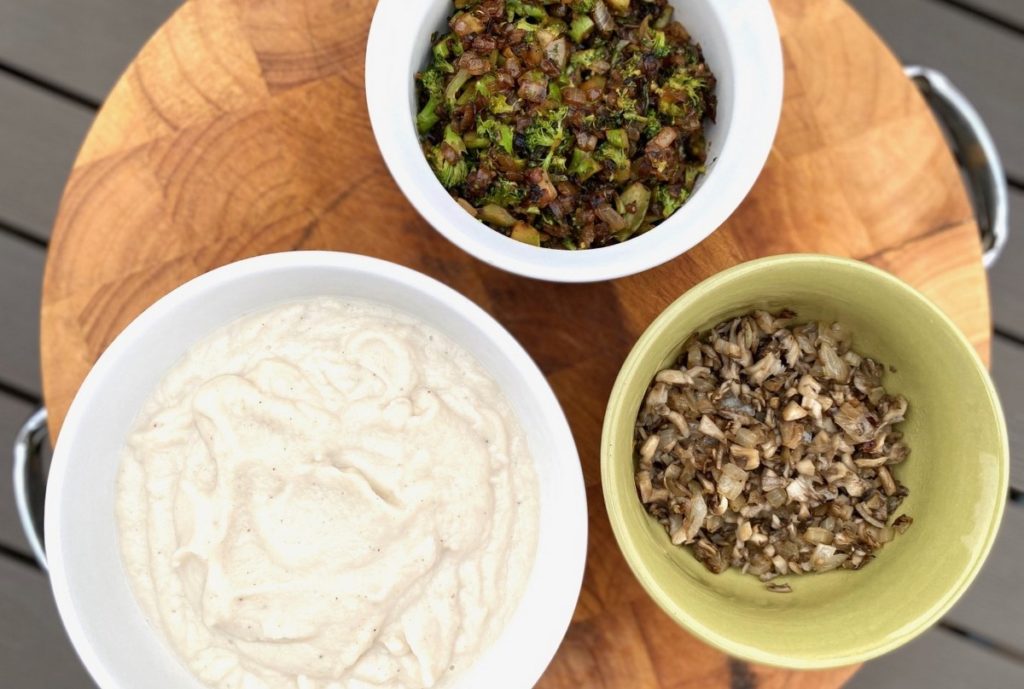
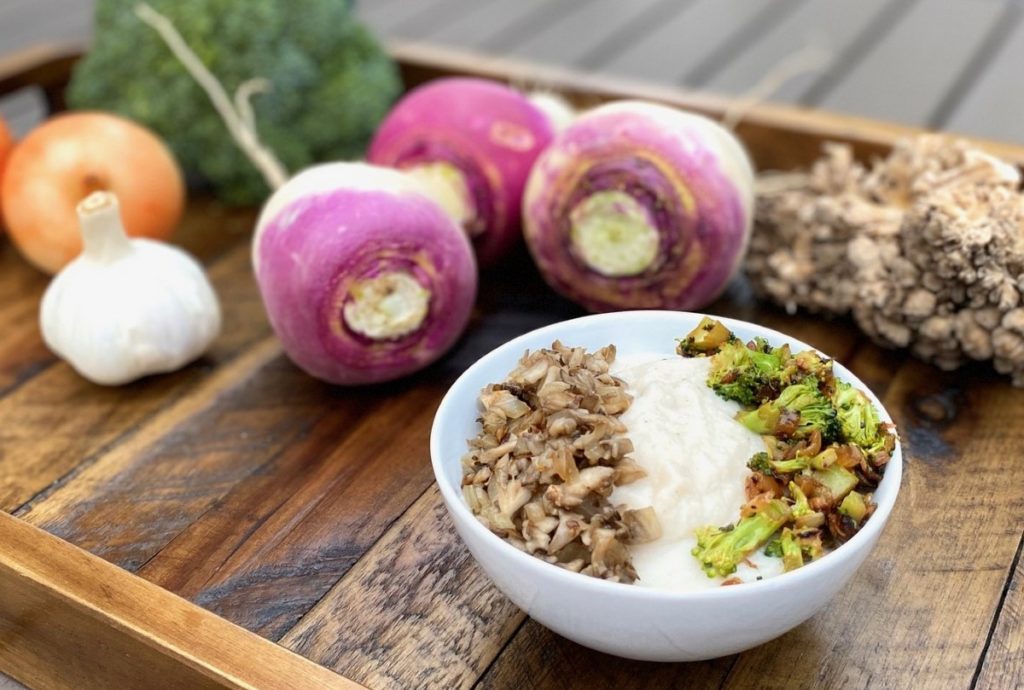
One of my favorite ways to serve turnips is to roast them, but I wanted to create a recipe that used them in a different way.  This dish features turnips that have been cooked and then pureed.  Top with some mushrooms and broccoli and this dish becomes a delicious blend of flavors and textures.

Pureed Turnips with Riced Broccoli and Sauteed Mushrooms

Ingredients:
2 lbs purple top turnips
2 Tbsp butter (or non-dairy substitute)
½ tsp garlic powder
1/8 tsp black pepper
¼ tsp sea salt

  • Wash turnips and cut into 1- inch cubes.
  • Fill large pot halfway with water. Bring to a boil.
  • Place cubed turnip pieces in water. Bring to a boil again and then reduce to a simmer.  Cook for 30 minutes or until turnips are fork tender.
  • Drain turnips. Place in blender or food processor with butter and seasonings.  Blend until smooth.
  • Place turnip puree in serving bowl. Top with riced broccoli and sauteed mushrooms or simply serve as a side.

Riced Broccoli

Ingredients:
2 Tbsp olive or avocado oil
½ medium onion, finely chopped*
2 cloves garlic, minced
3 Tbsp water
1 cup broccoli crowns, finely chopped*

Heat oil in pan on stovetop.  Reduce heat to low.  Add onions and garlic.  Cook for 2 minutes.  Add water to deglaze the pan.  Add broccoli and cover.  Cook for 10 minutes.  Remove from heat and set aside.

*You can also put the onion and broccoli in a food processor and finely chop.

Sauteed Mushrooms

Ingredients:
2 Tbsp olive or avocado oil
½ medium onion, finely chopped
1 cup Maitake mushrooms, finely chopped
Pinch sea salt

Heat oil in pan on stovetop.  Reduce heat to low.  Add onions and cook for 2 minutes.  Add mushrooms and salt.  Mix and allow to cook for 5 minutes.  Remove from heat and set aside.

Recipe and photos by Stephanie Borzio.  Stephanie is a mom of three active boys and is an autoimmune warrior.  After battling her own health for several years, Stephanie found healing through food and lifestyle changes, including joining Blooming Glen Farm CSA of which she is a long time member.  She is a Board Certified Integrative Nutrition Health Coach who is passionate about sharing healthy living tips and real food recipes.  Instagram and Facebook: Tru You Essentials; Website: www.truyouessentials.com
What a beautiful bounty we have this week in our CSA shares!  We certainly won’t have any trouble eating the rainbow as we incorporate all of the amazing produce from the farm.  This week’s recipe highlights the cubanelle and sweet peppers we received, but also incorporates the sweet onion, tomatoes, corn, and basil from our shares.  Enjoy!
Stuffed Peppers with Creamy Avocado Sauce

Ingredients:
6 cubanelle or sweet peppers (or add in a poblano for the heat lovers in your household)
1 Tbsp olive oil or avocado oil
½ sweet onion, chopped
2 cloves garlic, minced
1 lb ground turkey or ground beef**
1 cup chopped tomatoes (I used cherry tomatoes, but use whatever kind you have on hand)
2 ears corn
½ tsp sea salt
¼ tsp black pepper
Creamy avocado sauce (recipe below)

  • Preheat oven to 350°F.
  • Lay peppers lengthwise. Cut off the top third of the pepper and remove the seeds.  Dice the pepper pieces that you just removed and set aside.

  • Place oil in frying pan and heat. Sauté onion for 3 minutes on medium heat.  Add garlic and cook for another minute.
  • Add ground turkey or ground beef and cook through, about 6-8 minutes.
  • Remove corn kernels from the cobs.
  • When meat is cooked through, add corn and diced peppers. Cook for 2 minutes.
  • Puree half of the tomatoes.
  • Add chopped tomatoes, tomato puree, salt, and pepper to meat mixture. Mix to incorporate and remove from heat.
  • Place peppers in baking dish and fill with meat mixture.
  • Bake for 25 minutes.
  • Drizzle with creamy avocado sauce before serving.

**For a vegetarian or vegan option, eliminate ground turkey/beef and replace with 2 cups cooked quinoa.  Sauté the onions and garlic as noted above and then add the quinoa.  Then add the corn and diced peppers and follow the remainder of the steps.

Creamy Avocado Sauce

Ingredients:
1 avocado, peeled and seed removed
1 ½ Tbsp lemon juice
1 clove garlic
1 Tbsp olive oil
¼ tsp sea salt
1 Tbsp fresh basil
½ cup water
** optional- add a ¼ to ½ a jalapeno to taste for extra kick. Remove seeds and inner flesh for less heat.

  • Place all ingredients in blender. Blend until smooth.
  • If sauce is too thick, add a little bit more water.
  • Store in airtight container in the refrigerator.


Recipe and photos by Stephanie Borzio.  Stephanie is a mom of three active boys and is an autoimmune warrior.  After battling her own health for several years, Stephanie found healing through food and lifestyle changes, including joining Blooming Glen Farm CSA of which she is a long time member.  She is a Board Certified Integrative Nutrition Health Coach who is passionate about sharing healthy living tips and real food recipes. 
Instagram and Facebook: Tru You Essentials; Website: www.truyouessentials.com