tomatoes Tag

With the cooler days and nights of late summer, I find that instead of craving quickly cooked meals and cold salads, I have been turning to more warm, comforting dishes. The appearance of soups and stews on the table is a delightful reminder of the fast approaching fall season!

Tomato soup is that perfect transitional late-summer meal. Alongside a good grilled cheese, you can’t match the freshness and comfort of this classic dish. My recipe uses whole milk for creaminess (not as heavy as those recipes that call for cream), roasted garlic and sweet peppers to add a depth of flavor, and a topping of balsamic vinegar and fresh corn for some sweetness.

Tomato Soup with Roasted Garlic and Sweet Peppers

-Preheat oven to 400 degrees

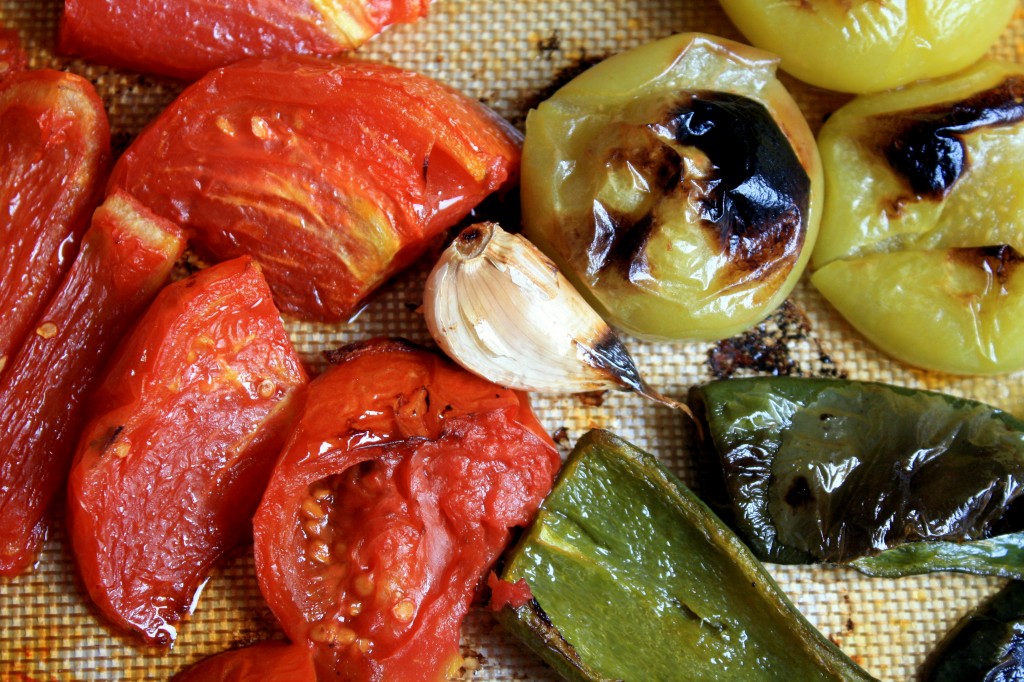
-Quarter approximately 3 pounds of red tomatoes and place on baking sheet with 4 or 5 (about 3/4 of a pound) of sweet peppers, seeded and diced, and 5 or 6 unpeeled garlic cloves. Roast in oven for 20 minutes or so until veggies are tender.

-Meanwhile, in a large pot, melt 4 tablespoons of butter and saute 1 white onion until translucent. Stir in 2 heaping tablespoons of tomato paste.

-Pour 4 cups of chicken or veggie stock over onions and bring to boil. Then turn down to a medium-low heat.

-Dump roasted veggies into pot with stock and onions, making sure to remove garlic skins beforehand. Puree with an immersion blender. **If you don’t have one of these you can simply put the mixture into a blender, food processor or food mill.

-Add in 1 cup of whole milk (or half a cup of heavy cream if you prefer) and 2 tablespoons of balsamic vinegar

-Let cook on medium-low heat for 20 minutes to let flavors meld. Stirring occasionally.

-Top with a splash more of balsamic and some fresh, sweet corn. Serve along side your favorite version of grilled cheese. ENJOY!

Recipe and photos by Jana Smart- Blooming Glen Farm employee and frequent creator of creative recipes using farm fresh seasonal ingredients. Check out more of her recipes on her food blog http://www.agrarianeats.blogspot.com/

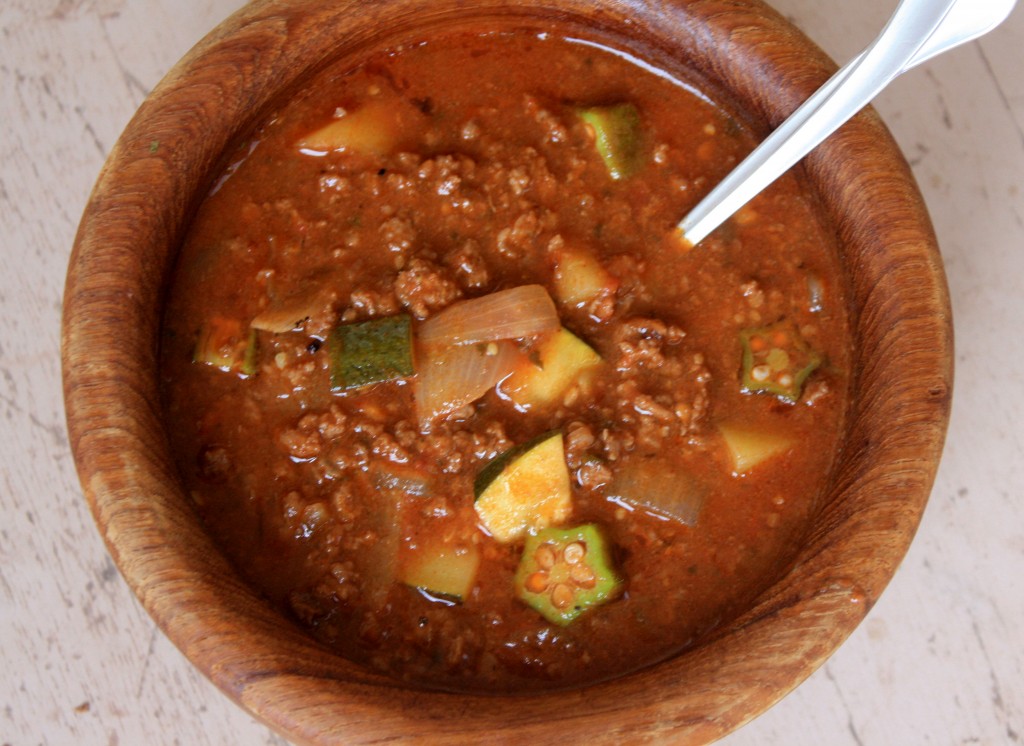
This flavorful chili is a very light and healthy recipe that utilizes a lot of this week’s share–onions, tomatoes, tomatillos, hot peppers, summer squash, and okra. This is a great way to use up some of those items you may not know what to do with. Tomatillos give this chili some sweetness and depth of flavor, while the okra gives it some good texture and acts as a thickener.

Summertime Chili

Cut up 2 pounds of tomatoes into quarters and put on baking sheet with:

2 poblano peppers, stem removed and seeded
1 jalapeno, stem removed and seeded (you might want to wear gloves for this step!)
1 pound of tomatillos, husks removed
2 cloves of garlic

-Drizzle all veggies with a little olive oil and place in a 400 degree oven for 20 minutes or until they start to get tender and brown slightly. [**The last 5 minutes I set my oven to BROIL to char the veggies a little bit, but feel free to simply roast if you don’t like that flavor] Set aside to cool.

-Meanwhile, in a large stockpot, saute 1 white onion and 2 cloves of garlic in a few tablespoons of olive oil over medium heat. Cook until translucent and add 2 heaping tablespoons of tomato paste. Mix well.

– Add in with the onions 2 pounds of ground beef (Tussock Sedge Farm is both local and grass-fed) and brown until fully cooked. Salt and pepper generously.

-Place all of the roasted veggies in a food processor with 1 teaspoon of salt, 2-3 tablespoons of chili powder and 1 teaspoon of cumin. Pulse until pureed.

-Add pureed mixture in with the cooked beef and onions along with 2 medium sized summer squash, cut into small pieces, and 1 1/2 cups of chicken or veggie stock

-Bring chili to a boil and then turn down to a low setting and simmer for 45 minutes to an hour, stirring occasionally.

-In the last 15 minutes of cooking, chop up a handful of okra and toss in. This will help thicken the chili and give some additional texture and flavor.

-Let cool a bit and serve alongside some cornbread and maybe a cold beer. ENJOY!

Recipe and photos by Jana Smart- Blooming Glen Farm employee and frequent creator of creative recipes using farm fresh seasonal ingredients. Check out more of her recipes on her food blog http://www.agrarianeats.blogspot.com/

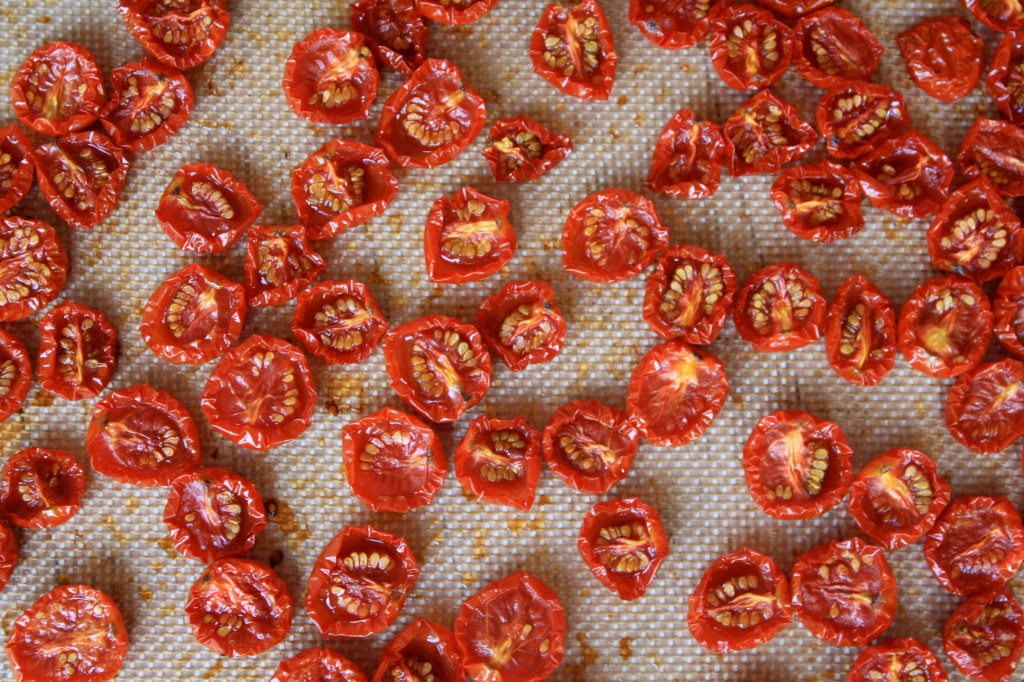
I came upon this method for drying cherry tomatoes that is a bit different than the standard “dry” dehydrating method. Here, you toss the tomatoes in olive oil before drying–a simple touch that gives them a wonderfully caramelized flavor that is perfect for pizza or pasta toppings. These are a great alternative to those expensive oil-packed sundried tomatoes you find in most stores. The only downside is you will need to freeze them if you want them to keep for storage. Good luck getting that far though! These make for a super sweet and delicious snack!

**If you want to dry these the traditional way to keep for a while in your cupboard, simply omit the olive oil and check to make sure the tomatoes are completely dry before storing.

-Heat your oven to 250 degrees

-Cut whatever quantity of cherry tomatoes you have in half and put in a bowl and lightly coat with olive, grapeseed, or other light oil.

-Spread on cookie sheet, cut side up (1 pint will fit on one cookie sheet give or take)

-Slow roast them in the oven for 5-6 hours depending on how dry you want them.**I was going to eat them right away so I didn’t dry them all the way (only about 4 hours) and used them in a pasta dish. YUM!

-Throw them in a quiche, on a pizza or some Penne and ENJOY! If you want to freeze them, simply cool and put in a plastic baggy.

Recipe and photos by Jana Smart- Blooming Glen Farm employee and frequent creator of creative recipes using farm fresh seasonal ingredients. Check out more of her recipes on her food blog http://www.agrarianeats.blogspot.com/

Now that the worst of that torrential heat wave from last week is waning, I find myself finally able to make my way back into the kitchen and near a stove for the first time in weeks. I’ve been eating mostly cold salads and ice cream lately, so the idea of a baked-cheesy-crispy-veggie-something sounded perfect. This is a variation of a classic French dish that simply involves layering vegetables and topping them with cheesy, herby breadcrumbs. Before you get started, I recommend making your own breadcrumbs. You can buy them at the store pre-made, but I find a very noticeable difference in them from the ones you make from scratch. One of my favorite bloggers, Smitten Kitchen, gives these valuable tips on the ease of making your own:

May I implore you, nay, beg you to forgo store-bought breadcrumbs and make your own? It is too simple not to. Take any bread at all — I mean your favorite kind, rolls the pizza place sent you with your salad, the crusts off your kid’s sandwich — leave it out overnight and pulse it in the food processor the next morning: instant breadcrumbs that will put that sawdust in a can to shame! In a rush? Fresh bread grinds up well, too, whether or not you toast it first. Planning ahead? Make a lot and keep it in the freezer. Breadcrumbs, at the ready!

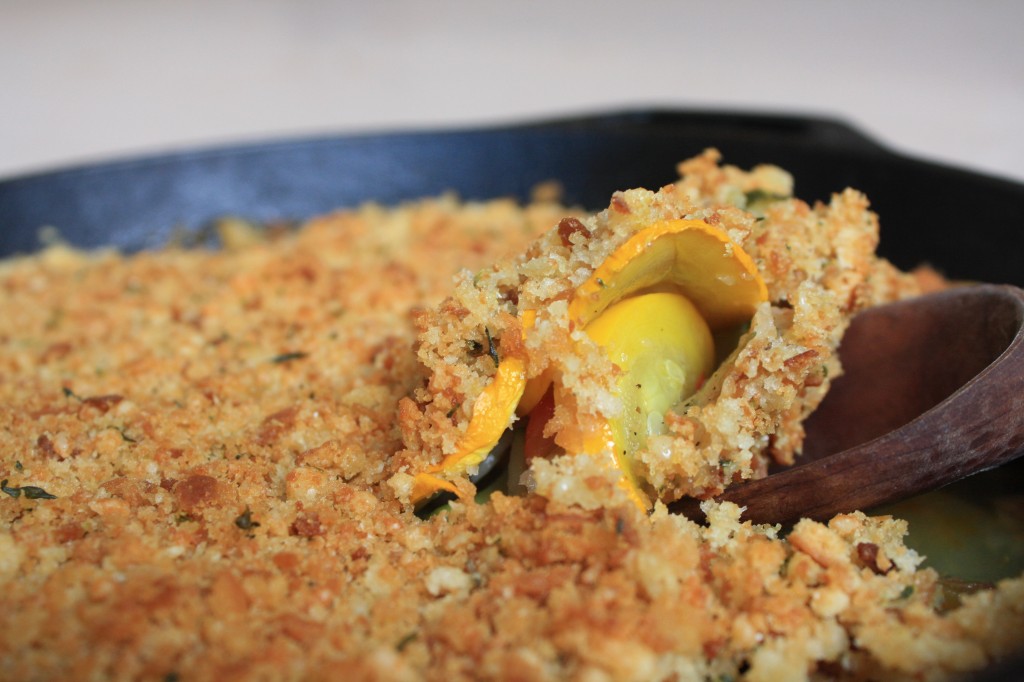
Once you have the breadcrumbs ready, this impressive summer gratin layered with new potatoes, tomatoes and summer squash will be ready for quick assembly.

Provencal Summer Gratin

-Preheat oven to 400 degrees and oil a large cast iron or baking dish with equivalent volume.

-Thinly slice about 1 pound of new potatoes and assemble them at the bottom of the pan, slightly overlapping the layers. Salt and pepper generously.

-Slice about 1 1/2 to 2 pounds of red tomatoes (slice up an heirloom to throw in for variation if you have it). Arrange layer of tomatoes on top of potatoes. Salt and pepper.

-Thinly slice 2 gloves of garlic and arrange atop the tomatoes. Sprinkle some dried oregano and thyme.

-Cut 2 summer squash into 1/4 inch slices and layer on top of tomatoes and garlic. Salt and pepper.

-Pour 1/4 cup of chicken broth and 2 tablespoons of olive oil over layers (for cooking moisture)

-Take 1 cup of homemade breadcrumbs and mix in a small bowl with 1/2 cup of parmigiano reggiano or pecorino cheese and a dash of dried oregano and thyme. Sprinkle over veggie layers.

-Bake gratin for 40-45 minutes. Cool slightly. ENJOY!!

Recipe and photos by Jana Smart- Blooming Glen Farm employee and frequent creator of creative recipes using farm fresh seasonal ingredients. Check out more of her recipes on her food blog http://www.agrarianeats.blogspot.com/

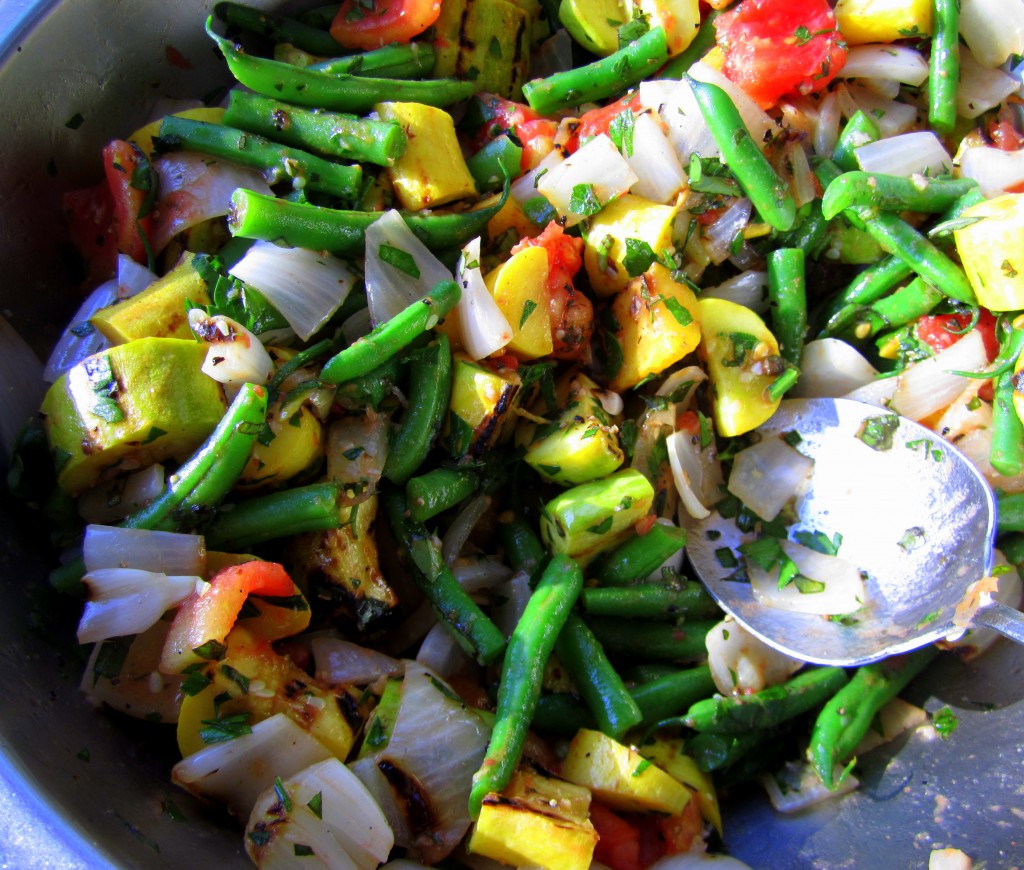
Chef Rich of Dinner’s Done Personal Chef Service joined us on Tuesday for a demonstration and tasting. Chef Rich has been a regular here at the farm over the years, doing demos during CSA pick-ups, as well as at our festivals. It’s always a pleasure to chat with him, as I seem to learn something new each time. This Tuesday morning he popped over to the farm and picked up some fresh picked veggies and herbs, then after a little prep, returned in the afternoon. As he fired up the grill and hot pad, a steady flow of people were drawn over, enticed by the wonderful aromas coming from his table. He happily shared his take on grilled veggies, which I immediately fell in love with for its surprising hint of tarragon. Of course, with the addition of any combination of fresh herbs, the recipe can be adapted to suit your taste. Or, you can always call Chef Rich, and he’ll turn your CSA share into meals for you!

Grilled Vegetable Salad (adapted from Cook’s Illustrated)

Chef Rich's Grilled Vegetable Salad

Begin by whisking the following ingredients together in a large bowl:

3 tablespoons white wine vinegar
1 1/2 teaspoons dijon mustard
3 garlic cloves, minced
1/2 teaspoon salt
1/2 teaspoon pepper

Slowly whisk in 6 tablespoons olive oil until thoroughly incorporated.  Reserve 2 tablespoons of the dressing. 

Next, add your prepped veggies to the marinade:

3 small to medium zucchini or yellow squash, cut in thick slices lengthwise
1 onion, any variety, sliced into 1/2 inch thich rounds. Be sure to keep the onion rounds together in the marinade for ease of grilling later
1-2 tomatoes, cored and cut in half
1/4 pound green beans, blanched and cut into bite-sized pieces (beans can also be grilled on a grill pan, if you have one)

Marinate veggies in the dressing for 15 minutes, tossing occasionally. Meanwhile, get your grill ready.

For a gas grill: turn all the burners to high, cover, and heat grill until hot, about 15 minutes.  Then lower the burners to medium-high.

Clean and oil cooking grate, then place the marinated veggies on the grill. Grill the squash and onion (covered if using gas) until charred and tender, 4-6 minutes per side.  Grill the tomatoes, cut side-down, on the coolest part of the grill until they start to soften, about 2-3 minutes.  Remove veggies (the skin will slip right off the tomatoes) and chop into 1” pieces and toss with reserved dressing, and beans. 

Add in your fresh herbs: 2 tablespoons minced basil, 1 tablespoon minced parsley, 1 tablespoon minced tarragon.

Cool for 10 minutes.  Season with salt and pepper to taste. Enjoy!

To contact Chef Rich Baringer of Dinner’s Done Personal Chef Service, call 215-804-6438, email: dinnersdonepa@comcast.net
or check out his website: www.MyChefSite.com/DinnersDonePA

Photos and text by Tricia Borneman, Blooming Glen farmer and co-owner.