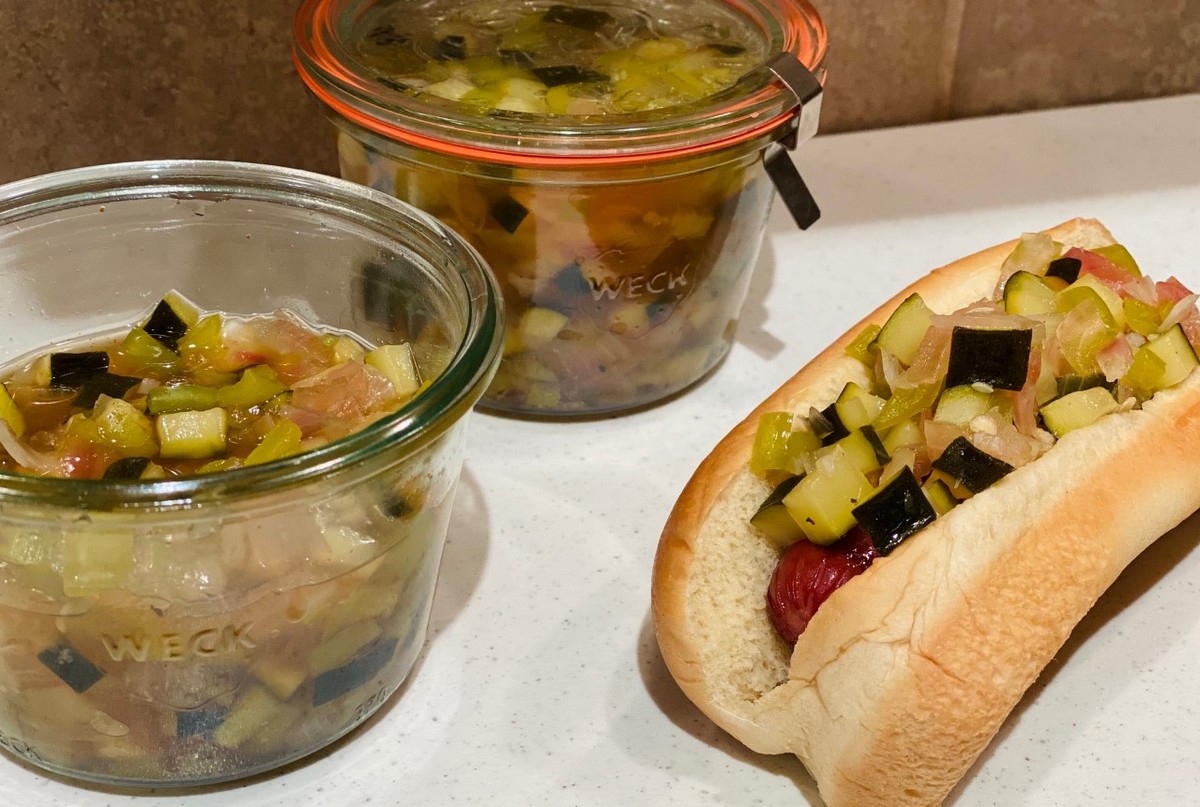
summer squash Tag

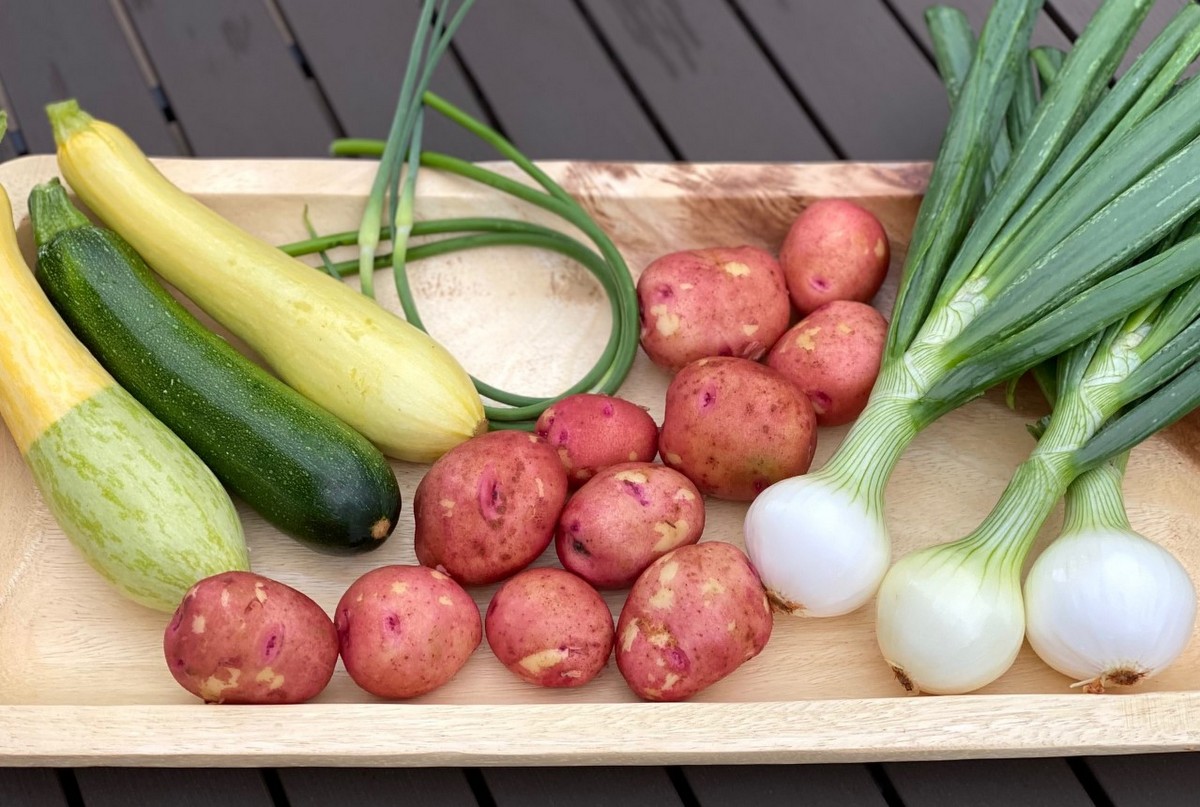
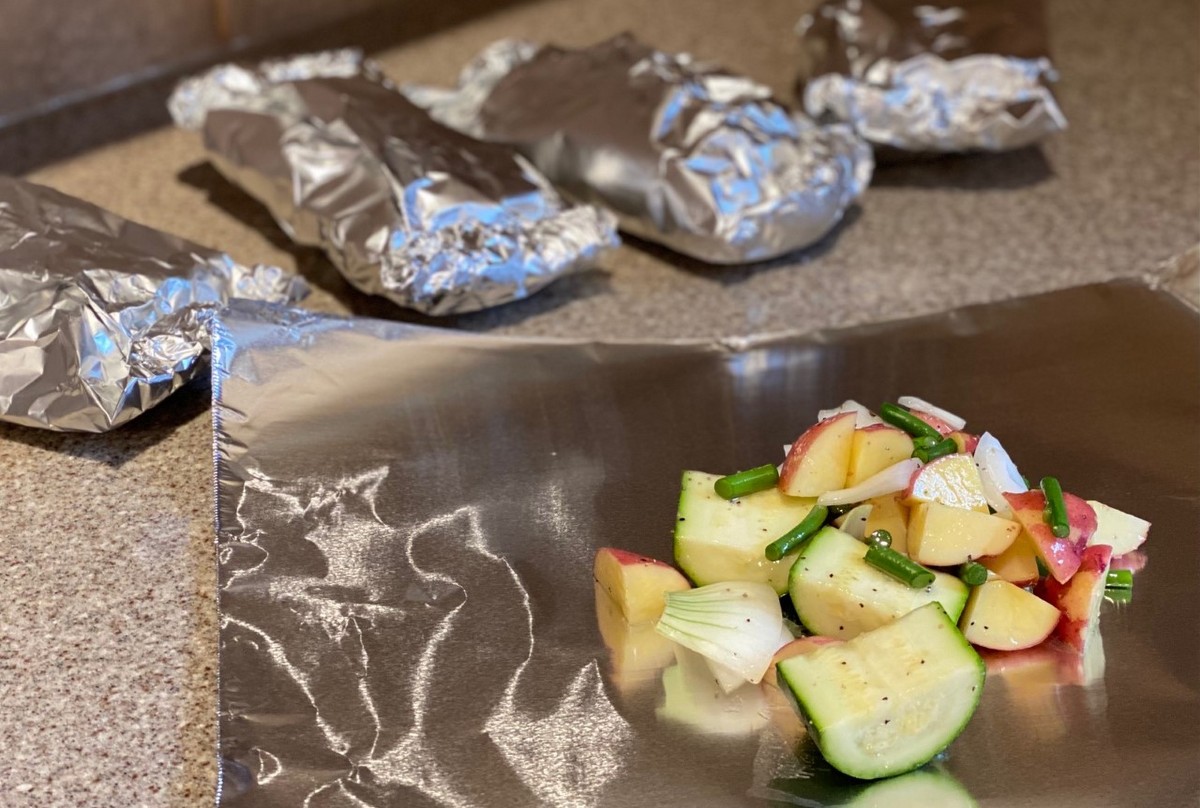
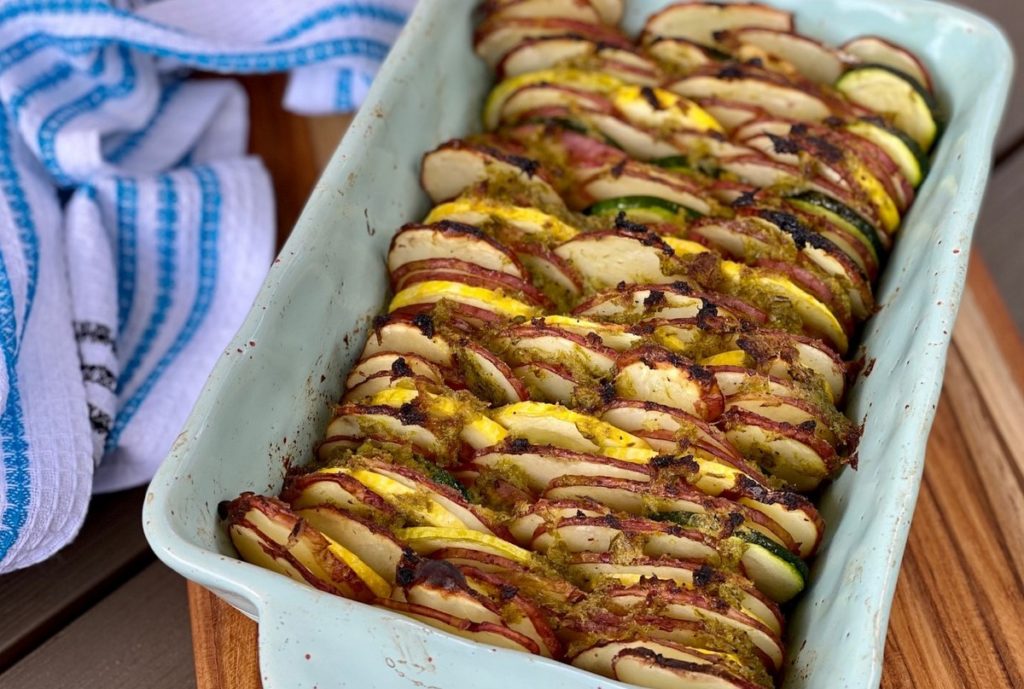
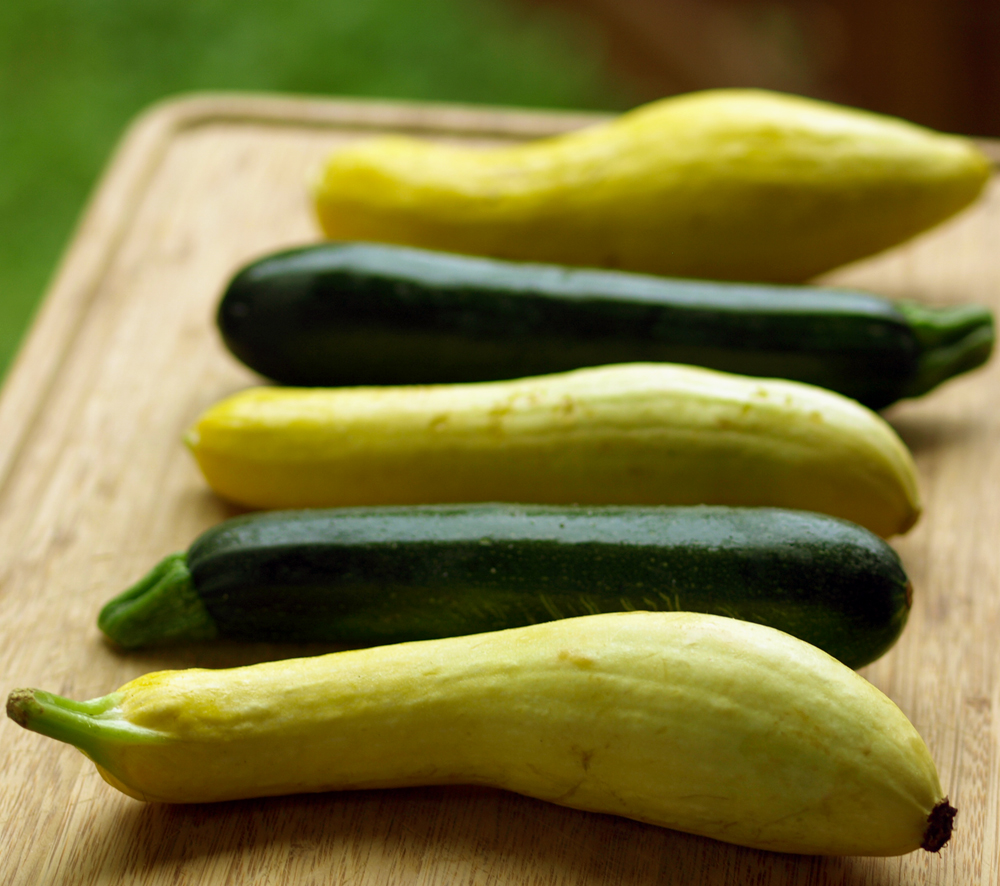
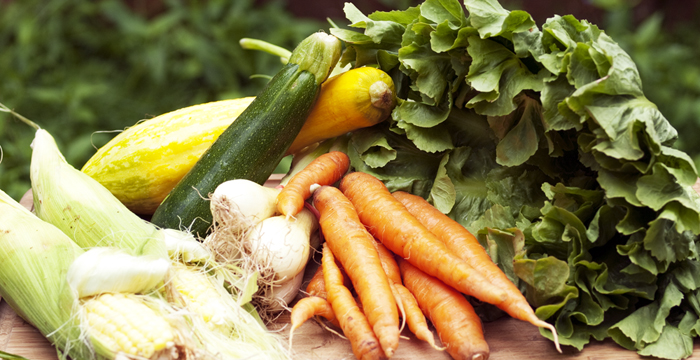
Throughout the CSA season, we receive a lot of summer squash.  It is delicious just grilled or roasted as a side, but sometimes it is fun to do something different with it.  This recipe turns the summer squash into a delicious relish and also uses the Cubanelle peppers, red onion, and garlic from our shares.  The recipe calls for zucchini but you can substitute with any of the summer squash varieties.

Zucchini Relish

Ingredients:
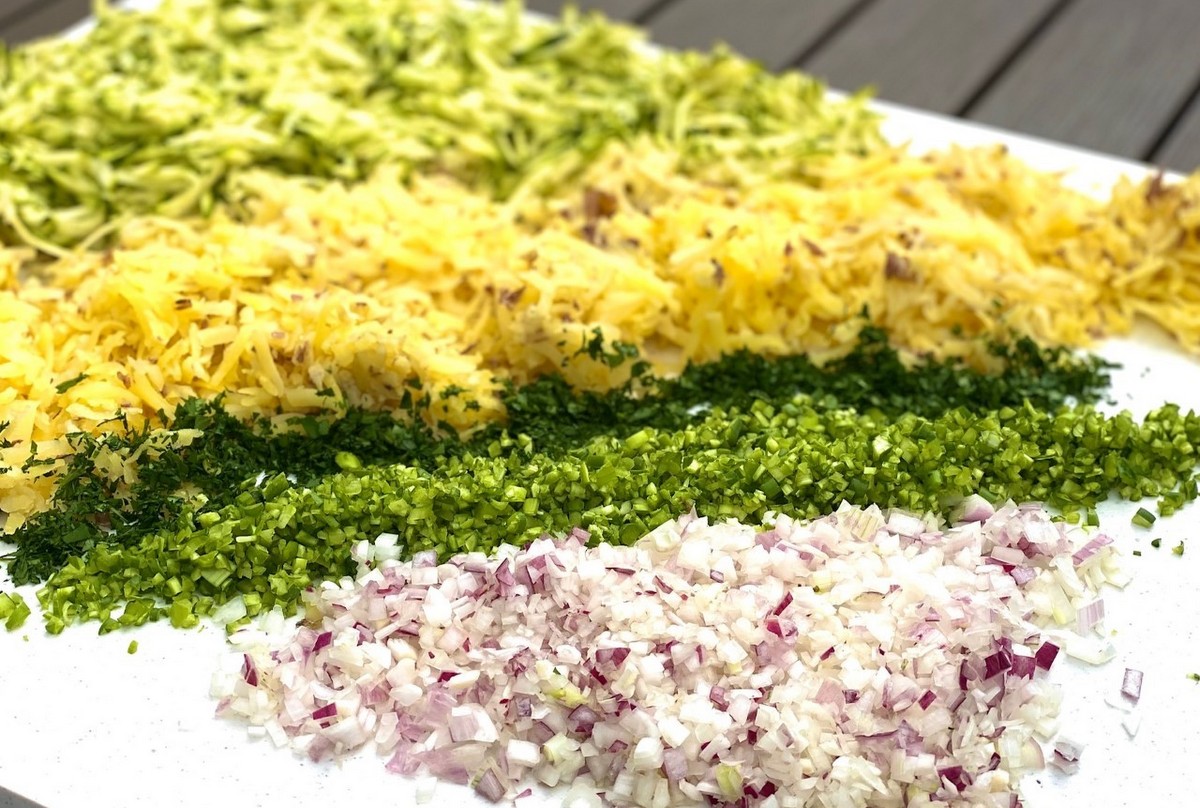
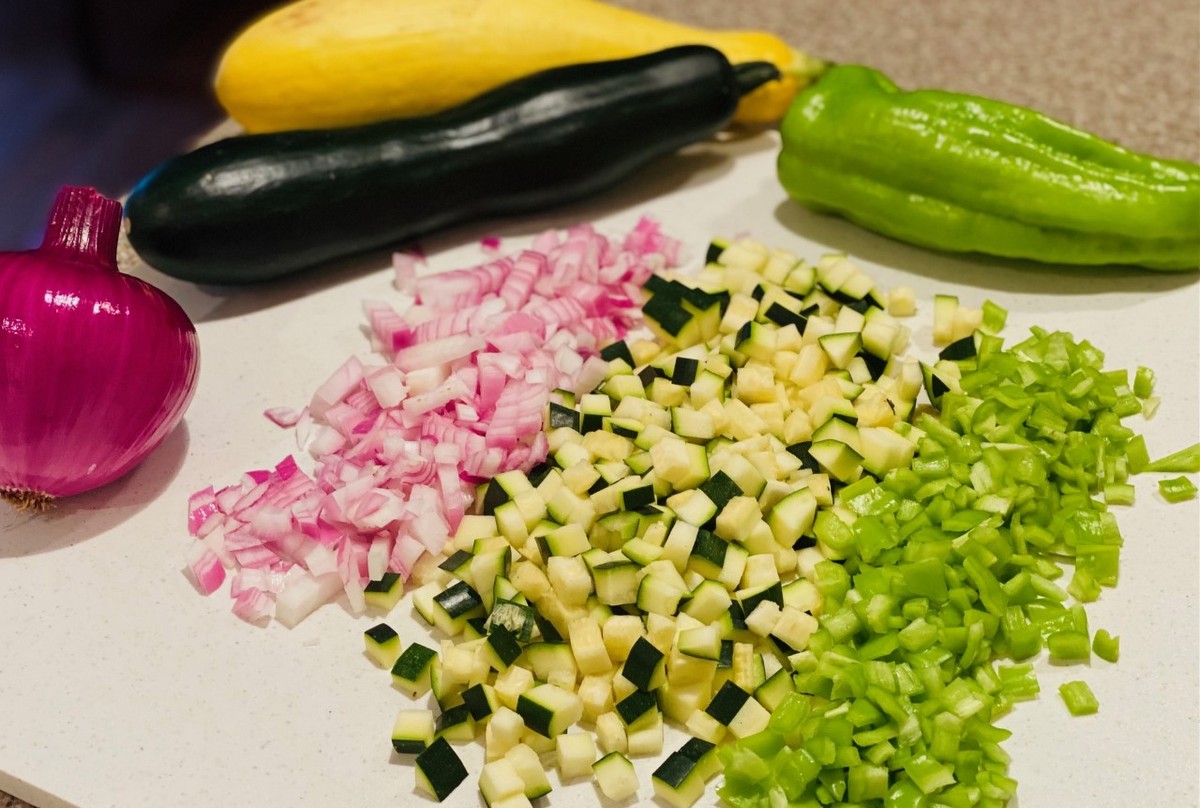
1 medium zucchini, finely diced (equivalent to 2-2 ½ cups)
2 medium Cubanelle peppers, chopped (equivalent to about 1 cup)
½ red onion, finely diced (equivalent to about 1 cup)
½-1 jalapeno, finely diced with seeds removed (optional)
4 tsp sea salt, divided
¾ cup white vinegar
1/3 cup honey
1/8 tsp black pepper
1/8 tsp paprika
2 cloves garlic, minced

  • Place zucchini, pepper, and onion in colander over a bowl. If you want to add a little spiciness to the relish, add the optional jalapeno to the chopped vegetables.

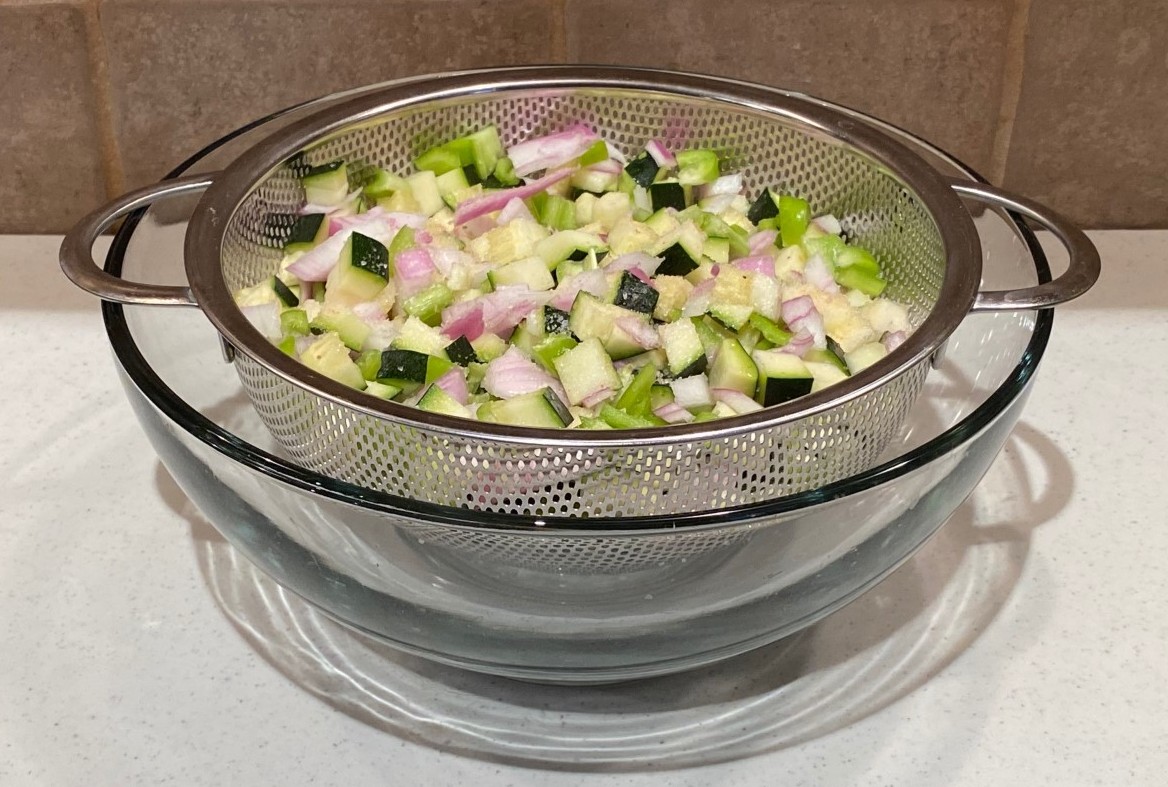
  • Sprinkle the chopped vegetables with 3 tsp salt. Mix well and let drain for 30 minutes.
  • Rinse and let stand for 10 minutes.
  • In a medium saucepan, combine vinegar, honey, remaining 1 tsp salt, black pepper, and paprika.
  • Bring to a boil. Stir until all of the honey is dissolved.
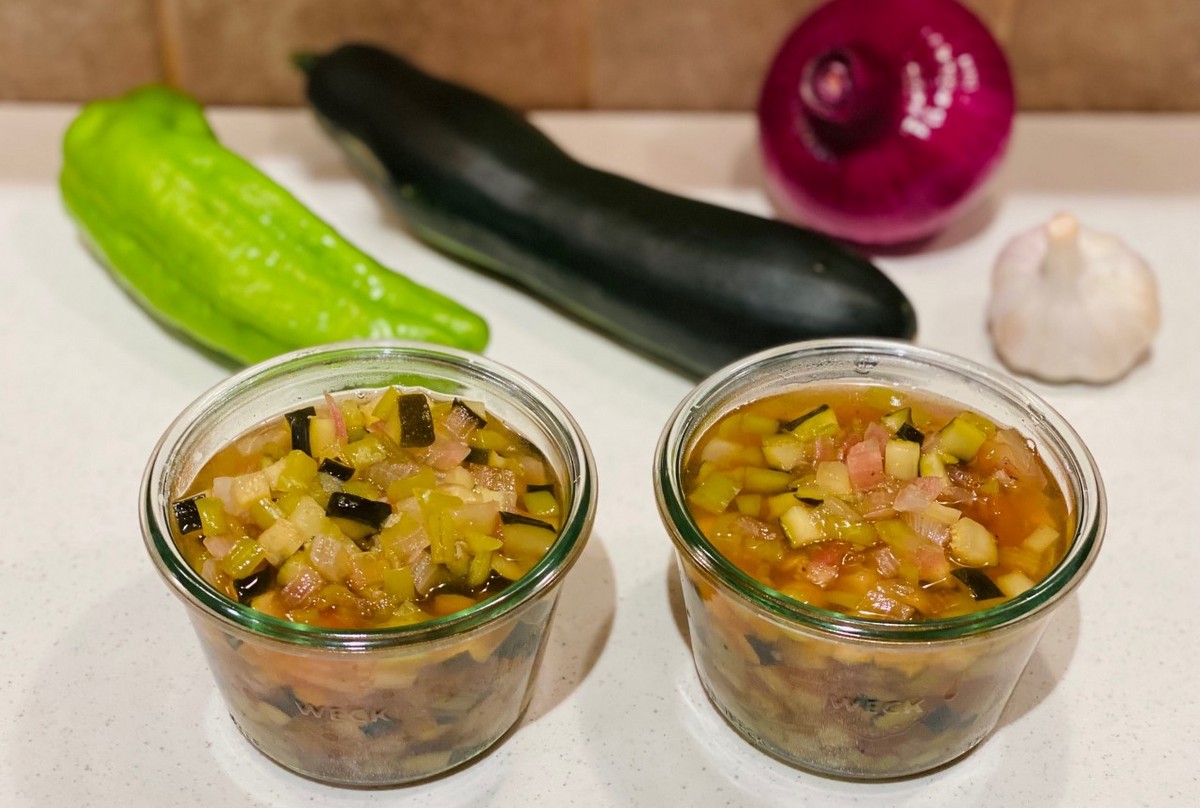
  • Reduce to a simmer. Add vegetables and garlic.  Mix well and cook for 8 minutes.
  • Can serve hot or cold.
  • Store in fridge.
  • Enjoy! The relish is great on top of hot dogs or burgers!

Recipe and photos by Stephanie Borzio.  Stephanie is a mom of three active boys and is an autoimmune warrior.  After battling her own health for several years, Stephanie found healing through food and lifestyle changes, including joining Blooming Glen Farm CSA of which she is a long time member.  She is a Board Certified Integrative Nutrition Health Coach who is passionate about sharing healthy living tips and real food recipes.  Instagram and Facebook: Tru You Essentials; Website: www.truyouessentials.com

Our shares are filled with so many amazing vegetables this week thanks to the hard work and dedication of our farmers at Blooming Glen.  I decided to use several of the items we received in this week’s recipe, including the summer squash, new potatoes, parsley, and torpedo onions.  This dish is full of flavor and can be served as a side to any meal or as an appetizer.  Make a double batch and freeze half to enjoy at a later date!

Summer Squash and Potato Bites

Ingredients:
½ lb new potatoes
1 cup shredded summer squash, tightly packed
1 ½ torpedo onion bulbs, finely chopped
3 garlic scapes, finely chopped or 2 cloves garlic, minced
1 Tbsp fresh parsley, finely chopped
¾ tsp sea salt
¼ tsp black pepper
1 egg

  • Wash potatoes. Keep whole.  Do not peel.
  • In a medium saucepan, boil water. Once water is boiling, place potatoes in and boil for 8-10 minutes depending on size of potatoes.  I used the larger ones in my share, so I cooked them for 10 minutes.
  • Drain the potatoes and place in freezer or in an ice bath to cool off.
  • While potatoes are cooling, place shredded summer squash between paper or cloth towels to remove moisture. I like to place a heavy pot on top to help with this.
  • Once potatoes are cooled, shred them on a box grater.

  • Place shredded potatoes & summer squash, and chopped onions, garlic scapes, and parsley in a large bowl. Mix to combine.

  • Add salt, pepper, and egg. Mix well.
  • Line baking sheet with parchment paper and then grease with cooking spray or oil.
  • Using a small cookie scoop, scoop the mixture onto the baking sheet. This recipe will make about 2 dozen bites.

  • Bake at 400°F for 35 minutes.*
  • Enjoy!

*You may also use an air fryer for this recipe.  Set air fryer to 400°F and cook for 10 minutes.


Recipe and photos by Stephanie Borzio.  Stephanie is a mom of three active boys and is an autoimmune warrior.  After battling her own health for several years, Stephanie found healing through food and lifestyle changes, including joining Blooming Glen Farm CSA of which she is a long time member.  She is a Board Certified Integrative Nutrition Health Coach who is passionate about sharing healthy living tips and real food recipes.  Instagram and Facebook: Tru You Essentials; Website: www.truyouessentials.com

Summer is officially here and we are almost ready to celebrate the Fourth of July.  As you prepare for barbecues, picnics, or camping adventures, this recipe is one that incorporates several share ingredients.  It is versatile and can be adjusted depending on what you have available.  Make it for your family or double it for a crowd.  Heat up the grill or cook it on a campfire!

Grilled Veggie Packets

Ingredients:
2 medium summer squash
1 lb new potatoes
2 sweet onions
7 garlic scapes
4 Tbsp olive oil, avocado oil, or melted butter
1 tsp sea salt
¼ tsp black pepper
¼ tsp smoked paprika
Optional- fresh chopped herbs

  • Preheat grill.
  • Cut 5 sheets of heavy duty aluminum foil into 12 x 18 inch strips. If you do not have heavy duty foil, you can use two sheets of regular foil per packet.
  • Prepare vegetables.
    • Summer squash- Slice into 1 inch disks. If the circles are really big, you can cut them in half (creating half circles).
    • New potatoes- Wash and leave skin on. Cut into ¼ – ½ inch cubes.  You want these to be smaller than the squash since they take longer to cook.
    • Sweet onions- Peel, quarter, and slice into wedges.
    • Garlic scapes- Cut into ½ inch pieces.

  • Place all prepared vegetables into a large bowl.
  • In a small bowl, combine oil/butter, sea salt, black pepper, and smoked paprika.
  • Pour oil/butter mixture over vegetables and toss until all vegetables are coated.
  • Divide vegetable evenly among foil packets. This recipe allows for about 2 cups per foil.

  • Fold foil to seal and wrap securely.
  • Grill temperature should be about 375-400°F.
  • Place foil packets on grill. Allow to cook for about 15 minutes, turning every five minutes to insure even cooking.

  • Remove packets from grill and carefully open.
  • You can serve right from the foil or place the grilled vegetables on a serving dish.
  • Garnish with fresh chopped herbs of choice or a dollop of herb butter (see recipe below).

Notes:

*If you are getting a mushroom share, feel free to add mushrooms to these packets.

*Pair with your favorite grilled protein.

*These packets can be made ahead of time.  Just refrigerate after assembling.  Remove from refrigerator 30 minutes before grilling.

*To make in the oven, cook for about 15 minutes at 400°F.

*Can also be made on a campfire!

*You can change the variety of vegetables in the grill packets as the produce we receive changes throughout the season.

Herb Butter

Ingredients:
8 ounces salted butter, room temperature
2 Tbsp fresh herbs, finely chopped (dill, basil, parsley, cilantro, etc.)

Other optional add-ins:
finely chopped scallions (1 Tbsp)
finely chopped garlic scapes (1 Tbsp)
crushed garlic cloves (2)

  • Cream butter.
  • Add herbs and any optional add ins. Mix well.
  • Place butter on a piece of wax or parchment paper.

  • Shape into a log using paper to help mold.  Log should be about 6 inches long.  Twist ends to secure.

  • Refrigerate for at least two hours.
  • Herb butter will be good in the refrigerator for at least two weeks.
  • If you want to preserve for longer, you can freeze the whole log right in the paper.


Recipe and photos by Stephanie Borzio.  Stephanie is a mom of three active boys and is an autoimmune warrior.  After battling her own health for several years, Stephanie found healing through food and lifestyle changes, including joining Blooming Glen Farm CSA of which she is a long time member.  She is a Board Certified Integrative Nutrition Health Coach who is passionate about sharing healthy living tips and real food recipes.  Instagram and Facebook: Tru You Essentials; Website: www.truyouessentials.com

Cherry tomatoes, plum tomatoes, heirloom tomatoes, and beefsteak tomatoes… oh my!  There are so many amazing things we can do with tomatoes.  They can be the star of a meal or a delicious side.  Eat them as is, add them to salads, can them, make sauce, or create this delicious soup.

Roasted Tomato Soup with Basil Oil and Fried Zucchini Noodles

Ingredients:
3.5- 4 lbs fresh tomatoes
2 medium onions, peeled and quartered
1 pepper (green bell or sweet cubanelle), halved and seeds removed
1 medium summer squash (zucchini or yellow squash), roughly chopped
6 cloves garlic, with skin on
3 Tbsp olive oil
1 tsp sea salt
½ tsp black pepper
6 basil leaves
Basil oil (recipe below)
Fried zucchini spirals (recipe below)

  • Preheat oven to 400°F.
  • Slice tomatoes into quarters or eighths if they are really big.
  • Place tomatoes, onions, pepper, summer squash and garlic in a large bowl. Add olive oil, salt, and pepper.  Toss to coat.
  • Place tomato mixture on baking sheet.

  • Roast for 25-30 minutes. Vegetables should be fork tender.
  • Allow to cool for a few minutes. Remove the skin from the garlic cloves.
  • Transfer mixture to blender, including juices on baking sheet. Add basil.  Process until smooth.  You may need to process in two batches.
  • Serve immediately or place in large saucepan and reheat later.
  • To serve, ladle soup into bowls. Drizzle on basil oil and top with fried zucchini spirals.
  • Soup can be stored in the refrigerator for up to a week. It also freezes well.

Basil Oil

Ingredients:
¼ cup basil leaves, packed
2 Tbsp olive oil
Pinch sea salt

  • Place boiling water in a bowl. Quickly blanch basil leaves (about 10 seconds) and then pat dry.
  • In food processor or blender, combine basil leaves, salt, and olive oil. Process well.

Fried Zucchini Spirals

Ingredients:
½ zucchini
½ cup avocado or coconut oil
Sea salt

  • Spiralize zucchini. If you don’t have a spiralizer, you can thinly slice strips of zucchini.  Place between paper towels to remove some of the water.
  • Heat oil in small saucepan.
  • When oil is hot, fry zucchini. Place one spiral in the oil to make sure it is hot enough.  Process the spirals in small batches for about 6 minutes each.  When done, the zucchini spirals should be crunchy.
  • Lay on paper towels and sprinkle with sea salt.

Recipe and photos by Stephanie Borzio.  Stephanie is a mom of three active boys and is an autoimmune warrior.  After battling her own health for several years, Stephanie found healing through food and lifestyle changes, including joining Blooming Glen Farm CSA of which she is a long time member.  She is a Board Certified Integrative Nutrition Health Coach who is passionate about sharing healthy living tips and real food recipes.  Instagram and Facebook: Tru You Essentials; Website: www.truyouessentials.com

This recipe showcases the potatoes, summer squash, and garlic scapes out of this week’s share.  Serve this as a side with dinner or make it part of your weekend breakfast buffet.

Ingredients:
½ medium yellow squash
½ medium zucchini
1 quart potatoes
½ cup salted butter, divided
¼ cup garlic scapes, chopped
½ tsp sea salt, divided
½ tsp black pepper, divided

  • Preheat oven to 375°F.
  • Using a mandolin, slice the yellow squash and zucchini into ¼ inch thick slices. Place in small bowl.
  • Slice the potatoes into 1/8 inch thick slices and place in a medium bowl.
  • Melt butter in small saucepan. Add 1 Tbsp melted butter to summer squash, sprinkle with salt and pepper, and toss to coat.  Add 2 Tbsp melted butter to potatoes, sprinkle with salt and pepper, and toss to coat.
  • Leave remaining butter in saucepan. Add garlic scapes and simmer for 2 minutes.
  • Blend butter and garlic scapes. Set aside.
  • Lightly butter baking dish (you can use an 8 inch square dish, or a 9 by 6 inch dish).
  • Layer potatoes and squash in baking dish (not flat, but upright). Fill dish but don’t overpack.
  • Pour butter and garlic scape sauce over vegetables.
  • Bake for 45-50 minutes. Potatoes should be fork tender.
  • Broil for 2 minutes to get the tops extra crispy.
  • Serve topped with fresh herbs or Parmesan cheese (if you can tolerate dairy).

Recipe and photos by Stephanie Borzio.  Stephanie is a mom of three active boys and is an autoimmune warrior.  After battling her own health for several years, Stephanie found healing through food and lifestyle changes, including joining Blooming Glen Farm CSA of which she is a long time member.  She is a Board Certified Integrative Nutrition Health Coach who is passionate about sharing healthy living tips and real food recipes.  Instagram and Facebook: Tru You Essentials; Website: www.truyouessentials.com

Varieties of summer squash and zucchini are are abundant during the summer — which is a very good thing! (And to clarify, at the farm we just call it all summer squash, of which this week’s dark gold and green zucchini is included under that heading. I am referring here to the lighter yellow squash as “summer squash”- it is also milder in flavor than the gold and green zucchini varieties that Blooming Glen grows). These light and mild veggies are not only delicious, but also healthy and versatile. Nutritionally speaking, the manganese in squash helps promote strength by building strong bones and connective tissues. As we know, vitamin C supports our immune systems, preventing colds and other infections, but it’s also an antioxidant that can help protect our bodies from the damage caused by pollution. Finally, the fiber in zucchini and summer squash aids digestion and promotes a healthy gut. In order to get all these benefits, it’s important to skip the peeler; like most other vegetables and fruits, a lot of the healthy stuff in zucchini and summer squash lives in or near the skin. Instead of peeling, simply rinse off the veggies under running water to remove any dirt. Here are a few tips for using up your stock of zucchini and summer squash:

  • Dice ’em up: Diced zucchini and summer squash can be added to soups, stir-fries, chilis, crepes and quiches, stews, curries, spaghetti sauce and rice. They can also be enjoyed raw, mixed into pasta salad, grain salads and green salads.
  • Cut into coins: Sliced zucchini and summer squash make a great topping for pizza, taste great layered into lasagna, or used in casseroles.
  • Savory pancakes: Add grated squash and zucchini to whole wheat pancake mix, along with some garlic powder and chopped spring onion. Serve with a dab of sour cream for a savory, summery side dish.
  • On the grill: Slice zucchini and squash lengthwise, into planks and spray lightly with high-heat cooking oil. Place on hot grill or grill pan and sprinkle with salt and pepper. Grill for 5-10 mins., until tender and charred, flipping once.
  • Thicken up soups: Cook and puree squash and zucchini to use as a creamy soup base.
  • Preserving: Shred and freeze zucchini and squash to preserve. Use thawed veggies in breads, muffins, casseroles, fritattas, and quiches.

Post and photos by Mikaela D. Martin: Blooming Glen CSA member since 2005, health counselor, and co-founder of Guidance for Growing, an integrative wellness practice in Souderton. Read more about healthy eating and living on her site, http://guidanceforgrowing.com

OLYMPUS DIGITAL CAMERAOne of the most common barriers to health eating that I hear is time. Between family & friends, work & school, hobbies & activities, there just never seems to be enough time, does there?

There are two tricks that I always recommend — and use myself: 1) A little meal planning & food prep each week, and 2) A repertoire of quick, simple, & adaptable recipes.  The Summer Veggie Noodle Bowl here serves double duty, playing a part in both of those tricks!  Prepare a big batch at the beginning of the week & reheat for lunches or dinners throughout the week, & when the seasons (or contents of your pantry) change, simply adapt the ingredients to what’s available.  Bonus: this dish taste great both hot & cold.

Summer Veggie Noodle Bowl

OLYMPUS DIGITAL CAMERA

Sauce
2/3 cup rice vinegar
1/2 cup tamari or liquid aminos
2 TBS sesame oil
3 TBS agave (or other sweetener)
6 gloves garlic, minced
1/2+ tsp crushed red pepper

Noodle bowl
1 package (~10 oz) brown rice vermicelli*
1 tsp sesame oil
1 cup onion, chopped
2 cups zucchini &/or summer squash, shredded or julienned
2 cups carrots, shredded or julienned
kernels from 2 ears of corn
1 head escarole, chopped
1 can (~1-3/4 cups) black soy beans**
Sesame seeds for garnish
* Or 1 package (~9 oz) whole grain soba noodles or 1 package (~8 oz) whole wheat angel hair pasta.  Or, change it to a whole grain bowl & use any whole grain (brown rice, quinoa, bulgur, etc.)
** Or shelled edamame, chickpeas, adzuki, other bean, or any other protein of your choice.

Directions
In a small bowl, whisk together the sauce ingredients until combined & then set aside.

Prepare noodles per package instructions, drain & stir in a small splash of sesame oil to prevent sticking.

Heat oil in a large skillet over medium-high heat. Sauté onions for 3-4 minutes, until translucent. Add zucchini, carrots, corn, escarole, & 1/3* of the sauce & sauté for 5-7 minutes, until heated through. Stir in beans & sauté another 5 minutes, until beans are heated & escarole is cooked down. Stir in noodles & 1/3* of the sauce. Cook for 2-3 minutes, stirring often, until everything is heated through. Garnish with sesame seeds & serve immediately.

* If you’re making a batch that will be reheated, reserve 1/3 of the sauce for reheating.  Otherwise, use 1/2 the sauce while cooking the veggies & 1/2 the sauce when stirring in the noodles.

gfg_head shot mPost and photos by Mikaela D. Martin: Blooming Glen CSA member since 2005, board-certified health counselor, and co-founder of Guidance for Growing, an integrative wellness practice in Souderton. Read more about healthy eating and living on her site, http://guidanceforgrowing.com!

Raw veggies for squash saladHappy Summer! As the temperatures rise this season, many of us find it harder to crank up the stove top or oven to get meals onto the table. This is a natural time of year to crave cooler, fresher ingredients that require little-to-no cooking — and eating these raw foods do provide us with benefits:

Eating our foods in a more raw form provides a different nutritional profile than eating a food cooked. For instance, ounce-for-ounce, raw Swiss chard has almost twice the amount of Vitamin C and almost three times the amount of Vitamin K than cooked Swiss chard. Similarly, raw zucchini offers much more folate and Omega-3 fatty acids than its cooked counterpart. Many people also find raw foods cleansing, as they often promote efficient digestion and a happy gut. Raw food also encourages us to slow down while eating, simply because it takes us longer to chew, which is a wonderful way to support portion control and mindful eating. All those benefits, and fresh, raw veggies also taste great (especially those from Blooming Glen 😉 )!

The recipe below uses lots of raw veggies from this week’s share, including summer squash, zucchini, green onion, dill, lettuce, and Swiss chard. By shredding the zucchini and chopping the greens, we’re helping out our belly a bit, making it easier to digest those veggies. As always, feel free to use this recipe as a base, an experiment with whatever vegetables, greens, and beans you happen to have on hand in the coming weeks.

Mostly Raw Mediteranean Squash SaladMediterranean Shredded Squash Salad

Ingredients
3 zucchini and/or squash, shredded
1 can chickpeas, drained and rinsed
1 green onion including greens, chopped
12-15 kalamata olives, sliced
5-6 sprigs dill, chopped (basil would also be good)
Chopped lettuce and/or Swiss chard

Dressing
1/4 cup olive oil
zest and juice of 1 lemon
1 garlic scape, minced
sea salt and ground black pepper

Optional: Pine nuts, capers, dried figs, dried apricots, feta cheese

Method
In a small bowl (I use a glass measuring cup), whisk together the dressing ingredients. In a larger bowl, combine all the other ingredients, except for the lettuce/chard. Pour the dressing over squash mixture and stir to combine well. Place a handful of chopped greens on a plate, top with a big scoop of the squash salad. Serve with optional toppings.

Post and photos by Mikaela D. Martin: Blooming Glen CSA member since 2005, board-certified health counselor, and co-founder of Guidance for Growing, an integrative wellness practice in Souderton. Read more about healthy eating and living on her site, http://guidanceforgrowing.com!

Grilled summer squashOne of my favorite parts of summer is the time we get to spend cooking and eating outside.  Grilling vegetables brings out a depth of flavor that just cannot be matched on the stovetop, and we’ve been taking full advantage of that with this season’s CSA share.  One of the best veggies to grill is summer squash and its partner, zuchinni.

Eating summer squash provides us with cancer-fighting antioxidant nutrients Grilled summer squashvitamin A, vitamin C and manganese. We also get a healthy dose of essential minerals magnesium and potassium, as well as copper. However, because many of these nutrients live in the skin of the squash, we need to make sure we leave it intact. Grilling summer squash allows us to do just that!

Of course, squash can be cubed or cut into disks for kabobs, but I really like it when its cut into planks and placed right on the grates of a hot grill. The recipe below calls for this method of cooking; give it a try and let us know what you think. I’ve paired the delicious and nutritious summer squashes with superfoods, brown rice and Swiss chard, and healthy plant protein from chickpeas. All that wrapped up into a summery salad suitable for a main dish or a side — that’s tough to beat!

Grilled summer squash

Grilled Summer Squash & Brown Rice Salad

Ingredients

1 cup brown rice
3-4 summer squash and/or zucchini, sliced lengthwise, about 1/4″ thick
5-6 leaves Swiss chard, stems completely removed (slice the stem out from between the two halves of the leaves)
1 can chickpeas, drained and rinsed
1/2 sweet onion and some of its greens, chopped

Dressing
2 tbs olive oil (or other oil of your choice)
1 tsp grated lemon zest plus 2 tbs juice
1/2 teaspoon agave
1/2 teaspoon salt
fresh herbs of your choice (basil works great here), chopped
additional salt and pepper to taste

Method
Cook the rice according to package directions.

Fire up your grill! Lay out the squash slices. Lightly spray each side with grapeseed (or other high-heat) oil, and then sprinkle with salt and pepper. Once the grill is heated, place the squash in one layer, cover and cook for ~3 minutes, until grill marks are apparent. Flip and cook another couple minutes, again until grill marks are apparent. Squash cooks very quickly on the grill and can become soggy (especially the larger ones) if left on too long, so be careful not to overcook. Remove from heat and let cool.

Blanch the Swiss chard in boiling water for 2 minutes, rinse in cold water and chop. Add chard, onion, chickpeas to a serving bowl.

Cut squash into a large dice and add to the bowl; you should have about 2 cups.  Gently stir in rice.

Combine the dressing ingredients in a small bowl. Mix well and then add to salad, stirring to combine everything. Adjust seasonings to taste.  Serve at room temperature, or chill.  This salad also make a great stuffing for tortillas or collard wraps.

Post and photos by Mikaela D. Martin: Blooming Glen CSA member since 2005, board-certified health counselor, and co-founder of Guidance for Growing, an integrative wellness practice in Souderton. Read more about healthy eating and living on her site, http://guidanceforgrowing.com!

Garlic scapes are the flower shoots that grow from the hard-neck varieties of garlic grown here on the farm. By plucking them from the plant, we encourage the bulbs to grow fat in the ground and simultaneously get yet another way to enjoy garlicky goodness.

Don’t be overwhelmed by the mass of these curlicues you’ve acquired in the last two weeks. Garlic scapes are wonderfully versatile. In any recipe that calls for garlic, you can replace one clove for about one scape. Because they are milder than cloves, garlic scapes can also be eaten more like a side dish than a seasoning. Just chop several into 2-inch segments and sauté on high heat with a bit of oil until they are tender and a bit caramelized.

I use garlic scape and kale pesto in this recipe to make a delicious filling for chickpea flour crepes. It may look and sound fancy, but it was a synch to whip up (I did it in about 10 minutes over lunch the other day). Chickpea flour is now widely available as a gluten-free substitute for wheat flour (I think I even found it in the local Landis). If you can’t find it or don’t have it, the recipe should work just fine with whole-wheat flour.

Use the leftovers of this pungent pesto to add flavor to soup or steamed veggies, toss with pasta, or garnish a rich piece of grilled meat.

Chickpea Flour Crepes with Savory Sautéed Veggies

Heat a small amount of oil or butter in a non-stick or cast iron pan. When oil is hot, add 1 cup sliced summer squash. When squash is tender, add 1 cup chopped kale, Swiss chard, or beet greens. Cook until greens are just wilted. Toss veggies with 2 tablespoons garlic scape pesto.

Whisk together one egg, ½ cup chickpea flour, 1 tablespoon olive oil, and a pinch of salt in a bowl. Slowly whisk in warm water until the batter becomes thin and pourable (thinner than pancake batter).

Ladle a small amount of the batter onto a hot, non-stick griddle or pan. Using the back of the ladle, spread the batter into a thin layer about the size of a tortilla. Carefully flip the crepe with a large spatula when the top starts to form bubbles and the bottom is golden brown. Repeat with the rest of the batter.

Spoon some vegetable mixture in the center of a crepe, sprinkle with some crumbled goat or feta cheese, and fold crepe over into a large taco shape.

Garlic Scape and Kale Pesto

In a food processor combine:

4-5 garlic scapes, chopped
½ cup kale, chopped
5 tablespoons olive oil
2 tablespoons raw pumpkin or sunflower seeds (*pesto hint: you can replace pine nuts with sunflower seeds in almost any pesto recipe for a nearly identical taste at a much more affordable price)
juice of 1 small lemon
pinch of salt

Process until garlic and kale are minced and ingredients are well blended together. Pesto can be stored in the fridge for about a week.

Text and photography by Kate Darlington – Blooming Glen Farm second year intern, Colorado native, and food lover.