Recipes

The mason jar salad is portable, healthy, and let’s be honest, pretty to look at. The idea has been popping up all over the web and I even spotted a mason jar salad cookbook at the bookstore in town. (Seriously- why didn’t I think of this first?) But there’s a reason people are excited about a meal in a jar. The appeal is truly the make-ahead convenience and as an added bonus for kids (ok, adults too), the fun factor. Put together these jars the night before, customize them slightly for different family members, then grab and go. Head off to school or work with a healthy farm fresh lunch!

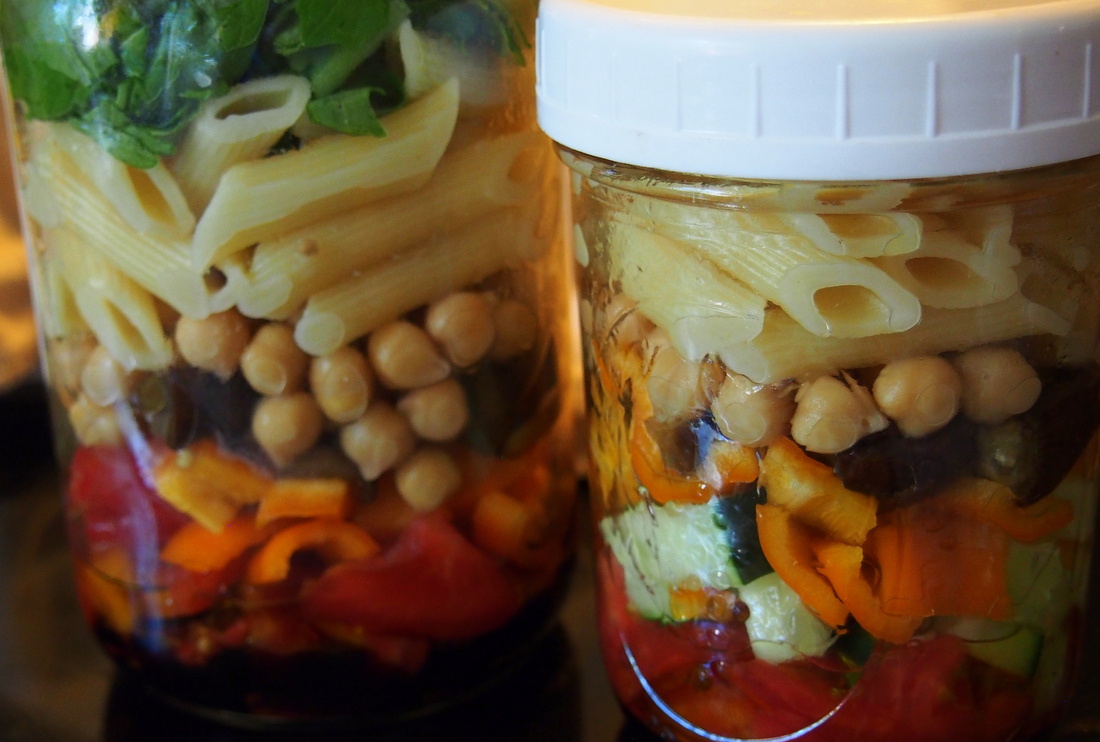
To avoid soggy salad dressing soaked greens, the trick is in the layering. Once you have a handle on the basic idea you can get as creative as you want. I made a pint size for my daughter and a quart size for me. But if you were pairing this salad with soup or a sandwich, or looking for a light lunch, a pint size would be plenty big enough for an adult.

The first layer is the dressing. (Though I did skip this for my daughter’s first back to school lunch- she’s not a dressing kid, but yours might be.) Use a little less than 2 tablespoons for the pint, and between 3-4 tablespoons for the quart. Mine was a simple balsamic, olive oil and honey blend. Check out Chef Kristin’s previous recipe post for some other salad dressing ideas.

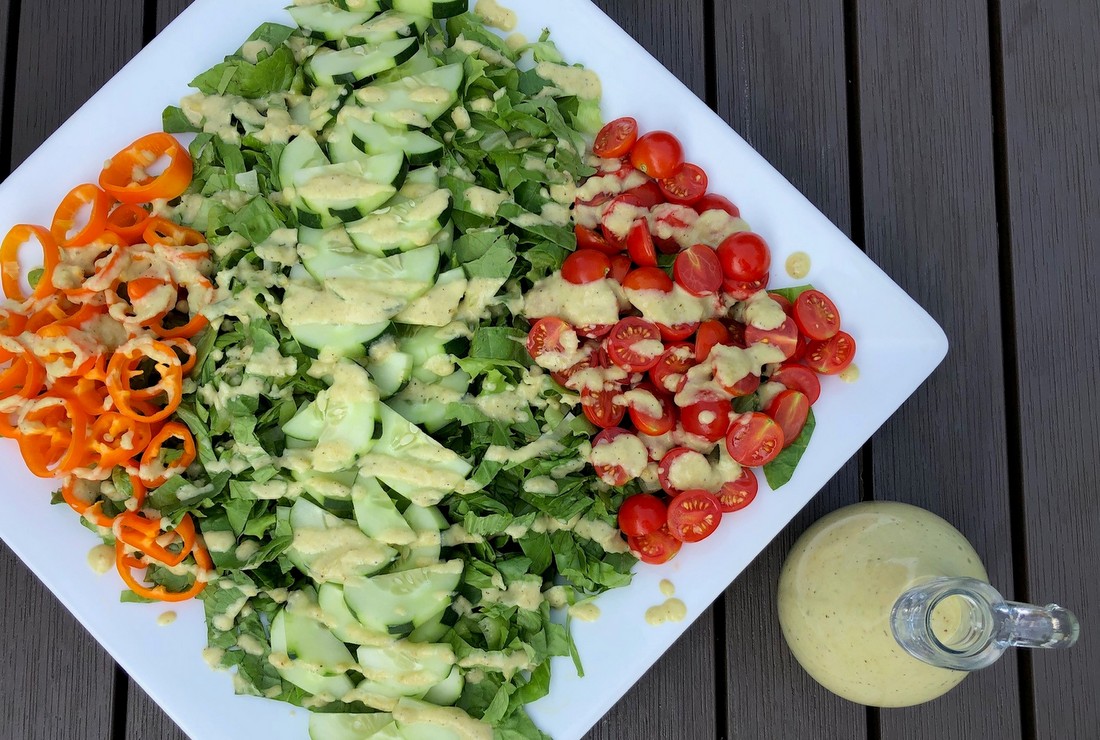
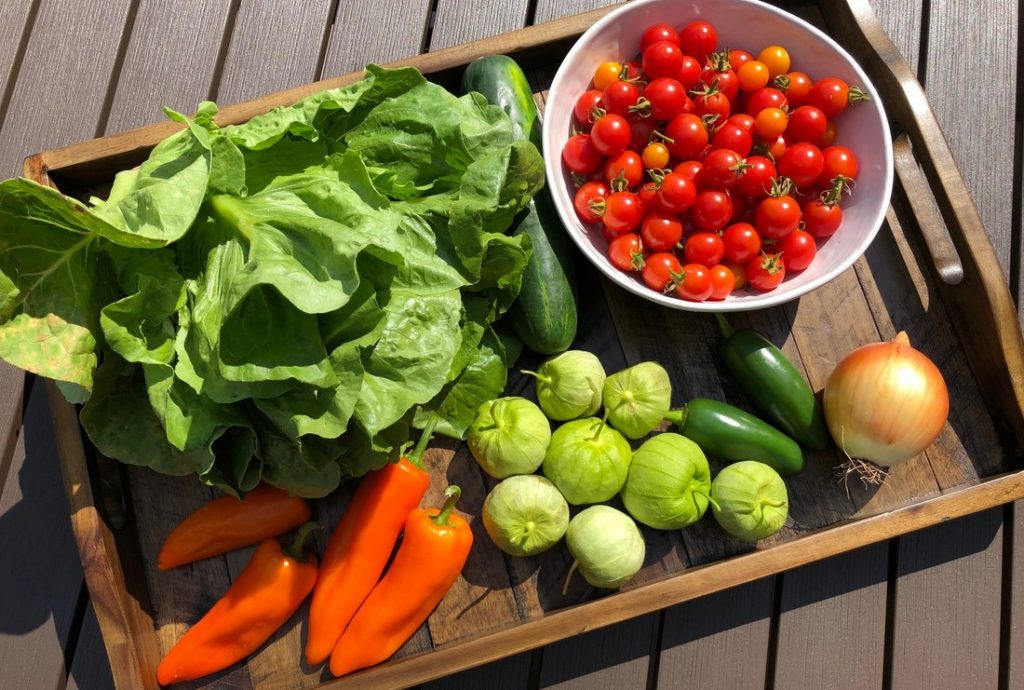
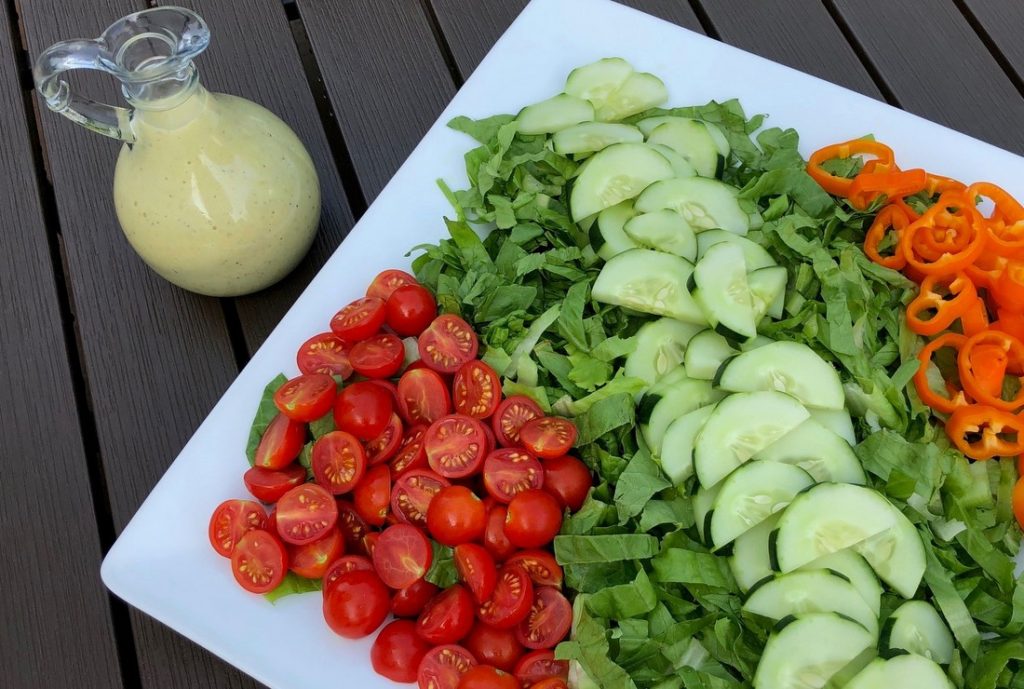
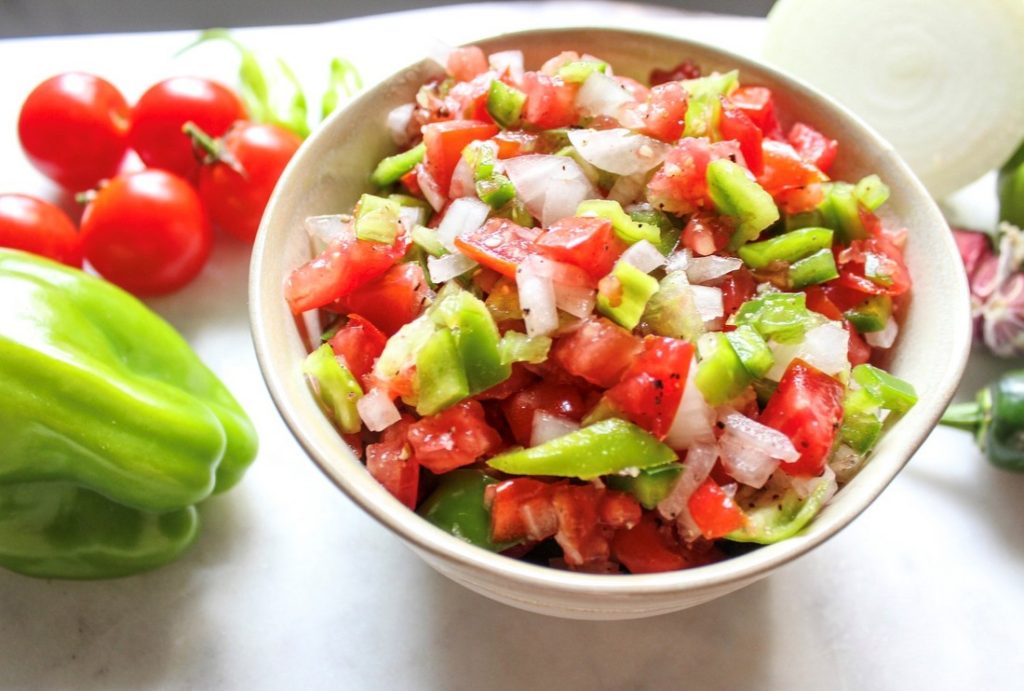
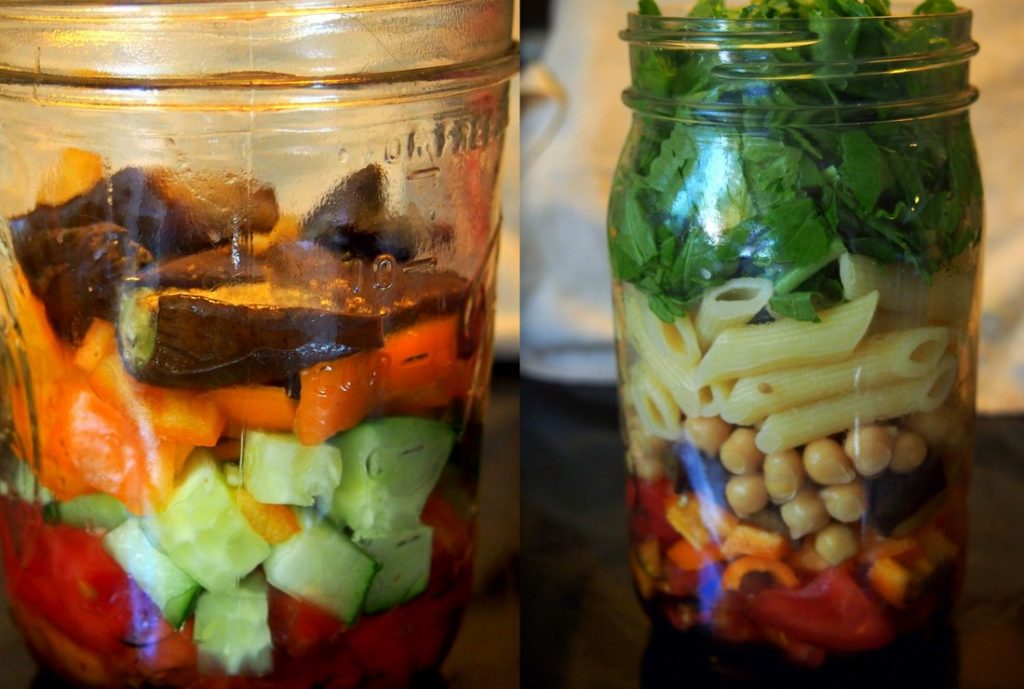
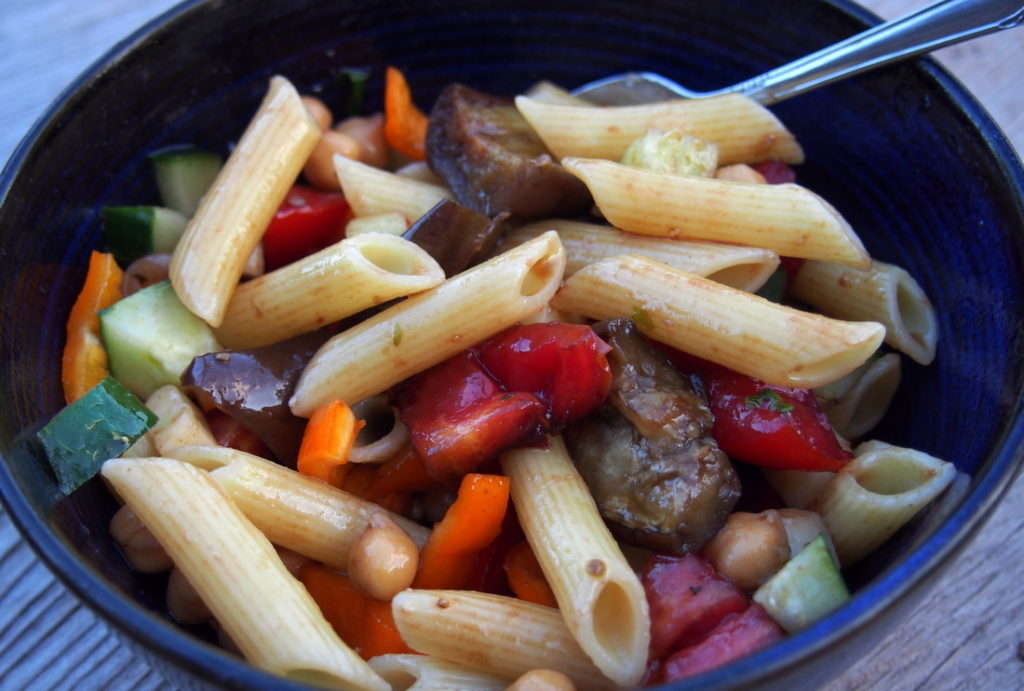
The next layer is the firmer vegetables- these will act as the barrier between the dressing and the rest of the salad. Put in something you don’t mind absorbing the dressing a bit- I did chunks of tomatoes, then diced cucumbers, followed by diced sweet peppers, and for my jar, the softer veggie came last, roasted eggplant. (The hardest part of this whole process is not making your layers too thick, and really packing them in there. I ended up with enough chopped veggies to make quite a few salads- not a bad thing- just make up some extra jars- they will keep in your fridge for a number of days.)

Next comes the grain/nut layer- I used chickpeas (organic- drained and rinsed from the can) and noodles. This layer could also be followed by a protein if you so desire- chunks of grilled chicken, hard boiled egg, or tofu. Check the fridge for those leftovers! For my daughter’s jar, I topped the noodles with diced cheddar cheese and called it done.

The final layer would be your greens- kale, spinach, radicchio, raab, arugula, lettuce mix- whatever is fresh and seasonal! My jar got a layer of packed broccoli raab.

The morning of school I just grabbed my daughter’s jar out of the fridge, and sat it in a small plastic bowl in her lunchbox with a fork and an icepack. (It’s much easier to eat these salads out of a bowl- and the pouring in part really mixes all the layers up. Plus what 9-year old doesn’t want to feel part of the process?!). It was a hit! She came home with an empty jar and asked for another tomorrow. Score!

I have mason jar salad ideas spinning through my head- I’m imagining a fresh tomato salsa, followed by rice and beans, then arugula or kale. Or what about a sweet yogurt dressing, a fresh fruit layer, quinoa then spinach? So many options! Experiment and share your ideas on our facebook page. Personally, I’m just thrilled to have a source of inspiration for those back-to-school lunches!

Original Post from Sept. 2014, edited and reposted 2019. Post and photos by Tricia Borneman, Blooming Glen farmer and co-owner. Tricia and her husband Tom have been farming together since 2000. Blooming Glen Farm is celebrating its 14th season bringing high quality certified organic vegetables, herbs, fruits and cut flowers to our local community.


Sometimes it is nice to keep things simple and enjoy the vegetables we receive in their raw state.  Salads are always a fantastic option for summertime picnics, barbecues, or quick meals.  This week’s recipe showcases a simple salad with a dressing that highlights tomatillos!  Enjoy!

Grilled Tomatillo Dressing
Ingredients
1 lb tomatillos
2 jalapeno or poblano peppers
1 sweet onion
½ cup avocado or olive oil (plus a few Tbsp for grilling)
¼ cup apple cider vinegar
2 tsp lime juice
1 tsp sea salt
½ tsp black pepper
2 Tbsp honey

  • Preheat grill to about 400°
  • Remove husks from tomatillos and place in bowl. Peel onion, slice into ½ inch thick rounds, and place in bowl.  If using jalapenos, slice in half and remove seeds and stems.  If using poblanos, just place in bowl whole.
  • Add 1-2 Tbsp of cooking oil to bowl. Mix to coat vegetables.
  • Grill vegetables for 5 minutes per side.
  • Remove from grill. Place tomatillos and onion in blender.  If using jalapenos, place them in blender as well.  If using poblanos, remove stems and place them in blender.
  • Add remaining ingredients to blender. Blend well until a thick dressing is formed.
  • Serve with salad, use as a marinade, or use as a spread for sandwiches, burgers or wraps.

Simple Summer Salad
Ingredients
1 head lettuce, chopped
1 cup cherry tomatoes, halved
1 cucumber, peeled and sliced
3-4 sweet peppers, stems and seeds removed, cut into rounds

  • Prepare all vegetables. Place on platter.
  • Drizzle grilled tomatillo dressing over top.
  • Enjoy!


Not feeling salad? Try the tomatillo dressing on a delicious grass-fed beef burger!

Recipe and photos by Stephanie Borzio.  Stephanie is a mom of three active boys and is an autoimmune warrior.  After battling her own health for several years, Stephanie found healing through food and lifestyle changes, including joining Blooming Glen Farm CSA of which she is a long time member.  She is a Board Certified Integrative Nutrition Health Coach who is passionate about sharing healthy living tips and real food recipes. Instagram and Facebook: Tru You EssentialsWebsite: www.truyouessentials.com

It’s that time of year when there are endless tomatoes! I can eat them right off the vine but I wanted to make something different to use em up:) There’s nothing like the taste of tomato soup made with fresh in season tomatoes. Make a few extra batches and stick them in the freezer for those cold winter days when you’re dreaming of a vine ripened tomato!

Ingredients
3 cups tomatoes (I used a mix of cherry tomatoes and chopped large ones)
1/2 sweet onion
2-3 garlic cloves
1 tsp avocado oil
1 large carton vegetable broth (about 4 cups)
2 Tbsp cream cheese (I used dairy free)
3 Tbsp cassava flour or arrowroot powder
3 fresh basil leaves
Pinch of red pepper
Salt and pepper

Place tomatoes, onion and garlic on a baking sheet and toss with oil. Bake at 450 for 15 minutes and then 5 minutes under the broiler. Remove from oven and add to a pot over the stove with vegetable broth. Use immersion blender (or blend in regular blender if you don’t have one) and add in the rest of ingredients and blend till combined. Serve with bread or grilled cheese for dipping!

Recipe and Photos by Olivia Edgar. Olivia’s passion for food and cooking finds focus on recipes using plant based, organic ingredients which make people feel their absolute best. She is a graduate of The Institute for Integrative Nutrition (IIN) and now meal preps for clients and small events. Olivia is newly married, and when she’s not cooking and sharing her recipes and holistic approaches on her Instagram account, you can find her working on their fixer-upper in Telford.

Ground cherries are a brand new addition to our CSA shares this year.  It’s always fun to meet new produce and then figure out how to incorporate it into healthy snacks and meals.  Initially we were just eating the “husk” cherries as is, but then I really wanted to build upon their unique flavor.  So this week I got creative and incorporated them into some new recipes.  So…here are three recipes to try…three different ways to use your ground cherries!  You could even incorporate all three into a fancy little meal- the jam could be used in an appetizer, the marinade/dressing in your main dish, and then the chocolate covered ground cherries for dessert!  Yum!

Ground Cherry Jalapeno Jam

1 cup ground cherries- husked and cleaned
½ cup honey
1 jalapeno- seeds removed and finely chopped*
1 tsp lemon juice
¼ cup water

  • Place all ingredients in a small saucepan.
  • Bring to a boil and reduce to simmer.
  • Simmer for 20-25 minutes on low heat, stirring frequently. Cherries will break down and release their juices.
  • When the jam thickens up, it is done. If it becomes too thick, add water 1 tsp at a time to get desired consistency.
  • Allow to cool. Serve or store in airtight container in the refrigerator.

*If you like dishes spicier, feel free to add another jalapeno.  This jam is mild with 1 jalapeno.

**I poured this over a log of goat cheese and served it with grain free crackers.

Ground Cherry Marinade and Dressing

1 cup ground cherries- husks removed and cleaned
½ jalapeno- chopped
1 Tbsp honey
¼ cup apple cider vinegar (ACV)
½ tsp sea salt
¼ tsp black pepper
¼ cup olive oil
2 Tbsp apple cider vinegar (ACV)

  • Put ground cherries, jalapeno, honey, and ¼ cup ACV in a small saucepan.
  • Bring to a boil and then reduce to a simmer. Stir frequently.
  • Allow to simmer for 10 minutes.
  • Let cool a little bit and then blend to combine all ingredients.
  • Add sea salt and black pepper and blend once more.
  • At this point, it can be used as a marinade. It will pair well with chicken, fish, or even portobello mushrooms.  I recommend coating your protein or vegetables with the marinade and then roasting or grilling.  Halfway through the cooking, flip and baste with a little more marinade.
  • To turn this into a salad dressing, add the olive oil and 2 Tbsp ACV. Blend well.  Season with more sea salt and black pepper to taste.

Chocolate Covered Ground Cherries

¼ cup chocolate chips (I used Enjoy Life Dark Chocolate Morsels)
Ground cherries (as many as you want…this will probably make at least two dozen)

  • Create a double boiler by placing a Pyrex measuring cup in a small saucepan filled with water. The water should cover the bottom inch of the measuring cup, but not overflow.  You don’t want the measuring cup to sit on the bottom of the pan.  If you have a small double boiler, feel free to use that instead.
  • Heat water to boiling and then reduce to a simmer.
  • Add chocolate chips to Pyrex measuring cup. Stir until melted.
  • Once the chocolate is melted, remove measuring cup from the saucepan.
  • Prep ground cherries. Peel away the husks, but do NOT remove them.  Peel them up and squeeze the top so the husks resemble flower petals.
  • Grab the husk part of the ground cherry and dip in the melted chocolate. You want to cover 90% of the cherry, leaving only the very top surrounding the husks.
  • Place the chocolate dipped cherry on a plate lined with wax or parchment paper.
  • Repeat dipping for all cherries.
  • Place plate in the refrigerator for at least one hour to allow chocolate to set.
  • After the chocolate has set, they are ready to enjoy!

Recipe and photos by Stephanie Borzio.  Stephanie is a mom of three active boys and is an autoimmune warrior.  After battling her own health for several years, Stephanie found healing through food and lifestyle changes, including joining Blooming Glen Farm CSA of which she is a long time member.  She is a Board Certified Integrative Nutrition Health Coach who is passionate about sharing healthy living tips and real food recipes. Instagram and Facebook: Tru You EssentialsWebsite: www.truyouessentials.com

So many tomatoes and peppers in season.. how can I not make a homemade salsa! There’s plenty of ways to make it but my favorite kind of salsa is always chopped so you can really see and taste all those fresh veggies.

Ingredients
1/2 cup chopped tomatoes (2 big ones with the seeds removed or a bunch of small)
1 minced tomatillo
1/2 green pepper, chopped
1/2 sweet onion, chopped
2 minced shishito peppers
1 jalapeño pepper, mince and seeds removed
2 cloves grated garlic
Juice of half a lime
Himalayan salt and pepper

Stir everything together and serve with tortilla chips or fresh sliced veggies for dipping.

Recipe and Photos by Olivia Edgar. Olivia’s passion for food and cooking finds focus on recipes using plant based, organic ingredients which make people feel their absolute best. She is a graduate of The Institute for Integrative Nutrition (IIN) and now meal preps for clients and small events. Olivia is newly married, and when she’s not cooking and sharing her recipes and holistic approaches on her Instagram account, you can find her working on their fixer-upper in Telford.

Eggplants have made their way into our CSA shares!  Eggplant comes in many varieties and we received two in our shares this week- Italian and Asian.  Either of these can be used in this recipe.  Eggplant is full of amazing vitamins, minerals, and nutrients…including vitamin C, vitamin K, magnesium, fiber, and potassium.  It’s a wonderful addition to any meal and is the star of this dish!

Ingredients
1-2 eggplant (you want about 1 cup of pulp after roasting)
1 sweet onion
4 large garlic cloves
1 Tbsp fresh parsley
¼ tsp paprika
Sea salt
Black pepper
Avocado or olive oil

  • Preheat oven to 375°
  • Slice eggplant in half lengthwise. Peel outside of onion off (if there is a dry skin) and cut into fourths.  Peel garlic cloves.  Place eggplant, onion, and garlic on baking sheet.
  • Brush vegetables with either avocado or olive oil. Sprinkle with sea salt and black pepper.
  • Roast vegetables for 25 minutes or until fork tender.
  • Let eggplant cool for a few minutes. Peel away the skin from the pulp.
  • Place roasted eggplant pulp, onion, and garlic cloves in food processor. Add in fresh parsley and paprika.  Process to combine.  I like to keep it a little bit chunky, but you can certainly process it to create a smoother texture.
  • Season the dip with sea salt and black pepper to taste.
  • Place dip in small bowl. Garnish with paprika and fresh parsley.
  • Serve the dip with fresh vegetables, crackers, or fresh bread. You can even use it as a spread on a wrap or sandwich.
  • Enjoy!


Recipe and photos by Stephanie Borzio.  Stephanie is a mom of three active boys and is an autoimmune warrior.  After battling her own health for several years, Stephanie found healing through food and lifestyle changes, including joining Blooming Glen Farm CSA of which she is a long time member.  She is a Board Certified Integrative Nutrition Health Coach who is passionate about sharing healthy living tips and real food recipes. 
Instagram and Facebook: Tru You EssentialsWebsite: www.truyouessentials.com

With all the summer veggies coming in I had to make some fresh spring rolls with them! You can add in whatever else you have on hand like fresh herbs or sliced avocado.

Enjoy with my delicious tahini dipping sauce on the side:)

Ingredients for Spring rolls

1 pack rice paper
Bunch of carrots
1 cucumber
1 zucchini
1 red pepper
1 mango
Pea shoots
Scallions
Fresh mint or cilantro

Cut carrots, pepper and mango into thin strips. Slice cucumber and zucchini vertically as thin as you can (I used a mandolin). Dice scallions. Add water to a large plate to use for soaking the rice paper. When the rice paper becomes soft remove from water and add vegetables and mango to center of the paper. Tuck in sides and roll up until everything is secure inside. Continue for rest of rolls.

Ingredients for Tahini dipping sauce

1/4 cup tahini
2 Tbsp coconut aminos
2 Tbsp rice vinegar
1 clove garlic, grated
Juice of 1 lemon
Salt and pepper
Red pepper flakes(if you like spice)

Whisk all ingredients together and serve with spring rolls. Enjoy!!

Recipe and Photos by Olivia Edgar. Olivia’s passion for food and cooking finds focus on recipes using plant based, organic ingredients which make people feel their absolute best. She is a graduate of The Institute for Integrative Nutrition (IIN) and now meal preps for clients and small events. Olivia is newly married, and when she’s not cooking and sharing her recipes and holistic approaches on her Instagram account, you can find her working on their fixer-upper in Telford.

Avocado toast is all the rage these days.  Well…how about zucchini toast instead!  This recipe showcases the summer squash, garlic, tomatoes, and basil that we got in our CSA shares this week.  It is a really easy recipe that can be made as a side or can be the main dish for breakfast, lunch, or dinner!

Ingredients
1 zucchini or yellow squash (preferably a larger one)
Olive oil
2 avocados
2 cloves garlic, minced
Pinch black pepper
2 pinches sea salt
Lemon juice
½ tomato
1 batch basil garlic sauce

Basil Garlic Sauce
¼ cup basil leaves, packed
2 cloves garlic, roughly chopped
3 Tbsp olive oil
½ tsp onion powder
2 pinches sea salt
Pinch black pepper

  • Cut zucchini lengthwise about ½ inch thick. Brush with olive oil.
  • Heat grill to about 400-450° Grill zucchini slices about 3 minutes per side.
  • In a medium bowl, combine avocados, garlic cloves, black pepper, and sea salt. Use a fork to mash the ingredients together.
  • Remove seeds from tomato and chop.
  • Make basil garlic sauce by placing all ingredients in blender. Blend until well combined.
  • Assemble toast.
    • Place grilled zucchini slice on plate.
    • Top with ½ of the mashed avocado mixture.
    • Drizzle with lemon juice.
    • Add chopped tomato.
    • Drizzle the basil garlic sauce on top.
  • Enjoy!

Recipe and photos by Stephanie Borzio.  Stephanie is a mom of three active boys and is an autoimmune warrior.  After battling her own health for several years, Stephanie found healing through food and lifestyle changes, including joining Blooming Glen Farm CSA of which she is a long time member.  She is a Board Certified Integrative Nutrition Health Coach who is passionate about sharing healthy living tips and real food recipes.
Instagram and Facebook: Tru You EssentialsWebsite: www.truyouessentials.com

It’s officially summer!  This week’s recipe is inspired by the heat and sunshine that comes with this season.  We started to get cucumbers in our shares last week, and I’m sure we’ll be seeing them off and on over the coming months. Cucumbers are easy to use and incorporate into salads or simply slice and eat as a snack.  This week’s recipe showcases cucumbers in a very different way…frozen popsicles!

Ingredients
¾ cup honey
½ cup water
½ cup mint, chopped (I used the mojito mint from the herb gardens at the farm)
2 cups cucumber, chopped and NOT peeled
½ cup lime juice
3 Tbsp lime zest, divided

• Place honey and water in small saucepan.  Bring to a boil and then simmer until all of the honey is dissolved in the water.
Remove saucepan from heat and add in chopped mint.  Allow this mint to infuse for at least one hour.
Combine honey/mint mixture, cucumber, lime juice, and 2 Tbsp lime zest in blender.  Puree until smooth.
Sprinkle the remaining 1 Tbsp of lime zest in the bottom of the popsicle mold.  Pour the blended mixture into the mold.  If you do not have a mold, you can use paper cups and popsicle sticks!
Freeze overnight.
Makes about 6-8 popsicles depending on size of mold.

Recipe and photos by Stephanie Borzio.  Stephanie is a mom of three active boys and is an autoimmune warrior.  After battling her own health for several years, Stephanie found healing through food and lifestyle changes, including joining Blooming Glen Farm CSA of which she is a long time member.  She is a Board Certified Integrative Nutrition Health Coach who is passionate about sharing healthy living tips and real food recipes.
I
nstagram and Facebook: Tru You EssentialsWebsite: www.truyouessentials.com

This delicious lemon veggie risotto is an easy way to incorporate more veggies into your meal. This is filling enough to be a main course, or you can pair it with a greens salad. Feel free to add any other seasonal vegetables you have on hand that would fit in nicely like zucchini, asparagus, or the tomatoes that we will be seeing in the CSA share soon! (Leftover risotto also makes a delicious lunch- make small balls or patties, brush the patty with a whisked egg, and dredge in a flour/salt/breadcrumb combo and fry lightly in oil until browned. These are a great addition to salads.)

Ingredients
1 1/2 cup Arborio rice
4 cups vegetable broth
1/2 cup chopped snap peas
1/2 cup chopped greens of choice (I used Swiss chard)
2 torpedo onions diced (leaving the greens)
3 diced garlic scapes
3 tablespoons butter (I used dairy free to make this dish vegan)
1/2 cup dry white wine
1 tablespoon lemon juice
1/4 cup cheese of choice (also used dairy free)
Fresh dill

Heat vegetable broth over stove till hot. In another pot melt 1 tbsp butter to a pot and add garlic scapes and onions. Cook until onions are translucent. Add in rice and toast for a minute, then add wine and lemon juice. Stir until liquid is gone and add in a cup at a time of vegetable broth to the rice mixture. Stir constantly until each cup is dissolved into rice. Once broth is gone and rice is cooked, fold in snap peas, greens, butter and cheese. Season with salt, pepper and fresh dill.

Recipe and Photos by Olivia Edgar. Olivia’s passion for food and cooking finds focus on recipes using plant based, organic ingredients which make people feel their absolute best. She is a graduate of The Institute for Integrative Nutrition (IIN) and now meal preps for clients and small events. Olivia is newly married, and when she’s not cooking and sharing her recipes and holistic approaches on her Instagram account, you can find her working on their fixer-upper in Telford.