Author: bloomingglenfarm

With the heat and humidity we are experiencing this week, I wanted to create an easy recipe that did not require cooking.  Farm fresh cucumbers and tomatoes combined with a few other ingredients create this fresh versatile salsa.  It is a beautiful array of colors and the flavors burst with each bite.  Serve it as a snack or make it part of your main meal.  Regardless of how you choose to showcase this dish, it is sure to please everyone.


Cucumber Salsa

Ingredients:
2 Kirby cucumbers, diced
1 jalapeno, seeded and finely chopped (*adjust to your heat tolerance, any variety hot peppers can be used)
1 cup cherry tomatoes, quartered
Juice and zest from 1 lime
2 Tbsp fresh cilantro, finely chopped
1 medium sweet pepper, seeded and diced
½ sweet onion, finely diced
2 cloves garlic, minced
1 tsp sea salt
¼ tsp black pepper

  • Combine all ingredients in a large bowl.
  • Mix to combine.
  • Best if allowed to marinate for at least 30 minutes before serving.
  • Serve with chips, as a topping for grilled fish, with tacos, etc.

Recipe and photos by Stephanie Borzio.  Stephanie is a mom of three active boys and is an autoimmune warrior.  After battling her own health for several years, Stephanie found healing through food and lifestyle changes, including joining Blooming Glen Farm CSA of which she is a long time member.  She is a Board Certified Integrative Nutrition Health Coach who is passionate about sharing healthy living tips and real food recipes.  Instagram and Facebook: Tru You Essentials; Website: www.truyouessentials.com

When sweet onions made an appearance in our shares last week, I knew that I wanted to showcase them in a new recipe.  This snack is well worth the time it takes to caramelize these delicious onions and I highly recommend making homemade chips if you have the time.  This onion dip is sure to be a crowd pleaser!

Caramelized Onion Dip

Ingredients:
3 sweet onions
3 Tbsp butter (can sub avocado or olive oil)
2 cups (16 oz) sour cream (can sub plain yogurt)
¾ tsp sea salt
¼ tsp black pepper
½ tsp garlic powder
2 Tbsp fresh herbs, finely chopped (parsley, chives, thyme, etc.)

  • Peel skins of onion and thinly slice into rounds. I used a mandolin for this (set on 3/16 inch setting).
  • Heat butter in large skillet on medium heat.
  • Once butter is melted, add sliced onions. Cook for 3-5 minutes until onions are softened.  You will need to continually mix throughout these few minutes so that the onions evenly cook.

  • Turn the heat to low and cook for 40 minutes. Stir every 5 minutes.
  • After 40 minutes, the onions should be brown and caramelized.

  • Remove from heat and allow to cool a little bit.  Then chop into small pieces.
  • In a medium bowl, combine sour cream, salt, pepper, garlic powder and fresh herbs. Mix to combine.
  • Fold chopped, caramelized onions into sour cream mixture until evenly combined.
  • Serve with chips, crackers, or raw vegetables (snap peas, cherry tomatoes, peppers, carrots, etc.). You can also make your own chips.  See recipe below for air fried potato chips.
  • Store leftover dip in refrigerator.

Air Fried Potato Chips:

Scrub potatoes.  Leave skins on and use mandolin to thinly slice.  I recommend slicing to about 1/8 inch thick.  Soak potato slices in cold water for 15-20 minutes.  Drain in colander and dry slices on paper towels.  Spray the slices with either avocado or olive oil and sprinkle with sea salt.  Lay in a single layer in your air fryer.  Set air fryer to 370°F and cook for 15 minutes, flipping halfway through cook time.  Chips should be crispy and slightly browned when done.  Cool on a paper towel lined plate.

Recipe and photos by Stephanie Borzio.  Stephanie is a mom of three active boys and is an autoimmune warrior.  After battling her own health for several years, Stephanie found healing through food and lifestyle changes, including joining Blooming Glen Farm CSA of which she is a long time member.  She is a Board Certified Integrative Nutrition Health Coach who is passionate about sharing healthy living tips and real food recipes.  Instagram and Facebook: Tru You Essentials; Website: www.truyouessentials.com

With the abundance of fresh tomatoes and summer squash, I wanted to develop a recipe that showcases both of these.  This dish not only looks gourmet, but tastes absolutely amazing.  You can wow your family or double the recipe and surprise guests with this farm fresh meal.

Zucchini Rollatini

Ingredients:
2 medium zucchini or other summer squash, thinly sliced lengthwise (about 1/8 inch thick)
1 tsp sea salt
¼ tsp black pepper
3 Tbsp olive or avocado oil
2 cups tomato sauce (I used the Roasted Tomato Sauce from the blog: Blooming Glen Farm | Roasted Tomato Sauce)
15-16 ounces ricotta cheese *
2 cloves garlic, minced
2-3 Tbsp fresh herbs (basil, oregano, thyme, parsley, chives, etc.), finely chopped
¼ cup + 2 Tbsp parmesan cheese, divided *
Fresh herbs for garnish

  • Lay zucchini slices in single layer on paper towels and sprinkle with salt. Let sit for 10 minutes to “sweat”.
  • While zucchini is “sweating”, heat grill.
  • Brush both sides of zucchini slices with oil and sprinkle with black pepper.
  • Turn grill to low and grill zucchini for 2 minutes on each side. You should get nice grill marks but the zucchini should not be mushy.  Remove from heat and let cool.

  • Preheat oven to 350°F.
  • Place the sauce on the bottom of the baking dish. I used a large baking dish (8×14 inch rectangular dish) or you could use two smaller baking dish (8-9 inch square).
  • In medium bowl, combine ricotta, garlic, fresh herbs, and ¼ cup parmesan cheese. Mix well.
  • Lay out the grilled zucchini slices. Place 1 Tbsp of ricotta mixture on the thicker end of the zucchini.  Roll up so that the ricotta is in the middle.

  • Place in baking dish, seam side down.

  • Once dish is full, cover with foil. Bake for 20 minutes.
  • Remove foil and broil for 2 minutes.
  • Top with the rest of the parmesan cheese and garnish with some fresh herbs. Enjoy!

Notes:

*You can use vegan ricotta and vegan parmesan cheese.  There are so many dairy free options available now.

Recipe and photos by Stephanie Borzio.  Stephanie is a mom of three active boys and is an autoimmune warrior.  After battling her own health for several years, Stephanie found healing through food and lifestyle changes, including joining Blooming Glen Farm CSA of which she is a long time member.  She is a Board Certified Integrative Nutrition Health Coach who is passionate about sharing healthy living tips and real food recipes.  Instagram and Facebook: Tru You Essentials; Website: www.truyouessentials.com

Spaghetti squash is a low carb substitute for pasta dishes.  It has a pretty mild flavor, so it is great to pair with fresh herbs.  This dish can be used as a side for grilled protein, can be topped with roasted vegetables, or can serve as a base for a breakfast bowl.

Garlic Herb Spaghetti Squash

Ingredients:
1 spaghetti squash
¼ cup + 2 Tbsp olive oil or avocado oil, divided
¾ tsp sea salt
¼ tsp black pepper
3 large cloves garlic
3 Tbsp fresh herbs, finely chopped (oregano, basil, parsley, thyme, rosemary, sage, etc.)

  • Preheat oven to 400°F.
  • Slice spaghetti squash into 1-inch thick rounds. Remove the seeds and discard.

  • Brush both sides of the rounds with oil (2 Tbsp) and sprinkle with salt and pepper.
  • Place in single layer on parchment lined baking sheet.
  • Roast in oven for 30 minutes, flipping halfway through baking time.
  • Remove from oven and allow to cool for a few minutes until you are able to touch the squash rounds. Peel away the skin of the squash rounds and discard.
  • Separate the strands of the squash into “noodles”. You can use a fork to help with this process.  Place “noodles” into a medium bowl and cover to keep warm.
  • In a small frying pan, heat ¼ cup oil. Once hot, turn the burner down to low.  Add garlic.
  • Simmer on low, stirring constantly until garlic is golden and fragrant. This should only take a minute.

  • Remove from heat and add fresh herbs.

  • Add oil/garlic/herb mixture to the bowl of spaghetti squash and toss to coat.
  • Garnish with fresh herbs and serve.

Notes:
*Top with fresh roasted cherry tomatoes.  Combine 2 cups cherry tomatoes with 1 Tbsp oil, ¼ tsp sea salt, and a little black pepper.  Roast for 20 minutes in a 400°F oven.

Recipe and photos by Stephanie Borzio.  Stephanie is a mom of three active boys and is an autoimmune warrior.  After battling her own health for several years, Stephanie found healing through food and lifestyle changes, including joining Blooming Glen Farm CSA of which she is a long time member.  She is a Board Certified Integrative Nutrition Health Coach who is passionate about sharing healthy living tips and real food recipes.  Instagram and Facebook: Tru You Essentials; Website: www.truyouessentials.com

It’s tomato season- my favorite time of year!  The farm provides us with a plethora of tomato varieties- heirlooms, reds, plum, and cherry.  Since we have an abundance of cherry tomatoes this week, this recipe showcases them along with the onions, garlic, and fresh herbs.

Roasted Tomato Sauce

Ingredients:
3 lbs or 2 quarts cherry tomatoes *
2-3 torpedo onions, bulbs only (reserve green tops for another recipe)
1 head garlic
2 Tbsp olive oil
1 ¼ tsp sea salt
¾ tsp black pepper
2 Tbsp fresh herbs (basil, oregano, thyme, parsley, etc.)

  • Preheat oven to 400°F.
  • Wash cherry tomatoes and place on baking sheet.

  • Slice onions into quarters or eighths depending on their size. Place on baking sheet with tomatoes.
  • Peel garlic cloves and slice in half. Place on baking sheet with the tomatoes and onions.
  • Drizzle olive oil on tomatoes, onions, and garlic. Sprinkle with salt and pepper.  Mix well.
  • Cook for 1 hour. You should see the onions and tomatoes beginning to brown on the tops.

  • Remove from oven and let cool 10-15 minutes unless serving right away.
  • Transfer everything, including liquid, from baking sheet to blender. **
  • Add herbs and blend well. ***
  • To reheat, transfer to a pot on the stovetop. Heat on low until warmed through.
  • To freeze, place in ziplock bags or freezer containers.
  • Serve over zucchini noodles- “zoodles” (see below for instructions) or over your favorite pasta. Would also be great for a pizza sauce.

Notes:

*You can use any variety of tomato.  If you use plum tomatoes, cut them in half or quarters (depending on their size).  If you use heirlooms or reds, cut them in quarters or eighths (depending on their size).  The color of the sauce will be different depending on the color of tomatoes that you use.

**I ended up with about ¼ cup of liquid after the produce was roasted.  The variety of tomatoes you use can increase the amount of liquid at the end.  You do not have to use it all.  If you want a thicker sauce, use less liquid and if you want a thinner sauce, use it all.

***You can also use an immersion blender.  Transfer everything to a large bowl, add herbs, and blend.  This option will give you a chunkier sauce.

Zoodles:

Spiralize zucchini or squash to make long noodles.  Bring a large pot of water to a boil.  Drop noodles into the pot and cook for 1 minute.  Remove, sprinkle with a little sea salt, and drain in colander.  Do not cook for more than a minute- the noodles will become soggy.  They just need a quick blanch.

Recipe and photos by Stephanie Borzio.  Stephanie is a mom of three active boys and is an autoimmune warrior.  After battling her own health for several years, Stephanie found healing through food and lifestyle changes, including joining Blooming Glen Farm CSA of which she is a long time member.  She is a Board Certified Integrative Nutrition Health Coach who is passionate about sharing healthy living tips and real food recipes.  Instagram and Facebook: Tru You Essentials; Website: www.truyouessentials.com

New potatoes are freshly harvested from the ground and are uncured.  Leaving their thin skins on adds color, flavor and nutritional value to culinary dishes.  Combining these potatoes with butter, spices, and fresh herbs in a casserole make a great side dish.

Herb Scalloped Potatoes

Ingredients:
1 lb new potatoes
2 fresh torpedo onions (bulb only- reserve tops for another recipe or broth)
6 Tbsp salted butter, divided
½ cup flour (for gluten free options- use an all purpose blend or cassava flour)
1 tsp sea salt
¼ tsp black pepper
¾ tsp paprika
2 Tbsp + 1 tsp minced fresh herbs (dill, thyme, rosemary, sage, etc.)
2-3 cloves fresh garlic, minced
¼ cup parmesan cheese or nutritional yeast
2 cups milk (dairy or nondairy)

  • Preheat oven to 375°F.
  • Thinly slice potatoes. I used a mandolin set on 1/8 inch setting.

  • Thinly slice onions.
  • Use 1 Tbsp butter to grease baking dish. I used a 6 x 10 inch pan.
  • In the baking dish, layer half of the potatoes and then half of the onions.

  • Cut butter into thin slices and place 3 Tbsp on top of the onions.
  • In a medium bowl, mix flour, sea salt, black pepper, paprika, 2 Tbsp fresh herbs, garlic, and parmesan cheese or nutritional yeast.
  • Sprinkle half of the flour mixture into the baking dish on top of the onions and butter.
  • Layer the rest of the potatoes, then the rest of the onions, then the rest of the butter (2 Tbsp), and finally the remaining flour mixture.

  • Slowly add milk to the dish.
  • Cover with foil and bake for 45 minutes.
  • Remove foil and bake for an additional 15 minutes.
  • Broil for 3-5 minutes to crisp top. Remove from oven and let stand for 5 minutes.
  • Top with remaining 1 tsp fresh herbs and a few sprinkles of paprika before serving.

Notes:
*To make dairy free- use vegan butter, nutritional yeast, and dairy free milk.
*Can prepare in advance and refrigerate before cooking.
*Leftovers reheat really well.

Recipe and photos by Stephanie Borzio.  Stephanie is a mom of three active boys and is an autoimmune warrior.  After battling her own health for several years, Stephanie found healing through food and lifestyle changes, including joining Blooming Glen Farm CSA of which she is a long time member.  She is a Board Certified Integrative Nutrition Health Coach who is passionate about sharing healthy living tips and real food recipes.  Instagram and Facebook: Tru You Essentials

It’s summer squash season and we are seeing a variety of this summer fruit appear in our shares each week.  You can grill it, add it to stir fries, roast it, eat it raw, and even make baked goods with it.  I wanted to create a recipe using the summer squash that was different and unique.  So here it is- quick pickled summer squash!  This recipe is a way to preserve the squash and make a condiment that works wonderfully for summer barbecues and cookouts.  The pickled squash is amazing on hot dogs and burgers, on sandwiches or wraps, or even on top of tacos, a fresh salad or scrambled eggs.

Quick Pickled Summer Squash Ribbons

Ingredients:
2 small to medium sized summer squash (any variety works)
1 Tbsp sea salt
6 cloves fresh garlic
20 peppercorns
Optional: 6-8 slices jalapenos or ½ tsp red pepper flakes
2 cups apple cider vinegar
1 tsp ground turmeric
2 tsp ground mustard

  • Cut the squash into long ribbons. I used a mandolin set to 1/16 inch (you don’t want it so thin it’s like paper).
  • Line two large cookie sheets with paper towels. Lay the ribbons on the towels in a single layer.

  • Sprinkle squash ribbons with sea salt and allow to sit for 1 hour.
  • Gently dab the tops of the ribbons with a paper towel to soak up the moisture that has “sweated” out.
  • Place ribbons in two medium glass jars. I used 2 pint size jars.

  • Thinly slice the garlic and divide evenly among the jars.
  • Divide the peppercorns among the jars.
  • Optional- if you want to add a little heat, feel free to add a few slices of jalapeno (3-4 per jar) or some red pepper flakes (1/4 tsp per jar).
  • In a medium saucepan, combine the apple cider vinegar, turmeric, and ground mustard. Bring to a boil.  Reduce to a simmer and cook for 3-5 minutes.  Allow to cool for a few minutes.
  • Pour warm vinegar mixture into each jar. Cover and allow to completely cool on the counter.  Once cool, refrigerate for 24 hours.
  • Enjoy!

Notes:
*Feel free to cut this recipe in half using only 1 summer squash.  Just use half of the remaining ingredients.
*These store well in the refrigerator for many weeks (if you can resist eating them for that long).

Recipe and photos by Stephanie Borzio.  Stephanie is a mom of three active boys and is an autoimmune warrior.  After battling her own health for several years, Stephanie found healing through food and lifestyle changes, including joining Blooming Glen Farm CSA of which she is a long time member.  She is a Board Certified Integrative Nutrition Health Coach who is passionate about sharing healthy living tips and real food recipes.  Instagram and Facebook: Tru You Essentials; Website: www.truyouessentials.com

We received farm fresh celery in our shares this week.  As soon as I heard that news, I knew I wanted to showcase it in this week’s recipe.  This Creamy Celery Soup can be served warm or chilled.  It combines a whole head of celery with the fresh garlic, sweet onions, new potatoes, and dill from this week’s share.

Creamy Celery Soup

Ingredients:
4 Tbsp butter
2 fresh sweet onions, chopped (include green tops)
4 cloves fresh garlic, finely chopped
1 whole head celery with leaves, chopped (about 5-6 cups)- reserve a few leaves for garnish
2 cups diced new potatoes
4 cups vegetable broth
1 tsp sea salt
½ tsp black pepper
¼ cup fresh dill, finely chopped
¼ cup heavy cream (optional)

  • Melt butter in stockpot on stove.
  • Add onion and garlic to pot. Sauté on medium heat for 3 minutes.
  • Add celery and mix well. Sauté for an additional 5 minutes.
  • Add potatoes and broth. Bring to a boil.
  • Add salt and pepper.
  • Cover and simmer for 15 minutes or until potatoes are fork tender.
  • Remove from heat. Add dill and heavy cream if using.
  • Transfer the soup to a blender. Blend really well.  Soup should be creamy and uniform.  I recommend doing this in two batches.  You can also use an immersion blender.
  • Serve this soup warm or chilled. If serving chilled and it becomes too thick, blend in a little water to get desired consistency.
  • Garnish with fresh chopped celery leaves, fresh dill, and/or a dollop of sour cream.

Notes:
*To make this dairy free, use a vegan butter and do not add the optional heavy cream.
*Pairs really well with crostini topped with fresh garlic spread (Blooming Glen Farm | Eggplants and Fresh Garlic)

Recipe and photos by Stephanie Borzio.  Stephanie is a mom of three active boys and is an autoimmune warrior.  After battling her own health for several years, Stephanie found healing through food and lifestyle changes, including joining Blooming Glen Farm CSA of which she is a long time member.  She is a Board Certified Integrative Nutrition Health Coach who is passionate about sharing healthy living tips and real food recipes.  Instagram and Facebook: Tru You Essentials; Website: www.truyouessentials.com

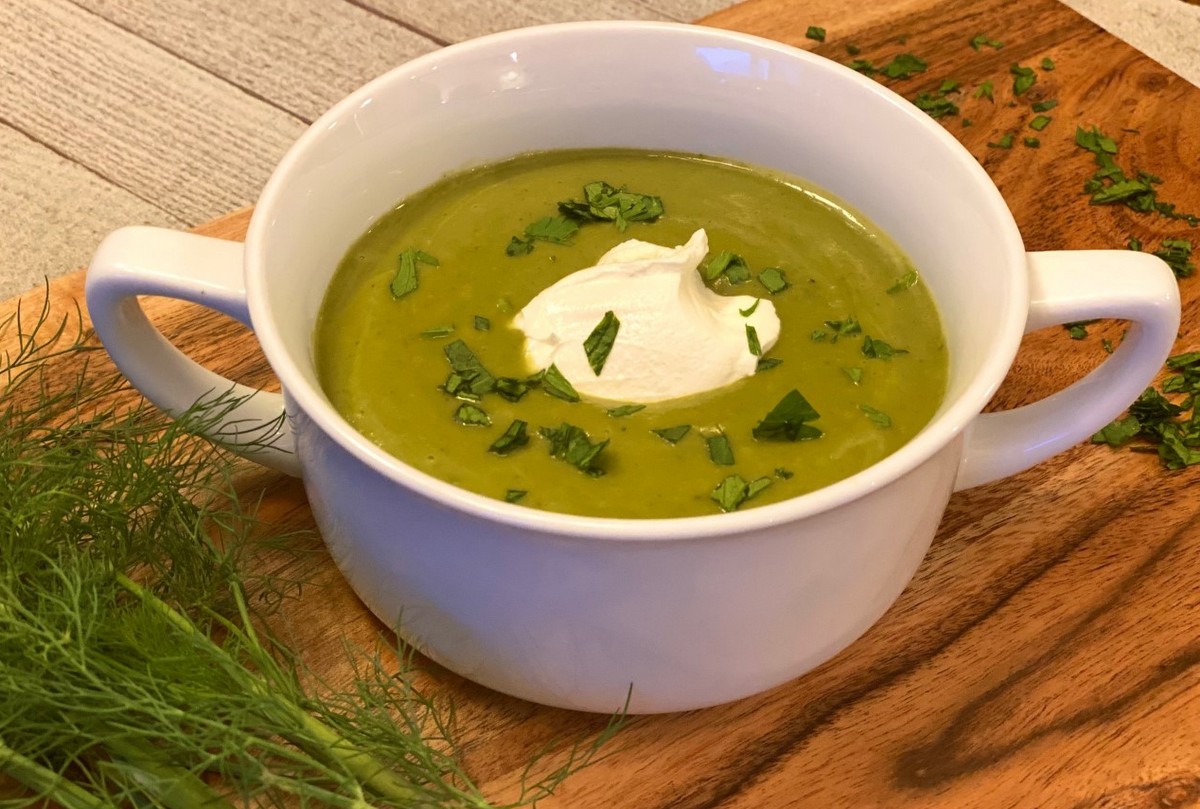
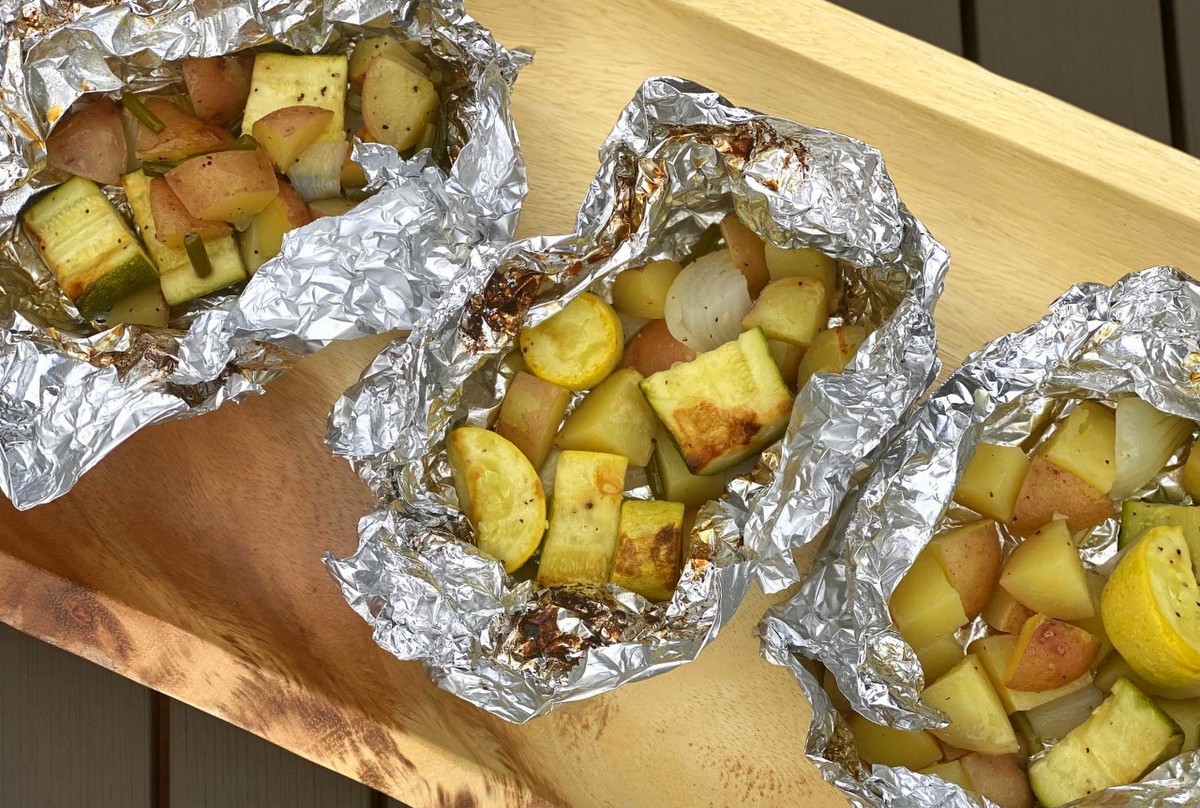
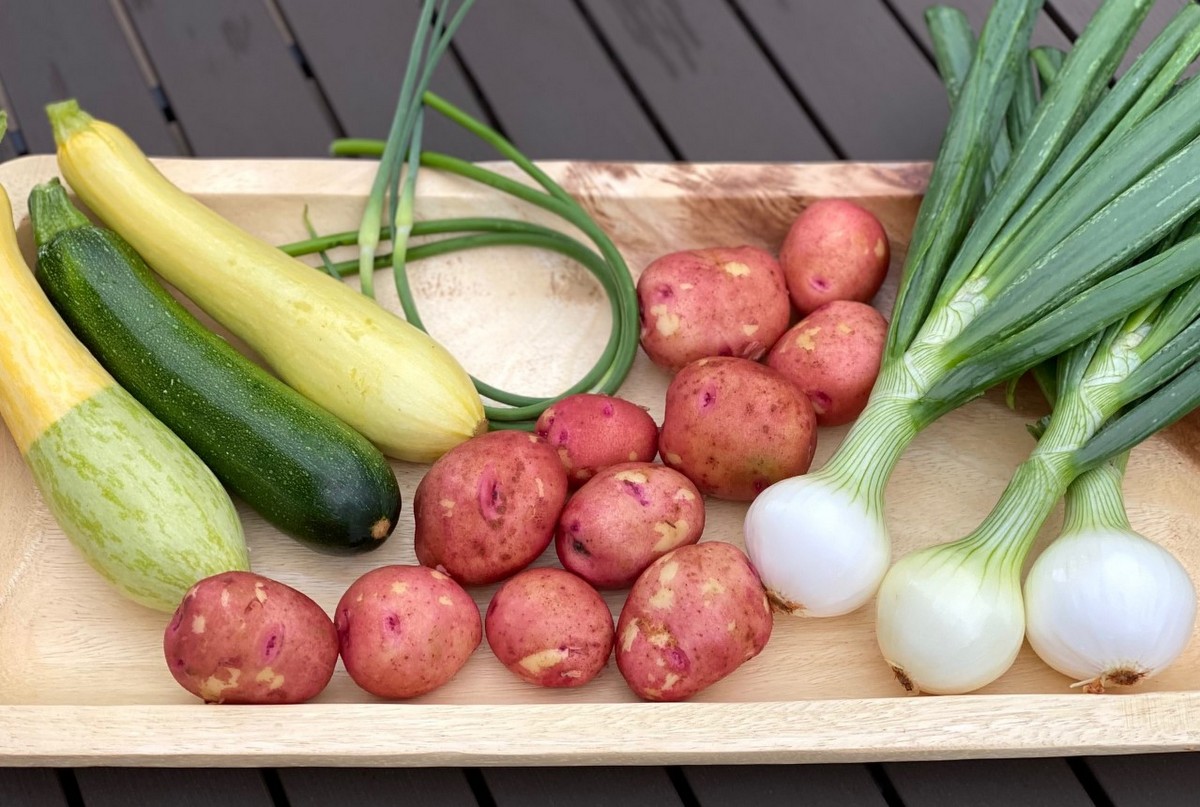
Since we began farming here at Blooming Glen 15 years ago, I’ve often mused (grumbled?) that our challenging red clay earth is likely better suited for pottery than it is for growing food. Yet every season we manage to harvest thousands and thousands of pounds of crops, proving that despite the heaviness of the soil, we can grow delicious mineral rich food year in and year out. Thanks to an exciting collaboration with Matt Zimmerman of Walnut St Pottery, we can now say with confidence that our farm’s soil is also perfectly suited to the creation of gorgeous pottery. There is something very poetic and affirming to harvest and arrange flowers in a vase made from the earth that nourished their growth (or to eat a soup of vegetables grown on the farm in a bowl made from the soil that grew those vegetables), and I am so grateful for the Zimmerman family for their creativity and efforts to bring this to fruition.

“In our wood kiln we fire pots made from local wild clay. These pots have a wilder and rougher look to them as they endure a more dramatic and harsh journey. There’s something special about holding wild clay in your hands. Food for past generations grew from it. The roots of great trees held it tightly. The rain waters carried it off the field and along the water ways of our community where it eventually found rest in local creek beds. It has stories to tell. These pots were born here and want to connect us with something bigger than ourselves.” Matt Zimmerman, Walnut St. Pottery

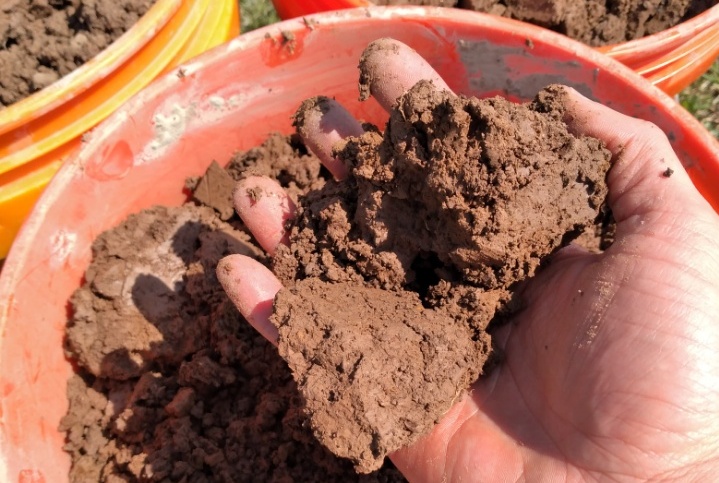
Once dug, the Blooming Glen Farm clay was dried in the sun before being re-hydrated, mixed, screened, slacked, then dried to a moldable consistency.

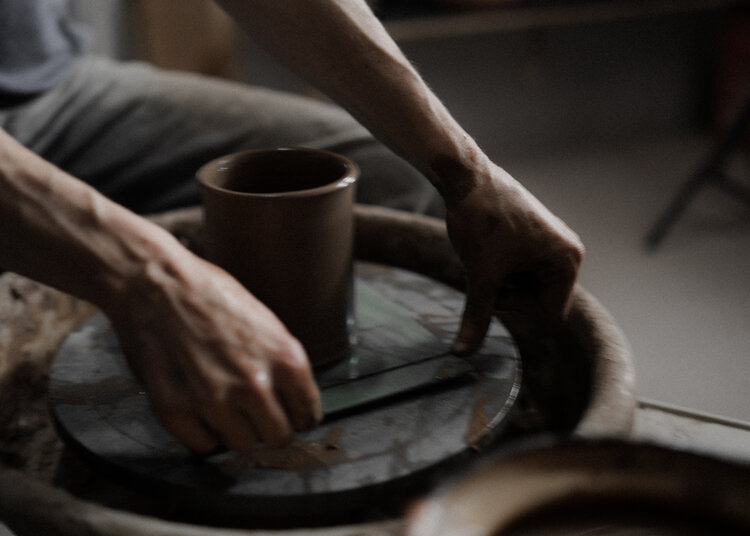
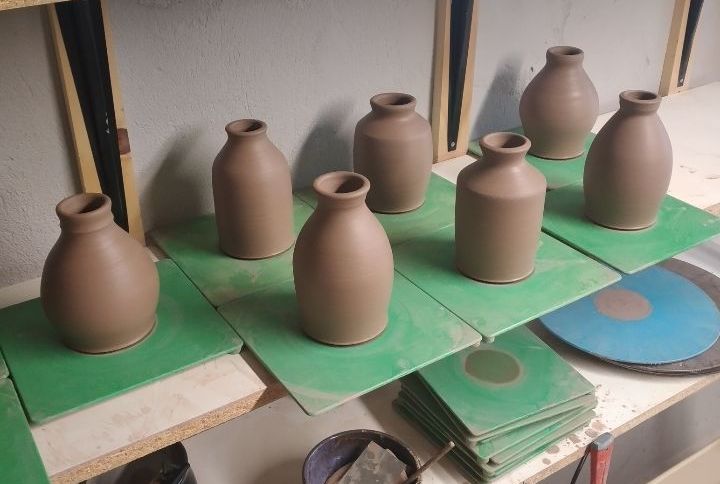
Then comes the making of the pots.

“I take great joy in crafting a lump of earth into a functional vessel for everyday use. For the most part our pots are thrown on the wheel. Some are then trimmed and/or handled. Working with wild clay presents many challenges. You must learn it’s strengths and weaknesses, it’s personality.” Matt Zimmerman

Once all the pots are made and dried they go through the first of two firings call the bisque. This brings the clay pots to the early stages of becoming ceramic. The pots become strong enough to handle comfortably yet remain porous enough to receive a coat of glaze. Walnut St. Pottery glazes are made mostly of ground stone and clay with a little metal oxides to provide color. Because they make all of their glazes they know everything that goes into them, and are 100% confidence in saying they are food safe.

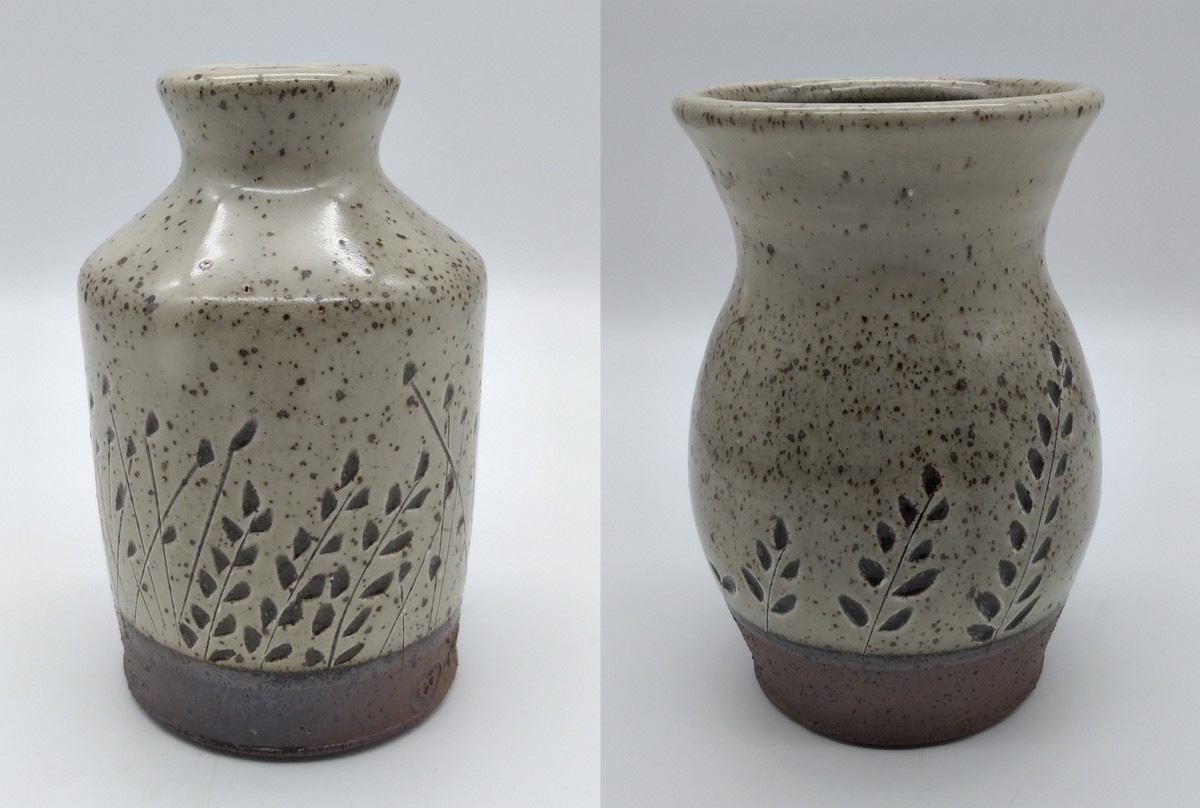
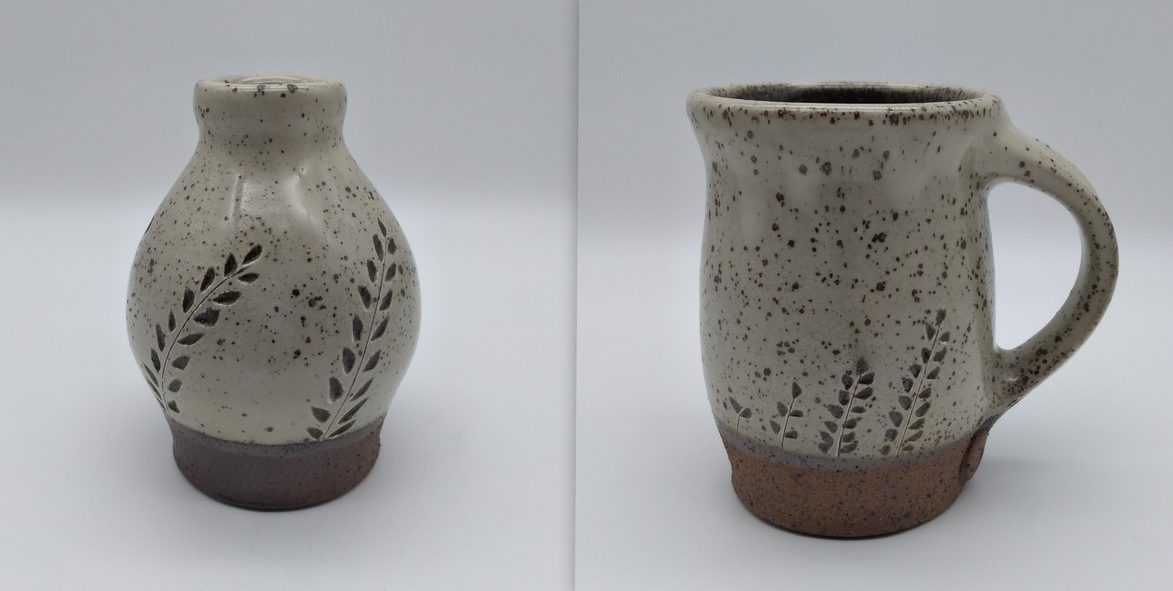
The glaze materials are mixed into water creating a thick liquid which is then applied to the porous pot.  The water is absorbed into the pot leaving a coat of the raw materials on the surface. Any slipware carvings are then created, like the beautiful wildflower designs.

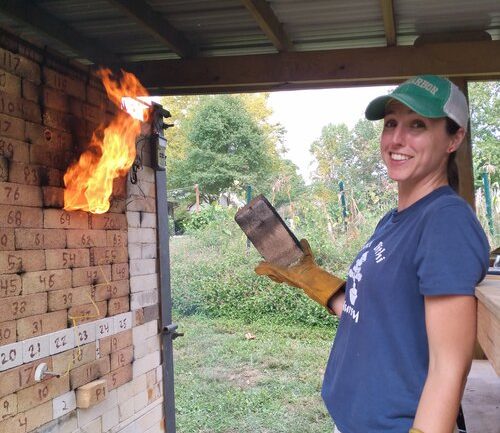
Lastly, the pots and glaze are fired to maturity in a wood fired kiln.

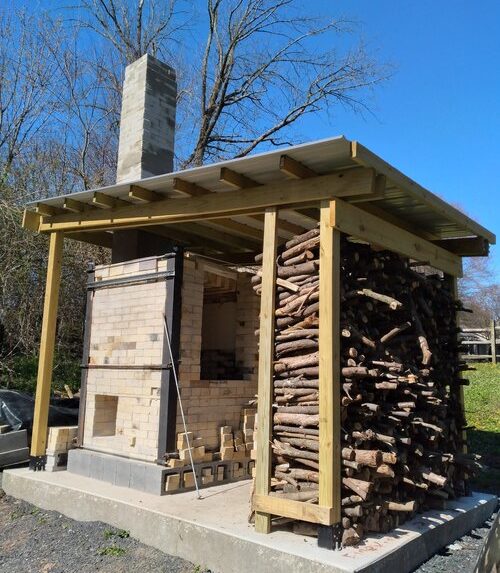
“Our wild clay pots withstand the harsh conditions inside our wood fired kiln. The flames from the fireboxes flow up into the ware chamber, and dance around the pots leaving their mark on the clay. Depending on the clay body being fired we’ll take the wood kiln temperature anywhere from 2300°F to 2400°F. The high temps turn the clay pots ceramic and melt the glaze materials into a glassy surface.”

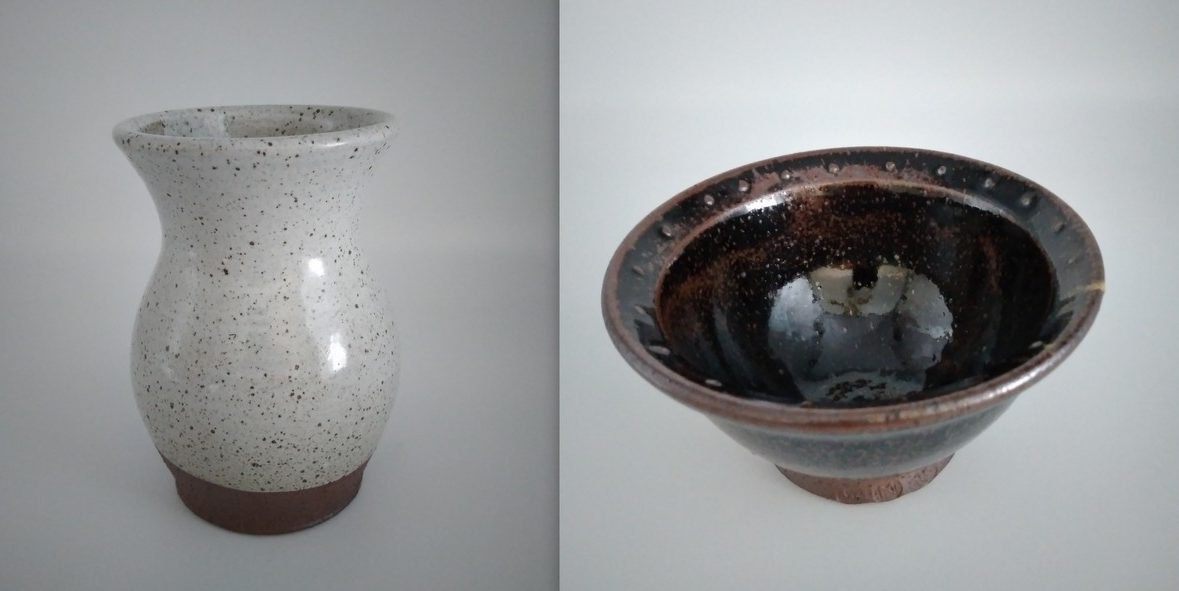
Matt was surprised at just how different our soil was even from other wild clay he’s harvested in and around Perkasie. The color was a vibrant red, the flames of the fire licking at the iron rich material. These beautiful Blooming Glen Farm wild clay pots will be for sale at the farm in the coming weeks. Larger vases, smaller bud vases, general purpose bowls, berry bowls and mugs. Quantity limited. Prices from $40- $65 each.

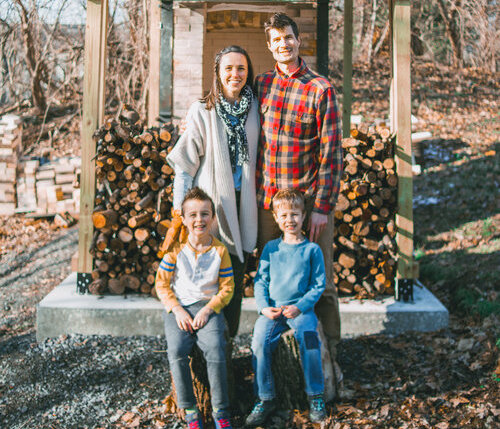
Photos and content provided by Walnut St. Pottery. Post by Tricia Borneman, Blooming Glen farmer and co-owner. Tricia and her husband Tom have been farming together since 2000. Blooming Glen Farm is celebrating its 16th season bringing high quality certified organic vegetables, herbs, fruits and cut flowers to our local community.

Summer is officially here and we are almost ready to celebrate the Fourth of July.  As you prepare for barbecues, picnics, or camping adventures, this recipe is one that incorporates several share ingredients.  It is versatile and can be adjusted depending on what you have available.  Make it for your family or double it for a crowd.  Heat up the grill or cook it on a campfire!

Grilled Veggie Packets

Ingredients:
2 medium summer squash
1 lb new potatoes
2 sweet onions
7 garlic scapes
4 Tbsp olive oil, avocado oil, or melted butter
1 tsp sea salt
¼ tsp black pepper
¼ tsp smoked paprika
Optional- fresh chopped herbs

  • Preheat grill.
  • Cut 5 sheets of heavy duty aluminum foil into 12 x 18 inch strips. If you do not have heavy duty foil, you can use two sheets of regular foil per packet.
  • Prepare vegetables.
    • Summer squash- Slice into 1 inch disks. If the circles are really big, you can cut them in half (creating half circles).
    • New potatoes- Wash and leave skin on. Cut into ¼ – ½ inch cubes.  You want these to be smaller than the squash since they take longer to cook.
    • Sweet onions- Peel, quarter, and slice into wedges.
    • Garlic scapes- Cut into ½ inch pieces.

  • Place all prepared vegetables into a large bowl.
  • In a small bowl, combine oil/butter, sea salt, black pepper, and smoked paprika.
  • Pour oil/butter mixture over vegetables and toss until all vegetables are coated.
  • Divide vegetable evenly among foil packets. This recipe allows for about 2 cups per foil.

  • Fold foil to seal and wrap securely.
  • Grill temperature should be about 375-400°F.
  • Place foil packets on grill. Allow to cook for about 15 minutes, turning every five minutes to insure even cooking.

  • Remove packets from grill and carefully open.
  • You can serve right from the foil or place the grilled vegetables on a serving dish.
  • Garnish with fresh chopped herbs of choice or a dollop of herb butter (see recipe below).

Notes:

*If you are getting a mushroom share, feel free to add mushrooms to these packets.

*Pair with your favorite grilled protein.

*These packets can be made ahead of time.  Just refrigerate after assembling.  Remove from refrigerator 30 minutes before grilling.

*To make in the oven, cook for about 15 minutes at 400°F.

*Can also be made on a campfire!

*You can change the variety of vegetables in the grill packets as the produce we receive changes throughout the season.

Herb Butter

Ingredients:
8 ounces salted butter, room temperature
2 Tbsp fresh herbs, finely chopped (dill, basil, parsley, cilantro, etc.)

Other optional add-ins:
finely chopped scallions (1 Tbsp)
finely chopped garlic scapes (1 Tbsp)
crushed garlic cloves (2)

  • Cream butter.
  • Add herbs and any optional add ins. Mix well.
  • Place butter on a piece of wax or parchment paper.

  • Shape into a log using paper to help mold.  Log should be about 6 inches long.  Twist ends to secure.

  • Refrigerate for at least two hours.
  • Herb butter will be good in the refrigerator for at least two weeks.
  • If you want to preserve for longer, you can freeze the whole log right in the paper.


Recipe and photos by Stephanie Borzio.  Stephanie is a mom of three active boys and is an autoimmune warrior.  After battling her own health for several years, Stephanie found healing through food and lifestyle changes, including joining Blooming Glen Farm CSA of which she is a long time member.  She is a Board Certified Integrative Nutrition Health Coach who is passionate about sharing healthy living tips and real food recipes.  Instagram and Facebook: Tru You Essentials; Website: www.truyouessentials.com